
Lawn
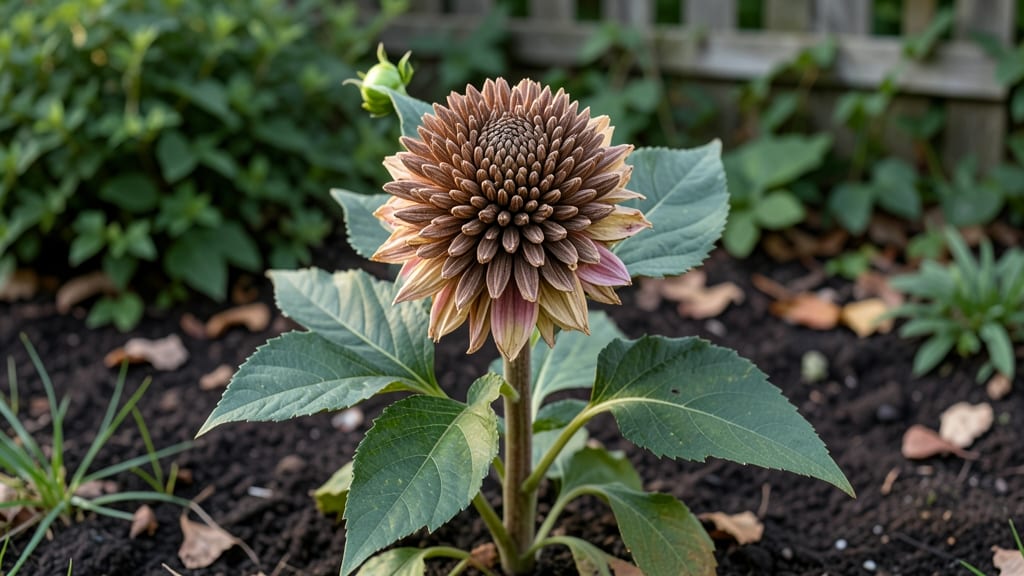
Saving dahlia seeds starts with a simple twist—literally. 🌼 The twist-off technique transforms fluffy seed heads into next year’s garden starters, and it only takes a few minutes when the time is right.
Most gardeners toss those dried blooms, but those papery spheres hold the potential for bold new dahlias in your beds.
Timing matters: wait until the seed heads are fully dried and brown in late fall or early winter, then give them a gentle twist to release the seeds.
No special tools needed—just your hands and a paper bag to catch the treasure. This method works for any dahlia variety, from dinnerplate blooms to delicate pompons.
What you’ll end up with is a stash of viable seeds ready for spring planting, cutting your costs and expanding your garden’s possibilities. The dried heads also make stunning winter decor—just leave a few on the stems for texture and interest until you’re ready to harvest.
Even experienced growers sometimes overlook this easy step, but once you try it, you’ll never skip seed saving again. Perfect for gardeners who love propagating plants or simply want to grow rare varieties without buying new tubers every year.
📚 In This Guide
- What you need
- Instructions
- Tips and common mistakes
- Wrapping up and next steps
What you need
- ● Mature dahlia seed heads: Fully dried, brown, and slightly papery (harvest after frost for best results). Aim for at least 5-10 healthy heads per variety.
- ● Sharp scissors or pruners: Clean, sterilized (70% isopropyl alcohol wipe) to avoid disease spread.
- ● Paper bags or brown envelopes: 1 per seed head (or a single large bag for bulk collection). Label each with the dahlia variety!
- ● Pencil or marker: For labeling (waterproof ink works best).
- ○ Drying tray or mesh screen: Optional but helpful for spreading seed heads to dry evenly (e.g., a wire cooling rack).
- ○ Fine-mesh sieve or sifter: (Optional) For separating seeds from chaff after drying.
- ○ Small paper towels or coffee filters: (Optional) To line bags for easier seed extraction.
- ● Timing is key: Harvest seed heads after the first hard frost (when foliage dies back but heads are still intact).
- ● Choose the right varieties: Some dahlias (like ‘Café au Lait’) produce fertile seeds, while hybrids may not. Stick to heirloom or open-pollinated types!
- ● Storage prep: Once seeds are dry, store them in a cool, dark place (like a sealed jar in the fridge) for up to 3 years.
How to harvest dahlia seed heads for next year's blooms
Here's the simple, foolproof method I use every fall to save dahlia seeds—and get bigger, better blooms next season.
🌿 Step 1: Wait Until Seed Heads Fully Mature
Leave the seed heads on the plant until they turn completely brown and papery, about 4-6 weeks after flowering. You'll know they're ready when the petals have fallen away and the center looks dry and brittle. I usually start checking in late September, depending on my climate zone.
Don't rush this step—immature seeds won't germinate. If you have a particularly large garden, mark the plants you want to save seeds from with garden flags so you don't accidentally cut them down before they're ready.
✂️ Step 2: Twist Off the Seed Heads
Gently grasp the base of the dried seed head and twist it off the stem with a quick, firm motion. You should feel a slight resistance before it pops free—this is the seed pod separating cleanly. Avoid cutting stems, as this can spread disease through the garden.
Place the seed heads in a paper bag (not plastic) and label them with the dahlia variety and the harvest date. I like to add a few drops of water to the bag to maintain humidity, but don't soak them—just enough to keep the seeds from drying out completely.
🪴 Step 3: Dry and Store Seed Heads Properly
Let the seed heads dry in a cool, dark place for 2-3 weeks. You'll hear a faint rattling sound when you shake the bag—this means the seeds are loose inside and ready for processing. A basement or garage works perfectly for this stage.
Once fully dry, open the seed heads and remove any remaining chaff or debris. Store the clean seeds in an airtight container with a desiccant packet to prevent moisture buildup. I keep mine in the refrigerator for up to 3 years without losing viability.
💧 Step 4: Prepare for Next Year's Planting
In early spring, soak the seeds overnight in lukewarm water to soften the outer coating. This speeds up germination and helps prevent rot. Plant them ½ inch deep in well-draining soil, spacing them 6 inches apart to allow room for growth.
Keep the soil consistently moist but not soggy until the seedlings emerge, which usually takes 10-14 days. Once they sprout, thin them to the strongest plant per location. You'll notice the new plants are hardier than store-bought starts—this is the payoff of saving your own seeds!
☀️ Step 5: Encourage Healthy Growth for Future Seed Heads
Give your homegrown dahlia seedlings full sun (6+ hours daily) and rich, well-draining soil to ensure strong stems and abundant blooms. Fertilize lightly with a balanced 10-10-10 formula every 4-6 weeks once the plants are established.
Deadhead spent blooms throughout the season to encourage more flowers—and save those seed heads again next year! The twist-off method becomes second nature after a few seasons, and you'll end up with a collection of unique, heirloom-quality dahlias that thrive in your garden.
Tips & tricks for perfect dahlia seed harvesting
Real talk: The difference between viable seeds and wasted effort often comes down to these small details I learned after years of trial and error.
Timing Secret: In Step 1, those 4-6 weeks after flowering are critical—don't guess! I mark my calendar the day my dahlias bloom and count forward. A quick trick: Use a small white card to gently tap the center of the seed head. If it makes a hollow sound (like a drum), it's ready. If it feels damp inside, wait longer.
Twist Technique: For Step 2, the twist-off method requires a firm but gentle grip. I use my thumb and forefinger to pinch the base of the seed head while my other hand stabilizes the stem. The key is to twist with a quick, confident motion—almost like unscrewing a jar lid. If it snaps off cleanly, you're doing it right. If you hear a crack, you've gone too far and damaged the stem.
Storage Wisdom: When storing your seeds in Step 3, here's what nobody tells you—label your containers with the variety AND harvest year. I've opened bags labeled "Black Dahlia" only to find they're actually "Velvet Queen" from three years ago. Also, place a small piece of chalk in with your seeds—it absorbs excess moisture better than silica gel packets and won't take up storage space.
Pro Tips for Dahlia Seed Head
- Real talk: The difference between viable seeds and wasted effort often comes down to these small details I learned after years of trial and error.
- Timing Secret: In Step 1, those 4-6 weeks after flowering are critical—don't guess!
- Twist Technique: For Step 2, the twist-off method requires a firm but gentle grip.
Frequently asked questions
Got questions about saving dahlia seed heads?
You’re not alone! Here are answers to the most common queries to help you master the twist-off technique and ensure success for next year’s blooms.
Why do I need to save dahlia seed heads if I can just buy new tubers?
Saving seed heads is a cost-effective way to propagate your own unique dahlias—especially heirloom or hybrid varieties that aren’t sold as tubers. Plus, it’s rewarding to grow plants from seeds you’ve collected! Just note that seed-grown dahlias may not always match the parent plant’s traits (like color or size).
When is the best time to harvest dahlia seed heads?
Harvest seed heads after the blooms fade and the pods turn brown and papery (usually late summer to early fall). Wait until the pods are fully dry but haven’t split open—this ensures seeds stay viable. If left too long, they’ll scatter, and you’ll lose your harvest!
What if my seed pods don’t twist off easily?
If the pods resist, they might not be dry enough. Try gently rolling the pod between your fingers or placing it in a warm, dry spot (like a sunny windowsill) for a few days. Avoid forcing it—you could damage the seeds inside. Patience pays off!
Can I save seeds from store-bought dahlias?
Technically yes, but store-bought dahlias are often hybrids bred for specific traits (like double blooms or disease resistance). Their seeds may not produce true-to-type plants. For reliable results, save seeds from open-pollinated or heirloom dahlias grown in your garden.
How should I store saved dahlia seeds until planting?
Once harvested, let seeds dry completely (1–2 weeks in a cool, dark place). Store them in a paper envelope or airtight container with a drying agent (like silica gel) to prevent mold. Keep them in a fridge or cool, dark spot—viability lasts 1–2 years if stored properly.
What do I do if my seed heads get moldy or squishy?
Mold or rot means the pods stayed too damp. Discard affected pods immediately—mold can ruin seeds. To prevent this, harvest pods when fully dry and avoid storing them in humid conditions. If you’re unsure, split open a healthy pod to check seed quality before bulk storage.
Wrapping up and next steps
Mastering the dahlia seed head twist-off technique is your ticket to next year’s vibrant blooms—no fancy tools or guesswork needed! 🌱 By saving viable seeds, you’ll not only preserve your favorite varieties but also unlock the joy of growing dahlias from scratch. Give it a try this season, and watch your garden flourish with homegrown beauty!
Ready to take the next step? Start with one or two seed heads this fall, experiment with the method, and soon you’ll be sharing your green thumb success with fellow gardeners. Happy growing! 🌸