
Lawn
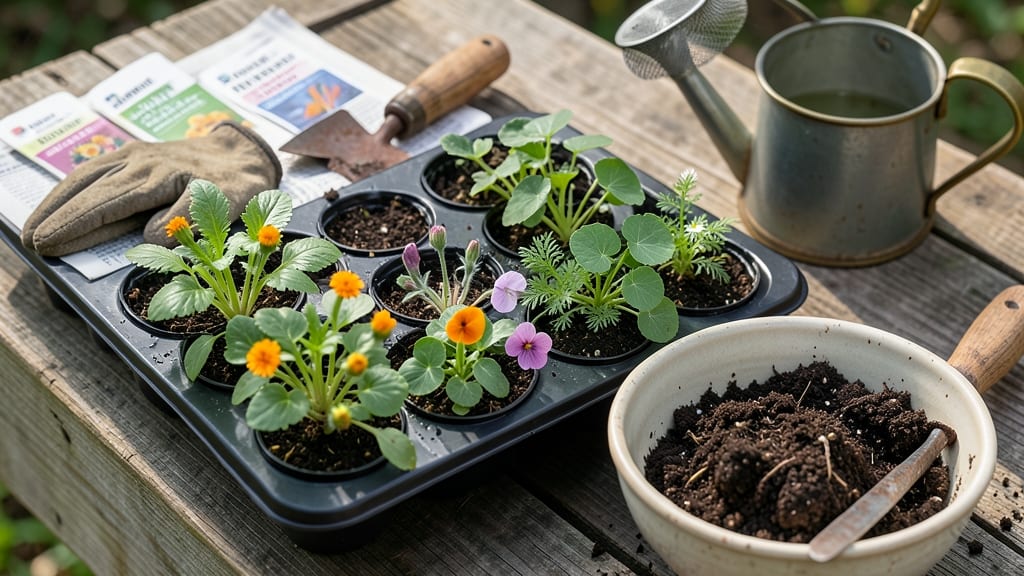
An edible flower seed mix turns your garden into a fragrant, colorful kitchen—no twisty stems or guesswork. 🌸 I’ve grown mine for three years now, and the secret isn’t just the right seeds but how you prep the soil and space them.
Nasturtiums, calendula, and borage aren’t just pretty; they’re edible, pest-repelling powerhouses that thrive in containers or garden beds.
The trick starts with loose, well-draining soil mixed with compost—think crumbly, not compact. Plant seeds ¼ inch deep, 6–12 inches apart, and keep them moist but not soggy. Most varieties sprout in 7–14 days, and you’ll see blooms ready for snipping in as little as 6 weeks.
Just avoid overcrowding, or you’ll end up with leggy, weak stems that snap when you try to harvest.
By midsummer, you’ll be tucking petals into salads, garnishing cocktails, or steeping flowers in honey—all while keeping pests at bay. The key is harvesting early in the morning when petals are crispest, and always cutting just above a leaf node so the plant keeps growing.
My favorite combo? Calendula for color, nasturtiums for peppery bites, and borage for that cucumber-like crunch.
Works in partial shade or full sun, though most edible flowers need at least 4–6 hours of light daily. If your soil drains poorly, raise beds or mix in perlite.
And here’s the best part: these flowers keep producing until frost, so you’ll have fresh blooms for 6+ months with minimal effort.
📚 In This Guide
- What you need
- Instructions
- Tips and common mistakes
- Wrapping up and next steps
What you need
- ● Edible flower seed mix: 1 lb (or ~2 cups) of high-quality organic seeds (e.g., nasturtium, calendula, borage, or pansy). Choose non-GMO, heirloom varieties for the best flavor and viability.
- ● Well-draining potting soil: 10–15 lbs of organic, peat-free mix (or a blend of 60% topsoil, 30% compost, and 10% perlite/sand for DIYers).
- ● Containers or garden beds: For containers: 5–10 pots (6–12" diameter) with drainage holes.
- ● For garden beds: A 4' x 4' plot in full sun (6+ hours/day) or partial shade (3–6 hours).
- ● Watering can or hose: With a gentle spray nozzle to avoid displacing seeds.
- ○ Organic fertilizer: Balanced 10-10-10 or compost tea (optional but recommended for nutrient-boosting).
- ○ Twine or small stakes (optional but helpful): For trellising vining flowers like nasturtiums.
- ● Gloves: A pair to protect hands from soil and sharp flower stems.
- ● Hand trowel or rake: For planting and soil prep.
- ● Pruning shears: Sharp, clean scissors for harvesting blooms.
- ● Sunlight access: Confirm your chosen spot gets the right light (most edible flowers thrive in full sun, but some tolerate partial shade).
- ● Weather awareness: Avoid planting during frost (check your local frost dates).
- ● Mulch: Straw or shredded leaves to retain moisture and suppress weeds.
- ● Slow-release fertilizer pellets: Mix into soil at planting for a nutrient boost.
- ● Drip irrigation system: For consistent watering (especially in hot climates).
- ● Bee-friendly companion plants: Basil, thyme, or marigolds to attract pollinators.
- ● Food-safe pesticide: Neem oil spray if pests become an issue.
Step-by-step instructions for growing a thriving edible flower garden
Here's how to cultivate a lush, twist-free edible flower garden that blooms reliably all season.
🌱 Step 1: Select and Prepare the Planting Site
Choose a location with 6+ hours of direct sunlight daily—most edible flowers need full sun to produce vibrant blooms. I like to test my spot by observing how quickly morning dew evaporates; if it lingers past 10 AM, the area gets too much shade. Amend the soil with 2-3 inches of compost and work it into the top 6 inches to improve drainage and fertility.
Edible flowers thrive in well-draining soil, so avoid low spots where water pools. If your soil is heavy clay, mix in 1 part perlite to 3 parts soil to create air pockets. Test your soil's pH—most edible flowers prefer a slightly acidic to neutral range of 6.0-7.0. You'll see better germination and stronger growth when the soil is just right.
🌱 Step 2: Sow Seeds at the Right Depth and Spacing
Scatter seeds thinly across the prepared bed, following packet instructions for depth—typically ¼ inch deep for most varieties. I tap the seed packet gently to release one seed at a time, spacing them 12-18 inches apart to allow room for mature plants. Overcrowding leads to weak stems and fewer blooms, so resist the urge to plant too densely.
Lightly cover seeds with soil and mist the area with water until the surface feels damp but not soggy. Use a fine spray nozzle to avoid displacing seeds. Place a small marker near each row to track varieties, especially if you're growing multiple types. Water gently once daily until seedlings emerge, keeping the soil consistently moist but never waterlogged.
☀️ Step 3: Provide Consistent Care for Strong Growth
Once seedlings reach 2-3 inches tall, thin them to 12 inches apart to prevent competition for nutrients. Use clean scissors to snip excess seedlings at soil level—this reduces transplant shock compared to pulling. Fertilize lightly with a balanced, organic fertilizer (like 5-5-5) every 4-6 weeks to encourage steady growth without promoting excessive foliage over flowers.
Watch for pests like aphids or slugs early in the season. I use a strong spray of water to dislodge aphids and set out beer traps for slugs—both methods work without harsh chemicals. Deadhead spent blooms regularly to encourage continuous flowering. You'll notice new buds forming within 2-3 weeks of consistent care, signaling a healthy, productive garden.
✂️ Step 4: Harvest Blooms for Long-Lasting Edible Beauty
Harvest flowers in the early morning when petals are fully open and dew-free. Use clean, sharp scissors to cut stems at a 45-degree angle, leaving 2-3 sets of leaves below the bloom to promote regrowth. Avoid harvesting more than 1/3 of the plant at once—this ensures the plant keeps producing new flowers.
Store harvested blooms in a cool, dry place for up to 5 days before using. For longer storage, dry flowers by hanging small bundles upside down in a dark, well-ventilated area for 1-2 weeks. You'll see your garden flourish with continuous blooms if you maintain this balance between harvesting and letting the plant recover.
🌿 Step 5: Extend the Season with Smart Planning
To enjoy edible flowers year-round, stagger plantings every 2-3 weeks starting in early spring. This ensures a steady supply of blooms even as some varieties finish their cycle. In fall, protect tender plants with a light frost cloth if your climate drops below 35°F. Many edible flowers, like calendula and nasturtiums, are cold-hardy and will rebound in spring.
Rotate crops annually to prevent soil depletion and disease buildup. I keep a simple garden journal to track what I plant where each year—it’s surprising how quickly soil health improves with rotation. With this approach, you’ll have a vibrant, twist-free edible flower garden that keeps giving all season long.
Tips & tricks for perfect edible flower gardens
These practical insights will help you avoid common pitfalls and maximize your edible flower harvest all season long.
Soil Preparation: The 2-3 inches of compost mixed into the top 6 inches of soil isn't just about nutrients—it's about creating the perfect air-water balance. I've found that adding a handful of worm castings to this mix gives an extra boost of beneficial microbes that help seeds germinate faster. For heavy clay soils, mix in perlite at a 1:3 ratio right when you're preparing the bed, not after planting.
Seed Spacing Strategy: The 12-18 inch spacing between plants might seem generous, but trust me—it prevents the most common edible flower failure: weak stems from overcrowding. I've seen beautiful gardens ruined by plants that toppled over because they were too close. Consider this your insurance policy for sturdy, harvest-ready blooms that don't twist or snap when you go to pick them.
Pest Prevention: That early season pest control with water sprays and beer traps isn't just about dealing with problems—it's about prevention. I've learned the hard way that waiting until pests become visible means you're already losing blooms. Set up your beer traps (a shallow dish of beer buried at soil level) the day you plant, and you'll catch slugs before they become a problem. The water spray works best in the early morning when aphids are most active and sluggish.
Season Extension: The 35°F frost protection threshold is crucial for tender varieties, but don't stop there. I've found that adding a layer of straw mulch around plants before temperatures drop below 40°F gives an extra degree of protection. This simple step can mean the difference between a garden that dies back completely and one that keeps producing through fall. For truly cold climates, consider using mini hoop tunnels covered with frost cloth for winter protection.
Pro Tips for Edible Flower Seed Mix
- These practical insights will help you avoid common pitfalls and maximize your edible flower harvest all season long.
- Soil Preparation: The 2-3 inches of compost mixed into the top 6 inches of soil isn't just about nutrients—it's about creating the perfect air-water balance.
- Seed Spacing Strategy: The 12-18 inch spacing between plants might seem generous, but trust me—it prevents the most common edible flower failure: weak stems from overcrowding.
Frequently asked questions
Got questions about growing your own edible flower seed mix? You’re not alone! Here are some of the most common queries—plus straightforward answers to help you avoid pitfalls and maximize your harvest.
Can I grow edible flowers in containers?
Many edible flowers thrive in containers, especially if you choose compact varieties like nasturtiums or pansies. Just ensure your pots have drainage holes and use a well-draining soil mix. For larger blooms (e.g., calendula or borage), opt for containers at least 12 inches deep. Pro tip: Rotate containers occasionally for even sunlight exposure!
How long does it take for edible flower seeds to sprout?
Germination time varies by flower type, but most edible flower seeds sprout within 7–21 days under ideal conditions (warm soil, consistent moisture, and sunlight). Check your seed packet for specifics—some, like basil flowers, may sprout faster (5–10 days), while others (e.g., violas) can take longer. Keep soil moist but not soggy to avoid damping-off.
What’s the best way to prevent pests from damaging my edible flowers?
Pests like aphids, slugs, and spider mites can target edible flowers, but prevention is key! Start with healthy soil (rich in compost) to boost plant resilience. Use organic sprays like neem oil or insecticidal soap if needed, and handpick larger pests (like slugs) at night. Interplanting with herbs (e.g., marigolds or dill) can deter pests naturally.
Can I harvest edible flowers year-round?
With the right mix and care, you can enjoy fresh edible blooms nearly year-round! In mild climates, cool-season flowers (e.g., pansies, calendula) thrive in winter, while warm-season varieties (e.g., nasturtiums, borage) flourish in summer. In colder regions, grow indoor-friendly flowers (like chives or microgreens) under grow lights. Extend your season with row covers or cold frames!
What can I do if my edible flowers aren’t blooming?
Lack of blooms often stems from over-fertilizing with nitrogen (which promotes leafy growth) or insufficient sunlight. Switch to a low-nitrogen, high-phosphorus fertilizer to encourage flowering, and ensure your plants get 6–8 hours of sunlight daily. Deadhead spent blooms regularly to prompt new growth, and avoid crowding plants—thin seedlings if needed for better airflow.
Wrapping up and next steps
Incorporating an edible flower seed mix into your garden isn’t just about adding beauty—it’s about growing delicious, nutrient-packed blooms year-round with minimal fuss. With the right twist-free harvesting techniques and a few simple tools, you can enjoy vibrant, safe-to-eat flowers that brighten meals and boost your garden’s charm.
Whether you’re a seasoned gardener or just starting, this approach makes edible blooms accessible and rewarding!
Ready to dive in? Start small—pick a sunny spot, grab your seeds, and let nature do the rest. Your first harvest could be just weeks away! 🌸