
Lawn
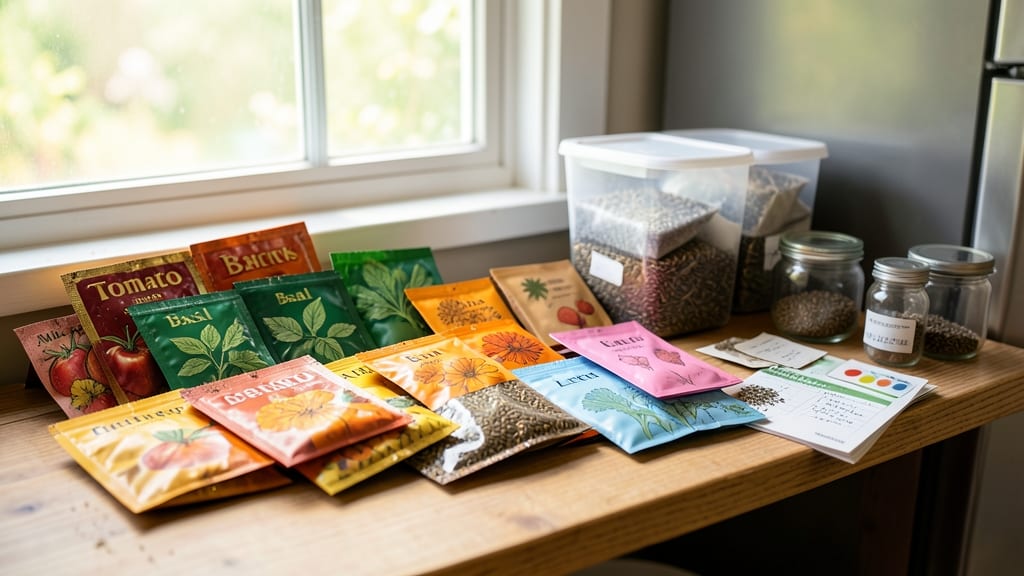
Proper garden seed storage can double—or even triple—their lifespan, saving you money and ensuring you always have your favorite varieties. ✨ I learned the hard way when my heirloom tomato seeds lost viability after just two years in a damp basement drawer.
The right conditions—cool, dry, and dark—keep seeds fresh for years, while common mistakes like moisture or heat exposure can ruin them in weeks.
You’ll need just a few simple supplies: airtight containers (like glass jars or vacuum-sealed bags), silica gel packets or moisture absorbers, and labels with seed names and dates. The key is controlling humidity—too much moisture speeds up deterioration, while dry conditions preserve seeds for decades.
Even a small kitchen pantry can work if you keep temperatures steady between 32°F and 50°F.
With the right setup, your stored seeds will stay viable for 5-10 years or longer, depending on the type. Imagine opening a jar of seeds from last year’s harvest and planting them fresh—no need to buy new packets every season.
The satisfaction of growing from seeds you saved yourself is unmatched, and your garden will thank you for the extra care.
This method works for any seed type, from vegetables to flowers, and adapts to small spaces or large collections. Whether you’re a beginner or a seasoned gardener, proper storage ensures you’re always ready for planting season. Let’s keep those seeds alive and thriving!
📚 In This Guide
- What you need
- Instructions
- Tips and common mistakes
- Wrapping up and next steps
What you need
- ● Air-tight containers: 3-5 containers (e.g., mason jars, plastic or glass seed envelopes, or vacuum-sealed bags). Choose containers with tight-sealing lids to prevent moisture and pests from entering.
- ● Silica gel packets: 2-4 packets (2-3 grams each) to absorb excess moisture. These can be found in small packs at pharmacies, craft stores, or online.
- ○ Desiccant alternatives (optional but helpful): Uncooked rice (1/4 cup per container)
- ● Cat litter (bentonite clay-based, not scented or clumping)
- ● Dryer sheets (unscented, 1 per container)
- ● Seed-saving envelopes or small bags: If not using containers, opt for paper or breathable fabric seed envelopes (e.g., kraft paper or muslin bags) for smaller seed quantities.
- ● Permanent markers or labels: To label seeds with names, varieties, and planting dates.
- ● Storage location: A cool, dark, and dry place (e.g., basement, refrigerator, or cool pantry) with a consistent temperature between 32–41°F (0–5°C).
- ○ Small funnel: For easy transfer of seeds into containers (optional but handy!).
- ● Humidity indicator: A small digital hygrometer (0–90% range) to monitor moisture levels inside containers (ideal for advanced storage setups).
- ● Vacuum sealer: For long-term storage of larger seed quantities (e.g., FoodSaver machine).
- ● Zip-top bags: With a one-way valve (e.g., Mylar bags) for additional moisture protection.
- ● Food-grade oxygen absorber: To further extend seed viability (especially for tropical or delicate seeds).
Step-by-step guide for humidity-controlled garden seed storage
Here's how to keep your seeds viable for years using simple, effective methods.
🪴 Step 1: Choose the Right Containers
Start with airtight, moisture-resistant containers like glass jars with tight-sealing lids or heavy-duty plastic containers with gaskets. I prefer mason jars because they're reusable, stackable, and create a perfect seal. Avoid cardboard or paper envelopes—they let moisture in and degrade over time.
Label each container with the seed variety, purchase date, and germination test date (usually 2-5 years from planting). Use a permanent marker or masking tape with a pencil. Store the labels outside the jar to prevent them from sticking to the seal. This ensures you'll know exactly what's inside without compromising the seal.
💧 Step 2: Control Humidity Before Sealing
Seeds need to be completely dry before storage. Spread them on a clean, dry surface and let them sit for 24-48 hours in a well-ventilated area. If you're storing seeds harvested from your garden, dry them further by placing them in a paper bag (not plastic) with a few holes punched in it for 1-2 weeks in a warm, dry spot.
Check for moisture by squeezing a handful of seeds—if they feel damp or sticky, dry them longer. You'll know they're ready when they feel crisp and dry to the touch. This step is critical because even slight moisture speeds up seed deterioration.
☀️ Step 3: Add Moisture Absorbers
Place a silica gel packet (the kind that comes with electronics) or a small amount of uncooked rice in the bottom of each container before adding seeds. These absorb any residual moisture and keep humidity low. For glass jars, I use one silica packet per pint-sized jar—just enough to protect without taking up too much space.
If you don't have silica packets, a small handful of rice works too. The key is to keep the environment dry enough to prevent mold or rot. Seal the container tightly but don't overfill it—leave about 1 inch of space at the top to prevent pressure buildup from temperature changes.
⏰ Step 4: Store in a Cool, Dark Place
Keep your sealed containers in a cool, dark location with consistent temperatures between 32-41°F. A refrigerator crisper drawer or a root cellar works perfectly. Avoid basements with high humidity or attics where temperatures fluctuate wildly—these conditions shorten seed life dramatically.
Check your seeds every 1-2 years by testing a few for germination. Place them between damp paper towels in a warm spot and check for sprouts in 7-14 days. If fewer than 80% germinate, it's time to replenish your supply. This simple test tells you exactly how viable your stored seeds remain.
✂️ Step 5: Rotate and Refresh as Needed
Use the first-in, first-out (FIFO) method—plant the oldest seeds first. Label containers with the year you stored them so you can track age easily. When you open a container, inspect seeds for signs of mold, pests, or musty odors. If you notice any of these, discard the entire batch immediately.
Every 3-5 years, refresh your seed supply by purchasing new packets. Even the best storage conditions can't guarantee viability beyond this point. This rotation ensures you always have healthy, high-quality seeds ready for planting when you need them.
Tips & tricks for perfect humidity-controlled seed storage
Took me years to perfect these little details—here's how to avoid the most common mistakes and extend seed life even longer.
Container Selection Tip: For long-term storage beyond 5 years, opt for vacuum-sealed mylar bags instead of mason jars. They completely eliminate air exposure, which is the enemy of seed viability. If you stick with jars, choose amber or dark-colored glass to block light, which can degrade seeds over time. I've had heirloom tomato seeds last over a decade using this method.
Drying Strategy: The 24-48 hour drying time in Step 2 is non-negotiable for store-bought seeds, but garden-harvested seeds often need that extra 1-2 weeks in a paper bag. Place the bag in a warm, sunny windowsill (not direct sunlight) to speed up the process. You'll know they're ready when they rattle like marbles when shaken—no more soft, squishy seeds!
Moisture Absorber Hack: When using rice as a moisture absorber, toast it lightly in a dry skillet first. This prevents it from absorbing too much moisture from the air before you even seal the container. I use about 2 tablespoons of rice per pint-sized jar—just enough to create a small barrier layer without taking up valuable space for seeds.
Storage Environment: The 32-41°F range is ideal, but if your fridge is the only option, store seeds in the crisper drawer (not the freezer section). Temperature fluctuations are more damaging than cold itself. Pro tip: Place a small thermometer inside your storage space to monitor conditions—some refrigerators can get too cold, which actually reduces seed viability over time.
Pro Tips for Garden Seed Storage
- Took me years to perfect these little details—here's how to avoid the most common mistakes and extend seed life even ...
- Container Selection Tip: For long-term storage beyond 5 years, opt for vacuum-sealed mylar bags instead of mason jars...
- Drying Strategy: The 24-48 hour drying time in Step 2 is non-negotiable for store-bought seeds, but garden-harvested ...
Frequently asked questions
Got questions about keeping your garden seeds fresh and ready for planting? Here are some of the most common concerns—and straightforward answers to help you store seeds like a pro!
How long can I store seeds in humidity-controlled containers?
With proper storage (cool, dry, and dark conditions), most vegetable seeds stay viable for 1–5 years, while heirloom or rare seeds can last even longer. Check seed packets for specific lifespans—just remember: humidity control is key to preventing mold or premature germination.
What’s the best time of year to store seeds for next season?
Store seeds immediately after harvest or purchase, ideally in late summer or early fall. This gives them the longest shelf life before planting season. Avoid storing seeds when humidity is high (like post-rainfall) or during temperature swings (e.g., spring thaw).
Can I use regular plastic bags instead of humidity-controlled containers?
While plastic bags work short-term, they’re risky for long-term storage because they trap moisture and ethylene gas (which speeds up seed aging). For best results, opt for airtight, moisture-absorbing containers (like those with silica gel packets) or vacuum-sealed bags to lock out humidity.
How do I know if my stored seeds are still good?
Test viability by placing a few seeds in a damp paper towel, sealing them in a bag, and checking for sprouts in 7–10 days. If 50% or more sprout, they’re still viable. For extra peace of mind, store seeds in labeled batches by year—this way, you’ll always know what’s freshest!
What’s the deal with refrigeration vs. room-temperature storage?
Cooler temps (32–41°F) slow seed aging, but most seeds thrive in a cool, dark pantry or basement (not the fridge). Only refrigerate seeds if your climate is humid or hot year-round. Pro tip: Never freeze seeds—ice crystals can damage them!
Wrapping up and next steps
Proper garden seed storage in humidity-controlled containers is your secret weapon for nurturing next year’s garden dreams! 🌱 By investing a little time and the right supplies, you’ll keep seeds viable, vibrant, and ready to grow—no guesswork required.
Now that you’re armed with the best methods, take the next step: audit your seed collection today and give those precious packets the perfect home. Happy growing!