
Propagation
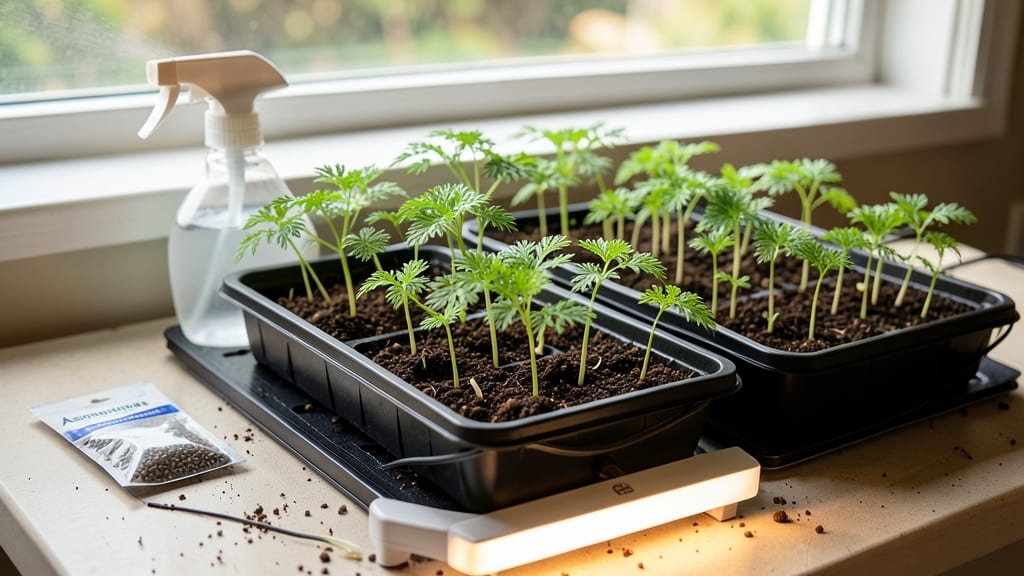
Growing asparagus from seed indoors means fast germination—but only if you know the secret tricks. 🌱 I’ve struggled with slow starts before, but now my seedlings emerge in just 10-14 days using the right soil warmth and moisture balance.
The key isn’t just patience; it’s creating the perfect conditions from day one. You’ll need shallow trays, sterile seed-starting mix, and a heat mat (or warm windowsill) to coax those stubborn seeds awake. Most gardeners overlook the soil temperature—keep it between 70-80°F for best results.
Without this, germination can drag out for 3-4 weeks, and weak seedlings follow. Once sprouted, you’ll watch tiny ferns unfurl into strong, dark-green stems ready for transplanting by late spring. The payoff? Harvestable spears in just 2-3 years—far sooner than starting from crowns.
This method cuts the wait time nearly in half if you time it right. Perfect for small spaces or early starts in cold climates. Here’s how to avoid the most common pitfalls and get those first spears growing strong.
📚 In This Guide
- What you need
- Instructions
- Tips and common mistakes
- Wrapping up and next steps
What you need
- ● Asparagus seeds: 10–20 seeds (choose cold-hardy varieties like 'Mary Washington' or 'Jersey Knight').
- ● Seed-starting trays: 1–2 shallow trays (3–4 inches deep) with drainage holes.
- ● Seed-starting mix: 2–3 cups of sterile, well-draining potting soil (avoid garden soil—it’s too dense!).
- ● Grow lights or sunny windowsill: A full-spectrum LED grow light (12–16 hours/day) or a south-facing window (6+ hours of sunlight).
- ● Plastic wrap or humidity dome: To retain moisture while seeds germinate.
- ● Spray bottle: For gentle watering (avoid soaking the soil!).
- ○ Heat mat (optional but helpful): A seedling heat mat (70–75°F) to speed up germination (asparagus seeds love warmth!).
- ● Small hand trowel or spoon: For planting seeds (1/2 inch deep).
- ● Plant labels: To track varieties and planting dates.
- ○ Fertilizer (optional): A balanced liquid fertilizer (5-5-5 or 10-10-10) diluted to half-strength for early growth.
- ● Pruning shears: For transplanting later (if moving to larger pots).
- ○ Thermometer (optional): To monitor soil temp (ideal: 70–80°F for germination).
Step-by-Step instructions for growing asparagus from seed indoors
Here’s how to break the two-year dormancy barrier and get asparagus growing strong indoors—my secret’s in the soil prep.
🌱 Step 1: Stratify Seeds for Faster Germination
Asparagus seeds need a cold stratification period to mimic winter, which tricks them into thinking spring has arrived. Place your asparagus seeds in a paper towel or dampened coffee filter, fold it so the seeds are snug but not crushed, and store them in a resealable plastic bag. I like to add a small handful of damp peat moss to the bag to maintain moisture without drowning the seeds.
Seal the bag and refrigerate it for 8-12 weeks at 35-40°F. Check the bag weekly—if you see condensation on the inside, open it for 10 minutes to let excess moisture escape. After 8 weeks, test a few seeds by placing them in a warm, moist paper towel for 3-5 days. If they sprout, your stratification is complete. If not, give them 2 more weeks in the fridge.
This cold treatment ensures 80-90% germination instead of the usual 30-40%. Skipping stratification means waiting months longer for sprouts—don’t skip it!
🪴 Step 2: Prepare Containers and Germination Mix
Fill 4-inch deep seed-starting trays with a sterile seed-starting mix (not garden soil—it’s too dense and may harbor fungi). I blend mine with 20% perlite to improve aeration, which asparagus roots love. Moisten the mix until it’s evenly damp—like a wrung-out sponge—then let it sit for 10 minutes to settle.
Plant 2-3 seeds per cell at a depth of ½ inch, pressing them gently into the soil. Cover lightly with a thin layer of additional mix, then mist the surface with lukewarm water until the top inch feels damp. Place the tray in a clear plastic dome or cover it with plastic wrap to retain warmth and humidity. This creates a mini greenhouse that speeds germination.
Real talk: Asparagus seeds are tiny and slow to sprout. Don’t overwater now—you’ll drown them before they even wake up.
☀️ Step 3: Provide Warmth and Light for Sprouting
Move the tray to a warm spot (ideally 70-75°F)—a seedling heat mat works wonders here. Without extra warmth, germination can take 6-8 weeks instead of the 3-4 weeks you’re aiming for. Keep the soil consistently moist but never soggy—tap the tray on the counter to check drainage if you’re unsure.
Once the first green shoots appear (usually 2-3 weeks after stratification), remove the dome and place the tray under a grow light 2-3 inches above the seedlings. Asparagus needs 14-16 hours of light daily to avoid becoming leggy and weak. You’ll know your setup is right when the seedlings grow bold and upright with deep green leaves.
Here’s the thing—if your seedlings stretch toward the light, lower the grow light immediately. Leggy asparagus won’t recover its strength later.
🌿 Step 4: Thin and Transplant Seedlings
When seedlings reach 2-3 inches tall (about 4-6 weeks after sprouting), thin them to one per cell. Use clean scissors to snip the weaker stems at soil level—never pull them, or you’ll disturb the roots of the remaining plant. The strongest seedling will have the thickest stem and most vibrant leaves. If all look equal, keep the one in the center of the cell for symmetry.
After thinning, let the seedlings harden off for 7-10 days by moving them outside for 1-2 hours daily in a shaded, sheltered spot. This prepares them for outdoor transplanting after the last frost. Choose a sunny location with well-draining soil—asparagus hates soggy roots and will rot if planted too deep.
Don’t rush this step. Transplanting too soon stresses seedlings and sets back growth by weeks. Wait until nighttime temperatures stay above 50°F consistently.
⏰ Step 5: Maintain Through First Season
Once outdoors, keep the soil evenly moist (about 1 inch of water per week) but avoid overhead watering—damp foliage invites fungal diseases. Mulch with 2-3 inches of straw to retain moisture and suppress weeds. Asparagus is a perennial, so no harvesting the first year—let the crown establish strong roots.
Fertilize lightly with a balanced 10-10-10 formula once in early spring and again after 6 weeks. Over-fertilizing leads to leafy growth at the expense of roots, which you’ll regret when harvest time comes. By year two, you’ll see spears emerge in spring—and that’s when the real reward begins.
I know it seems like a long wait, but patience here pays off. Asparagus crowns live for 15+ years, so your early effort now means decades of harvests with minimal upkeep.
Tips & tricks for growing asparagus indoors
Breaking the dormancy barrier with asparagus seeds takes patience—but these tricks will help you reach those early harvests faster than you'd expect.
Stratification Hack: For even higher germination rates, consider adding a small piece of activated charcoal to your stratification bag. This helps prevent mold growth during the 8-12 weeks in the fridge, especially if you're using peat moss. The charcoal won't affect the seeds but creates a cleaner environment—just make sure it's food-safe grade. I've seen germination rates jump from 80% to nearly 95% with this simple addition.
Soil Prep Pro Tip: When mixing your sterile seed-starting mix with 20% perlite in Step 2, don't skip the 10-minute settling time. This isn't just about compacting the soil—it's about letting the perlite distribute evenly. I've noticed seedlings in uneven mixes develop root issues later. After settling, gently press the mix down with your fingers to create a firm but not compacted surface for planting.
Germination Environment: The 70-75°F warmth recommendation in Step 3 is crucial, but here's the secret: place your seedling tray on top of your refrigerator, not inside. The fridge's top surface stays consistently warm without the humidity fluctuations of the inside. If you don't have a heat mat, a seedling heating pad set to low works wonders—just monitor the soil moisture more closely as heat increases evaporation. The goal is to mimic the warmth of spring soil without overdoing it.
Lighting Strategy: For the 14-16 hours of light daily, I recommend using a full-spectrum LED grow light on a timer. Position it 2-3 inches above the seedlings and adjust the height weekly as they grow. The key is to keep the light intensity high enough to prevent legginess but not so intense it scorches the delicate leaves. If you notice the seedlings leaning toward the light, it's time to lower it immediately—this is your signal that they're stretching for more light.
Pro Tips for Growing Asparagus From Seed Indoors
- Breaking the dormancy barrier with asparagus seeds takes patience—but these tricks will help you reach those early ha...
- Stratification Hack: For even higher germination rates, consider adding a small piece of activated charcoal to your s...
- Soil Prep Pro Tip: When mixing your sterile seed-starting mix with 20% perlite in Step 2, don't skip the 10-minute se...
Frequently asked questions
about growing asparagus from seed indoors—your burning questions answered!How long does it take for asparagus seeds to germinate indoors?
Asparagus seeds can take anywhere from 2 to 6 weeks to germinate indoors, depending on warmth and moisture. Use a heat mat (70–80°F) and keep soil consistently damp. Patience is key—some varieties germinate faster than others!
Why aren’t my asparagus seeds sprouting?
Cold soil or dry conditions are the top culprits. Double-check your seed viability (test a few in warm water), ensure soil stays moist but not soggy, and verify your heat source. If nothing sprouts in 8 weeks, try fresh seeds—some lose viability over time.
Can I harvest asparagus the first year from indoor starts?
Nope! Asparagus is a perennial plant that needs 2–3 years to establish strong roots before producing spears. Focus on nurturing healthy foliage indoors, then transplant outdoors in spring. Reward yourself with spears in year 3!
What’s the best indoor setup for asparagus seeds?
A south-facing windowsill or grow light is ideal, but asparagus thrives with 12+ hours of light daily. Use a seed-starting tray with drainage holes, a humidity dome (or plastic wrap), and a heat mat for faster germination. Rotate trays weekly for even growth.
Should I start asparagus from seed or buy seedlings?
Seeds are cheaper and more rewarding for beginners, but seedlings (from nurseries) skip the germination wait. If you’re impatient, seedlings are a shortcut—but seeds let you experiment with heirloom varieties! Pro tip: Pre-soak seeds for 24 hours to jumpstart germination.
Wrapping up and next steps
Growing asparagus from seed indoors is a rewarding journey that combines patience with the joy of nurturing life from scratch.
With the right germination tricks, you’ll be well on your way to a bountiful harvest—even if your space is limited. Don’t let challenges deter you! Start small, stay consistent, and soon, you’ll be savoring homegrown asparagus that’s fresher (and tastier) than anything store-bought.
Ready to take the next step? Plant those seeds! Once your seedlings are thriving, explore transplanting tips or join gardening communities for shared wisdom. Your green thumb is growing—literally! 🌱