
Propagation
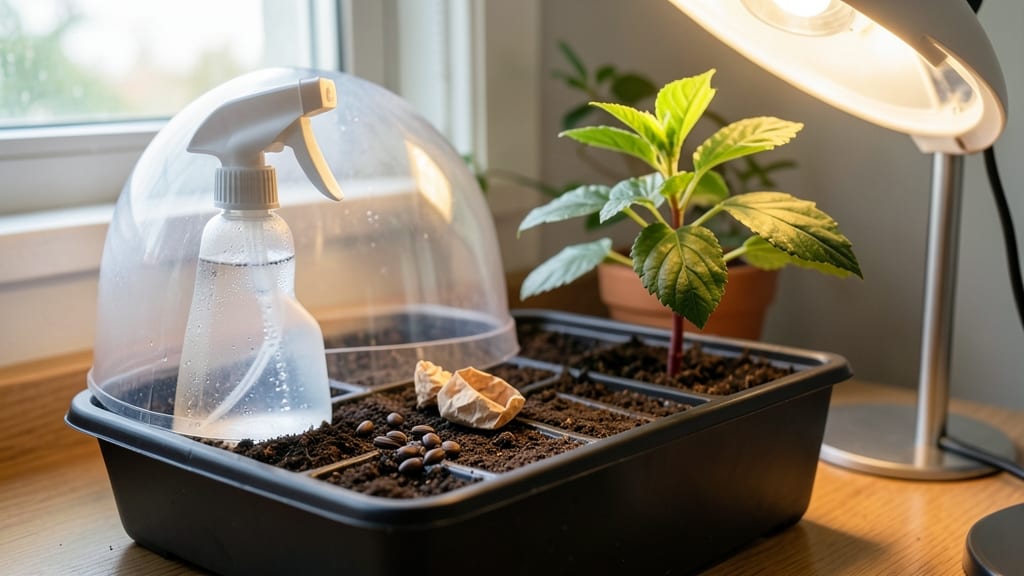
Cold-stratifying hibiscus seed germination unlocks sprouts in 7 days—something my stubborn seeds refused to do until I learned this trick. 🌱 The secret lies in mimicking winter's chill, which breaks dormancy and jumpstarts growth.
Most gardeners overlook this step and wait weeks for results, but cold stratification cuts that time dramatically.
You'll need a simple setup: damp paper towels, a sealed bag, and your fridge's crispest shelf. Hibiscus seeds thrive in 60-70°F soil after stratification, so warm them up gradually. The first tiny roots appear within days, signaling it's time to plant—no more guessing when they'll finally wake up.
By week two, you'll have sturdy seedlings ready for transplanting, their glossy leaves signaling strong health. The payoff? A head start on summer blooms that outshine store-bought plants. This method works for tropical hibiscus varieties too, proving cold isn't just for winter crops.
Confession: I nearly gave up after my first failed batch, but persistence paid off. Here's how to avoid the same mistakes and get reliable germination every time.
📚 In This Guide
- What you need
- Instructions
- Tips and common mistakes
- Wrapping up and next steps
What you need
- ● Hibiscus seeds: Fresh, viable seeds (5–10 per attempt). Pro tip: 💡 Harvest seeds from ripe, fully opened hibiscus flowers for best results!
- ● Cold-stratification method: Refrigerator: A standard fridge (35–40°F / 2–4°C).
- ● Damp paper towels or peat moss: Enough to lightly moisten seeds (avoid soaking).
- ● Zip-top plastic bag: 1 gallon-sized bag to seal moisture in.
- ● Germination containers: Seedling trays or small pots: 2–4 (3–4 inches deep).
- ● Well-draining potting mix: 1–2 bags (sterilized, seed-starting blend preferred).
- ○ Heat mat (optional but helpful): 1 (70–80°F / 21–27°C) to speed germination post-stratification.
- ● Spray bottle: 1 (for gentle watering).
- ● Grow lights or sunny windowsill: Access to 6+ hours of light daily.
- ● Humidity dome: 1 (to retain moisture during early growth).
- ● pH test kit: To check soil pH (ideal: 6.0–6.5 for hibiscus).
- ● Fungicide: 1 bottle (prevents damping-off in damp conditions).
- ● Label markers: 1 pack (to track seed varieties).
Step-by-step instructions for germinating hibiscus seeds through cold stratification
Here's how to break dormancy and get those stubborn hibiscus seeds sprouting reliably in just a week.
🌱 Step 1: Prepare Seeds with Warm Water Soak
Fill a small bowl with lukewarm water and add hibiscus seeds. Let them soak for 12-24 hours—this softens the tough outer shell and kickstarts germination. You'll see the water turn slightly cloudy as natural oils leach out, which is normal. After soaking, drain and pat the seeds dry with paper towels.
This step is crucial because hibiscus seeds have a hard, impermeable coating that blocks moisture. Without soaking first, many seeds would simply never wake up. I like to do this in the evening so the seeds can absorb overnight while I prep other materials.
💧 Step 2: Cold Stratify in Moist Medium
Line a shallow container with a damp paper towel or folded coffee filter. Arrange the soaked seeds about 1 inch apart—they'll swell slightly during stratification, so don't crowd them. Cover with another layer of damp paper towel, then place everything in a sealed plastic bag.
Store the bag in your refrigerator's crisp drawer (typically 34-40°F) for 7-14 days. Check weekly for mold—if you see fuzzy growth, discard those seeds immediately. The goal is consistent moisture without rot. You'll know stratification is working when you see tiny white roots emerging from the seeds.
☀️ Step 3: Transfer to Warm Germination Setup
After cold treatment, remove seeds from the fridge and plant them ½ inch deep in a tray filled with sterile seed-starting mix. Press gently but don't compact the soil—hibiscus seedlings need air around their roots. Water lightly from below using a tray method to avoid disturbing the seeds.
Place the tray in a warm location (70-75°F) with indirect light. A seedling heat mat helps maintain consistent warmth, which hibiscus seeds crave to break dormancy. You should see sprouts in 3-7 days—watch for the first true leaves to appear above the soil line.
🌿 Step 4: Provide Ideal Growing Conditions
Once seedlings emerge, move them to a bright location with filtered sunlight. Direct sun at this stage will scorch delicate leaves. Keep the soil consistently moist but never soggy—let the top inch dry slightly between waterings. Hibiscus seedlings are sensitive to overwatering, which causes damping-off.
After 4-6 weeks, when seedlings have 3-4 sets of true leaves, transplant them to individual pots. Harden off gradually by exposing them to outdoor conditions for increasing durations. You'll know they're ready for the garden when they've developed a sturdy stem and show no signs of stress from the transition.
Tips & tricks for perfect hibiscus seed germination
Here's what nobody tells you about breaking dormancy—these tricks make all the difference with stubborn hibiscus seeds.
Soak Smarter: That 12-24 hour soak in lukewarm water is your first critical step, but timing matters. Start this in the evening so seeds absorb overnight while you prepare other materials—this mimics natural hydration cycles. Pro tip: Use filtered water to avoid chlorine inhibiting germination, and change the water after 12 hours to prevent bacterial growth. The cloudy water you'll see is normal (natural oils leaching out), but if it smells foul, rinse immediately.
Stratification Secrets: In Step 2, the 34-40°F cold treatment is non-negotiable for hibiscus seeds, but placement matters. Store your sealed bag in the fridge's crisp drawer—not the door where temps fluctuate. I've found that placing a small dish of water nearby helps maintain humidity without over-wetting the paper towels. Check weekly for mold (fuzzy white growth)—if you see it, discard those seeds immediately and start fresh. The goal is consistent moisture without rot.
Warmth Hack: After cold stratification, hibiscus seeds need that 70-75°F warmth to sprout, but not all heat sources are equal. A seedling heat mat works best, but if you don't have one, place your tray on top of your fridge (not inside) where it stays warm but stable. Avoid direct heat sources like radiators, which can cause uneven germination. You'll know it's working when you see those first white roots—this is your green light to proceed with planting.
Light Management: Once seedlings emerge, that bright location with filtered sunlight is crucial. Direct sun at this stage will scorch delicate leaves, but too little light causes leggy, weak seedlings. I place mine near an east-facing window where they get morning sun and gentle afternoon light. If using grow lights, keep them 2-3 inches above seedlings and use a timer for 12-14 hours of light daily. The goal is strong, compact growth—not stretched-out weak stems.
Pro Tips for Hibiscus Seed Germination
- Here's what nobody tells you about breaking dormancy—these tricks make all the difference with stubborn hibiscus seeds.
- Soak Smarter: That 12-24 hour soak in lukewarm water is your first critical step, but timing matters. Start this in t...
- Stratification Secrets: In Step 2, the 34-40°F cold treatment is non-negotiable for hibiscus seeds, but placement mat...
Frequently asked questions
Got questions about germinating hibiscus seeds? You’re not alone! Here are some of the most common concerns—and their answers—to help you grow those vibrant sprouts like a pro.
How long does hibiscus seed germination really take?
With cold stratification, you’ll typically see sprouts in 7–14 days. If seeds stay dry or warm, germination can take 3–6 weeks. Patience is key—some stubborn seeds may wait even longer! Monitor soil moisture (keep it damp, not soggy) and maintain warmth (70–80°F) for best results.
Do hibiscus seeds need light to germinate?
Nope! Seeds germinate best in darkness—light comes later. Once sprouts emerge (about ½ inch tall), move them to a bright, indirect spot (like a sunny windowsill). Avoid direct sunlight at first, as tender seedlings can scorch. Think of it like a seed spa—darkness first, then sunshine!
What if my hibiscus seeds rot instead of sprouting?
Rotting seeds usually mean too much moisture or poor drainage. To fix it:
- Use a well-draining mix (like 50% perlite/pumice + 50% seed-starting soil).
- Water from the bottom (place trays in a shallow dish of water for 10 mins, then drain).
- Avoid overcrowding—space seeds 1 inch apart to prevent mold.
Can I germinate hibiscus seeds without cold stratification?
Yes, but success rates drop! Without stratification, germination can take 4–8 weeks (or longer). If you skip the cold treatment, try soaking seeds in lukewarm water for 24 hours first, then plant in warm soil (75–80°F). For best results, though, cold stratification mimics nature and speeds up the process.
How do I know if my hibiscus seeds are still viable?
Test viability with the float test:
- Fill a glass with water and drop seeds in.
- Floating seeds = dead (discard).
- Sinking seeds = viable (plant these!).
Wrapping up and next steps
Growing hibiscus from seed is a rewarding journey—especially when you unlock fast, reliable germination with cold stratification! By following the right steps—soaking seeds, chilling them, and providing warmth—you’ll see those first sprouts in just 7 days.
Whether you’re a seasoned gardener or a curious beginner, this method makes it easier than ever to nurture your own vibrant hibiscus plants.
Now that you’re armed with the know-how, take the next step! Grab your seeds, set up your propagation station, and watch your garden bloom with confidence. Happy growing—your hibiscus adventure starts today! 🌱✨