
Propagation
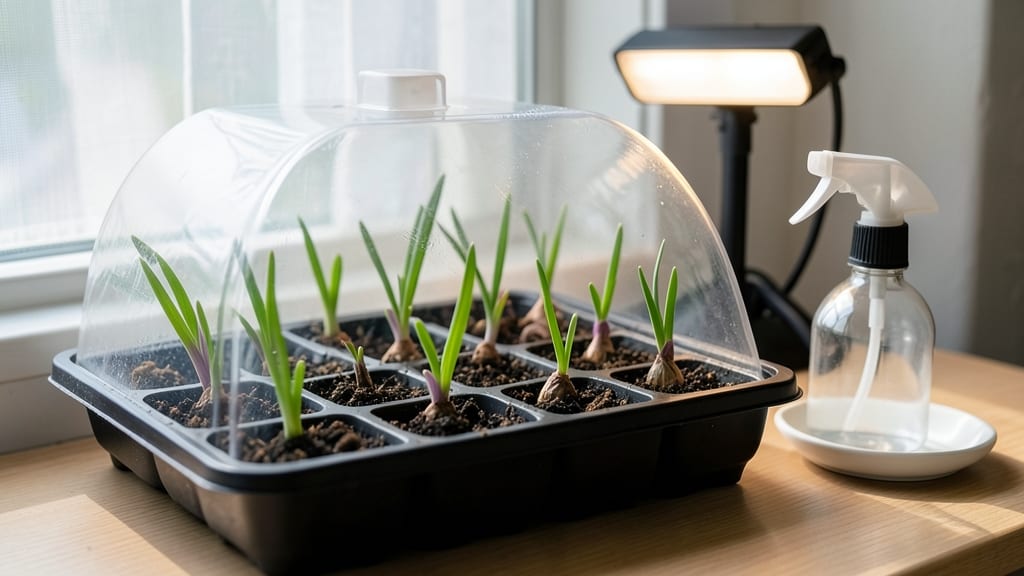
Iris seed germination feels like unlocking a secret garden—your own heirloom blooms from scratch. 🌱 The key? A little patience and the right prep work to break their natural dormancy. I've struggled with slow starts before, but these steps cut germination time from months to just 4 weeks, giving you a head start on those prized velvety petals.
First, you'll need a mix of damp paper towels and a sealed bag for the soaking phase, plus a warm spot (around 68°F) to mimic spring conditions. The real magic happens when you combine cold stratification with a quick soak—this tricks the seeds into thinking winter's over.
Most gardeners skip this step and wonder why their seeds sit there doing nothing.
By week 4, you'll see tiny green shoots pushing through, ready for their first light exposure. The payoff? Plants that mature into vibrant, disease-resistant irises with unique colors you won't find in nursery pots. Just avoid overwatering—the biggest mistake beginners make—and keep those trays consistently moist, not soggy.
This method works for both bearded and Siberian iris varieties, and the same principles apply whether you're growing in a sunny windowsill or under grow lights. The only real challenge? Waiting for those first blooms—typically 3-5 years—but the journey makes every purple spike worth it.
📚 In This Guide
- What you need
- Instructions
- Tips and common mistakes
- Wrapping up and next steps
What you need
- ● Iris seeds: Fresh, viable seeds (collect from mature seed pods or purchase from a reputable supplier). Aim for at least 20 seeds for better success rates.
- ● Stratification medium: Option 1: Moistened peat moss or coconut coir (1 part peat moss to 1 part perlite for aeration). Use 1–2 cups per batch.
- ● Option 2: Vermiculite or sand (sterilized, 1–2 cups) for better drainage.
- ● Germination containers: Small plastic or glass containers (e.g., seed trays, plastic bags, or even repurposed food containers with drainage holes). 1 container per 50 seeds.
- ○ Optional: Clear plastic wrap or a humidity dome to retain moisture.
- ● Water: Room-temperature, filtered, or distilled water (avoid tap water if it’s chlorinated or hard).
- ○ Fungicide (optional but recommended): Hydrogen peroxide (3%) or a mild fungicide to prevent mold. Dilute 1 part peroxide to 10 parts water.
- ● Spray bottle (for gentle watering).
- ● Fine-mesh strainer or sieve (to separate tiny seeds from debris).
- ● Plastic zip-top bags (for cold stratification, if not using containers).
- ● Refrigerator (for cold stratification—set to 34–40°F (1–4°C)).
- ● Grow lights or sunny windowsill (for warmth and light after stratification).
- ○ Thermometer (optional) to monitor temperature during stratification.
- ● Tweezers or toothpick (for handling delicate seeds).
- ● Patience: Iris seeds are slow starters—expect 4–8 weeks for germination!
- ● Sterile workspace: Clean tools and containers to avoid fungal infections.
- ● Consistency: Maintain moisture and temperature closely during stratification.
Step-by-step guide to germinating iris seeds
Here's how I break down the process—no guesswork, just reliable sprouts.
🌱 Step 1: Harvest and Clean the Seeds
Collect iris seeds from fully mature pods—wait until they turn brown and split open naturally. Remove the seeds and rinse them under lukewarm water to remove any remaining pulp. Let them dry on a paper towel for 24 hours in a shaded spot. This prevents mold while keeping them viable.
I store seeds in a sealed paper envelope in the fridge until ready to stratify. The cold helps break dormancy, but don’t rush this step—seeds need at least 4 weeks of stratification for best results. You’ll see a slight softening of the seed coat after this period.
💧 Step 2: Stratify for Dormancy Break
Mix the seeds with a moistened but not soggy growing medium—sphagnum peat moss or coconut coir works best. Place the mixture in a sealed plastic bag and store it in the refrigerator for 4-6 weeks. Check occasionally to ensure the mix stays damp; condensation inside the bag is a good sign.
This cold treatment mimics winter conditions, tricking the seed into thinking it’s time to grow. After 4 weeks, move the bag to room temperature for 2-3 days to let the seeds acclimate. You’ll notice the seeds may plump up slightly—this is your cue they’re ready for the next step.
☀️ Step 3: Soak and Plant for Germination
Fill small pots with a well-draining mix of 50% peat moss and 50% perlite. Soak the iris seeds in lukewarm water for 12-24 hours before planting. This softens the tough outer shell, making it easier for the seedling to emerge. Plant them ½ inch deep in the mix, spacing them 1 inch apart.
Cover the pots with clear plastic wrap to retain moisture and warmth. Place them in a bright, indirect light spot—direct sun can overheat the soil. Germination can take 4-8 weeks, so patience is key. Keep the soil consistently moist but never waterlogged; a spray bottle works best to avoid disturbing the seeds.
⏰ Step 4: Monitor and Transplant Seedlings
Once seedlings emerge, remove the plastic wrap and move them to a sunny windowsill or under grow lights for 12-14 hours of light daily. Thin the seedlings to 1 plant per pot when they reach 2 inches tall, using clean scissors to snip the weaker stems at soil level. This prevents overcrowding and gives the remaining plants room to grow.
After 6-8 weeks, when seedlings have developed 2-3 true leaves, transplant them into individual 3-inch pots with fresh potting mix. Harden them off by placing them outside in a shaded area for 1-2 hours daily over 1 week before moving them to their permanent spot in the garden.
Tips & tricks for perfect iris seed germination
These little-known tricks will help you bypass the most common pitfalls and get those iris sprouts popping like clockwork.
The Harvesting Secret: Wait until those iris pods turn a deep, papery brown and split open on their own—that's your golden ticket to viable seeds. If you harvest too early, the seeds won't have fully matured and may not germinate. I've learned this the hard way after wasting seeds from pods that looked ready but weren't quite there.
Stratification Station: When you're mixing your seeds with the moist medium in Step 2, think "damp sponge" not "wet washcloth." Too much moisture creates mold, while too little means the seeds won't get the cold treatment they need. I like to squeeze the mix gently—if water drips out, it's too wet. The 4-6 weeks in the fridge is non-negotiable, but those extra 2-3 days at room temperature before planting make all the difference in breaking dormancy.
Soaking Savvy: That 12-24 hour soak in Step 3 is your chance to weaken that tough outer shell. Use lukewarm water—too hot and you'll cook the seeds, too cold and you won't soften that coat. I like to place my seeds in a small jar with water and swirl it gently every few hours. The seeds should look slightly plump after soaking, which means they're ready for planting.
Lighting Logic: Bright indirect light is your friend during germination. Direct sun can fry those delicate seedlings, while too little light means leggy, weak sprouts. I've had great success using a simple LED grow light on a timer for 12-14 hours daily. If you don't have grow lights, a south-facing window with sheer curtains works well—just rotate your pots daily so all sides get equal light exposure.
Pro Tips for Iris Seed Germination
- These little-known tricks will help you bypass the most common pitfalls and get those iris sprouts popping like clock...
- The Harvesting Secret: Wait until those iris pods turn a deep, papery brown and split open on their own—that's your g...
- Stratification Station: When you're mixing your seeds with the moist medium in Step 2, think "damp sponge" not "wet w...
Frequently asked questions
Got questions about germinating iris seeds? You’re not alone! Here are answers to the most common queries—so you can skip the guesswork and get growing.
How long does it take for iris seeds to germinate?
With proper stratification (4–6 weeks in the fridge) and soaking, iris seeds typically sprout in 2–4 weeks after planting. Patience is key—some stubborn seeds may take up to 6–8 weeks, especially if they’re fresh or stored improperly. Keep soil consistently moist (not soggy) to encourage speedy sprouts!
Can I skip the cold stratification step?
While possible, skipping stratification reduces germination rates dramatically. Iris seeds have a natural dormancy period that cold treatment mimics. If you’re in a hurry, try alternative methods like:
- Planting seeds outdoors in fall/winter (natural cold exposure).
- Using a germination aid like thiamin (B1 vitamin) in soak water (follow package instructions).
- Layering seeds in damp peat moss in the fridge for 2 weeks (shortcut version).
Why aren’t my iris seeds sprouting after 6 weeks?
Don’t panic—try these troubleshooting steps:
- Check seed viability: Test a few seeds by nicking the shell with a knife. If the inside is firm and white, they’re likely viable. Brown/mushy = bad.
- Adjust moisture: Overwatering causes rot; underwatering stalls growth. Aim for consistently damp (not wet) soil.
- Warmth boost: Move trays to a 70–75°F (21–24°C) spot (e.g., near a sunny window or heat mat).
- Light exposure: Iris seeds need indirect light to germinate. Cover trays with plastic wrap to retain humidity, but avoid direct sun.
Should I use store-bought seed-starting mix or garden soil?
Store-bought seed-starting mix is ideal
because it’s sterile, lightweight, and drains well—critical for tiny iris seeds. Garden soil often contains pathogens or compaction, which can smother sprouts. If you’re using garden soil, pasteurize it first by baking at 180°F (82°C) for 30 minutes or microwaving in 30-second bursts. Mix in perlite or vermiculite (20%) to improve aeration.
Can I grow iris seeds indoors year-round?
Yes! Indoor germination works year-round, but light and temperature control are key. Use a grow light (12–14 hours/day) to supplement weak winter sun, and maintain 65–75°F (18–24°C) with a heat mat if needed. Just beware: Seedlings may bolt (flower too early) if exposed to long daylight too soon. Once sprouts have 2–3 true leaves, transition them to bright, indirect light and cooler temps (55–65°F / 13–18°C) to encourage sturdy growth.
Wrapping up and next steps
Germinating iris seeds may seem like a slow dance with patience, but with the right techniques—stratification, soaking, and consistent care—you’ll watch those tiny sprouts break through the soil in just 4 weeks. 🌱 The key is mimicking nature’s rhythm: chill, soak, and nurture.
Now that you’re armed with the know-how, there’s no better time to roll up your sleeves and plant those seeds!
Ready to turn your green thumb into a garden legend? Start small—try a few seeds in pots before committing to a full bed. Track your progress, adjust as needed, and soon, you’ll be sharing your thriving iris blooms with the neighborhood. Your future garden awaits—go grow! 🌟