
Propagation
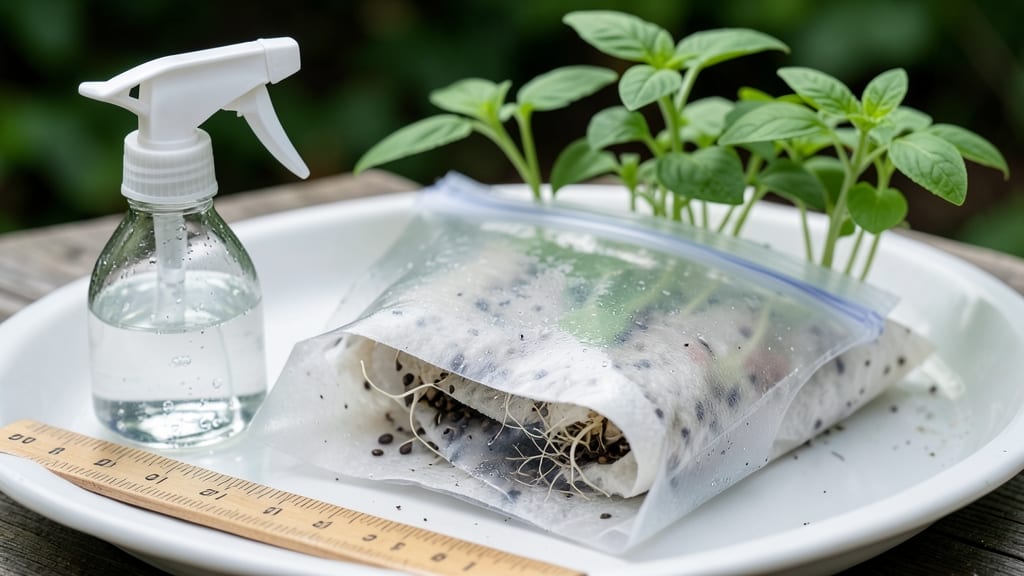
Starting seeds with paper towels cuts germination time in half—no soil, no mess, just speed. 🌱 I’ve used this method for delicate seeds like peppers and tomatoes, and they pop up in days instead of weeks, giving me a head start on the growing season.
The setup couldn’t be simpler: fold a paper towel into a square, dampen it lightly (not soggy), place seeds an inch apart, then fold it like a sandwich. Seal it in a plastic bag to trap humidity, and tuck it in a warm spot—like on top of the fridge.
You’ll see sprouts in as little as 3-5 days, and no more guessing whether seeds are rotting or just slow to wake up. Transplanting is a breeze too—just unfold the towel, pop the seedlings out by their roots, and they slide right into soil without shock.
The paper towel breaks down naturally, so there’s no waste or fuss. This method works for almost any seed, especially those that struggle in soil. Just avoid tiny seeds like lettuce—they’ll get lost in the folds. Ready to try it?
📚 In This Guide
- What you need
- Instructions
- Tips and common mistakes
- Wrapping up and next steps
What you need
- ● Paper towels: 2-3 thick, lint-free sheets (like Bounty or Viva) per seed type. Avoid recycled or scented towels—they can inhibit germination.
- ● Seeds: Choose fast-germinating varieties (e.g., basil, beans, lettuce, or herbs). Aim for 5-10 seeds per towel for testing.
- ● Spray bottle: A 16-32 oz misting bottle (like a plant sprayer) to keep towels moist without soaking.
- ● Plastic bag or container: A ziplock bag (quart-sized) or a clear plastic container with a lid (like a takeout container) to create a humidity dome.
- ● Water: Room-temperature, filtered water (chlorine-free if possible). Avoid tap water sitting overnight—it can harm seeds.
- ● Plate or tray: A shallow dish (like a 9x13-inch baking pan) to hold the paper towels flat.
- ● Heat mat: A seedling heat mat (set to 70-80°F) to speed up germination for slow starters.
- ● Grow lights: A LED grow bulb or full-spectrum light (12-16 hours/day) once sprouts emerge.
- ● Labels & marker: Write seed types on toothpicks or masking tape to track varieties.
- ● Scissors: For trimming towels to fit containers neatly.
Step-by-Step instructions for paper towel seed starting
Here's how to get seeds sprouting in days instead of weeks—no soil required.
🌱 Step 1: Prepare Your Seeds and Paper Towels
Soak your seeds in warm water for 12-24 hours to kickstart germination. I use a small bowl with just enough water to cover them—no need to drown. This softens the seed coat and speeds up the process. While they soak, lay out a stack of 4-6 paper towels (the kind you'd use for cooking) on a clean surface.
Fold the towels into quarters to create a neat rectangle—this keeps everything contained and makes it easy to transfer later. The goal is to create a damp, cozy environment where seeds can sprout without drying out. Think of it like a tiny, portable greenhouse.
💧 Step 2: Arrange Seeds and Moisten the Towels
Once your seeds have swollen slightly (you'll see them plump up a bit), gently place them on one half of the folded paper towel. Space them about 1 inch apart so they have room to grow without crowding. Fold the other half over them like a sandwich—this keeps everything snug and prevents seeds from scattering.
Mist the towels lightly with lukewarm water until they're damp but not dripping. You want the towels to feel like a wrung-out sponge—moist enough to support germination but not soggy. Too much water here will smother seeds or invite mold. Place the folded towel on a plate or shallow tray to catch any excess moisture.
☀️ Step 3: Create the Ideal Germination Environment
Seal the setup inside a ziplock bag to trap humidity—this mimics the damp conditions seeds crave in nature. Squeeze out any extra air before sealing to avoid creating a vacuum. Place the bag in a warm spot, like on top of your fridge or near a sunny window (but not in direct sunlight yet). Aim for a temperature between 70-80°F—this is the sweet spot for most seeds to sprout in 3-7 days.
Check the towels every 2-3 days to make sure they're still damp. If they feel dry, mist them lightly again and reseal. You'll know it's working when you see tiny roots breaking through the seed coat—this is your cue that germination is underway. Watch for the first signs of a tiny shoot emerging from the seed.
🌿 Step 4: Transfer Sprouts to Soil
Once your sprouts have ½-inch-long roots and a visible shoot (usually 5-7 days in), it's time to plant them. Fill small pots or seedling trays with moistened potting mix and make a tiny hole with your finger—just deep enough to cradle the sprout. Gently place the sprout into the hole, roots first, and cover lightly with soil.
Press the soil down very gently around the sprout to secure it without compacting the roots. Water lightly to settle the soil, but avoid soaking it—you don't want to disturb the delicate roots. Place the pots in a warm, bright spot (but not direct sun yet) to help them adjust. Within a few days, you'll see new leaves unfurling as the plant establishes itself.
⏰ Step 5: Monitor and Maintain Growth
Keep the soil consistently moist but not soggy—you'll know it's right when the top inch feels slightly damp to the touch. Avoid letting the soil dry out completely, as this can shock young seedlings. After 1-2 weeks, when the seedlings have 2-3 sets of true leaves, you can gradually introduce them to brighter light or even transplant them outdoors if temperatures are mild.
Here's where it gets fun—watch as your seedlings grow into strong, healthy plants. The paper towel method gives you a head start, but now it's time to nurture them through their next phase. If you notice any seedlings looking leggy or pale, they need more light. Adjust their position or add a grow light to keep them thriving.
Tips & tricks for perfect paper towel seed starting
These simple tricks will help you skip the waiting game and get your seeds sprouting faster than ever.
Soaking Secret: The 12-24 hour soak is your germination turbocharger, but don't let seeds sit in water longer than 24 hours or they'll start to rot. I like to use a small bowl with just enough warm water to cover them—think "swimming pool" not "ocean." After soaking, give them a quick rinse to remove any water-soluble inhibitors that might be slowing down germination.
Temperature Matters: That 70-80°F range is non-negotiable for most seeds. If your kitchen runs cooler, try placing the ziplock bag on top of your fridge or near a warm (but not hot) spot like a sunny window. Pro tip: A seedling heat mat set to low can work wonders if you're dealing with slower germinators like tomatoes or peppers.
Visual Cues for Success: In Step 3, when you're checking for dampness every 2-3 days, look for these signs: The paper towels should feel like a wrung-out sponge—not dripping, but not bone-dry either. If you see condensation inside the bag, that's perfect! And when you spot those first tiny roots breaking through the seed coat, you're just days away from seedlings.
Transfer Timing: The 5-7 day window for transferring sprouts to soil is flexible, but don't wait too long. Once roots reach about ½-inch and you see that first shoot, it's time to plant. I like to do this in the morning so the plants have the whole day to adjust to their new home. Use a toothpick to gently loosen the roots from the paper towel before planting—this helps prevent transplant shock.
Pro Tips for Paper Towel Seed Starting
- These simple tricks will help you skip the waiting game and get your seeds sprouting faster than ever.
- Soaking Secret: The 12-24 hour soak is your germination turbocharger, but don't let seeds sit in water longer than 24 hours or they'll start to rot.
- Temperature Matters: That 70-80°F range is non-negotiable for most seeds.
Frequently asked questions
Got questions about paper towel seed starting? You’re not alone—this method is simple but can raise a few curiosities! Here are answers to the most common ones to help you grow with confidence.
Why use paper towels instead of soil for seed starting?
Paper towels create a consistent, sterile environment that speeds up germination by keeping moisture and warmth stable. Unlike soil, they prevent mold, rot, and uneven moisture—so you see sprouts faster (often in just 3–7 days!). Plus, it’s mess-free and reusable if you’re eco-conscious.
How long does it take to see sprouts using paper towels?
Germination time varies by plant, but most seeds sprout in 3–14 days with paper towels. Fast growers like beans or peas pop up in 3–5 days, while slower ones (like herbs or tomatoes) may take 1–2 weeks. Keep the towels damp and warm (70–85°F) for best results!
Can I reuse paper towels for multiple seed batches?
Yes! Rinse and dry used towels thoroughly between batches to prevent mold or bacteria. Avoid bleached towels (chemicals may inhibit growth) and opt for unbleached, seed-free paper towels. Just ensure they’re fully dry to avoid soggy, unhappy seeds next time.
What do I do if my seeds rot or mold instead of sprouting?
Mold or rot usually means too much moisture or poor airflow. Fix it by:
- Squeezing excess water from the towel gently (don’t soak!).
- Spreading towels flat to dry slightly between checks.
- Using a fan on low for 10–15 mins/day to improve airflow.
- Discarding affected seeds and towels to avoid spreading.
When should I transplant seedlings from paper towels to soil?
Transplant when you see true leaves (not just the initial seed leaves) and the roots are 1–2 inches long. Handle gently to avoid damaging the delicate stems. Harden off seedlings by placing them near a sunny window for 1–2 days before moving to soil or pots. Pro tip: Use a damp paper towel around the roots to reduce transplant shock!
Wrapping up and next steps
Starting seeds in paper towels is a game-changer—it’s fast, mess-free, and perfect for impatient gardeners! 🌱 With minimal supplies and quick germination, you’ll have sturdy seedlings ready to transplant in no time.
Whether you’re a beginner or a seasoned gardener, this method saves space and stress while boosting success rates.
Ready to grow your green thumb? Grab those seeds and paper towels—your next gardening adventure starts now! For extra confidence, document your progress with photos or a journal to track growth milestones. Happy planting! 🌿