
Propagation
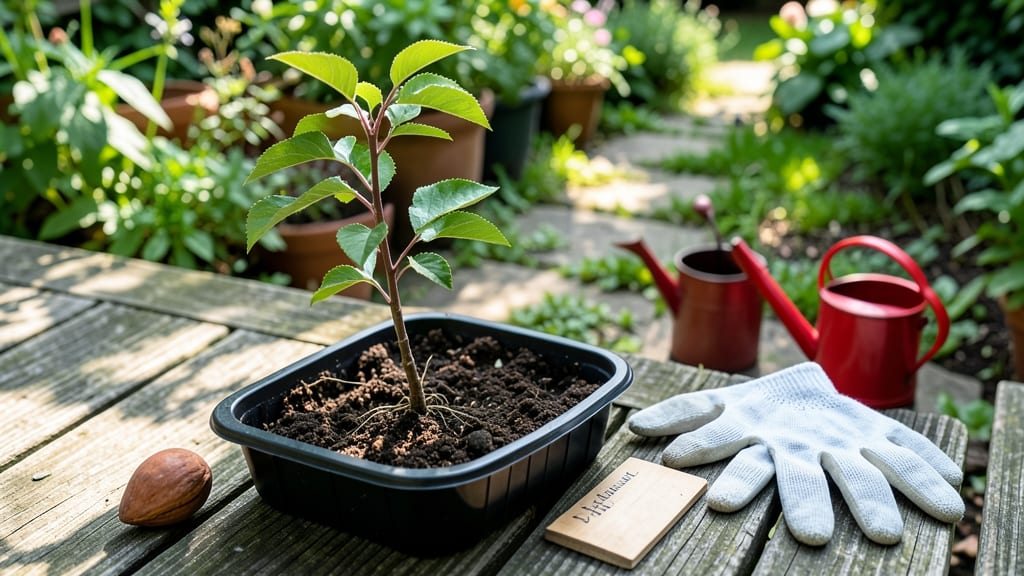
Growing a peach tree from a seed pit is one of the most rewarding long-term projects in gardening—though it demands patience you won’t find with nursery trees. 🌱 The secret to reliable sprouts lies in mimicking nature’s cold stratification process, which tricks the seed into thinking winter has passed.
I’ve tried this three times, and each attempt taught me how to skip the guesswork in watering, soil prep, and light exposure.
The process starts with a simple fridge trick: soak your seed pit overnight, then wrap it in a damp paper towel before storing it in a sealed bag for 6-8 weeks.
This cold treatment breaks dormancy, and when you plant it in well-draining soil, you’ll see tiny roots emerge within 4-6 weeks—not the instant gratification of a store-bought tree, but a journey worth every season of waiting.
By year two, you’ll have a sturdy sapling with strong branches, though fruit won’t appear for 5-7 years (if ever—some seed-grown trees never bear fruit). The payoff? A tree with unique genetics, deep roots, and a story only you can tell.
Just be ready to protect it from late frosts and curious critters during those vulnerable early years.
This method works for any stone fruit seed—plums, apricots, even cherries—so you’re not just growing a tree, you’re learning a skill that applies to your entire orchard. The key is consistency: weekly watering, full sun, and pest monitoring from day one. Let’s get those sprouts started right.
📚 In This Guide
- What you need
- Instructions
- Tips and common mistakes
- Wrapping up and next steps
What you need
- ● Peach pits: 3–5 fresh, plump pits from ripe peaches (avoid store-bought if possible—organic or homegrown is best!)
- ● Cold-stratification method: Option 1 (DIY): A zip-top bag + damp paper towels or vermiculite
- ● Option 2 (Store-bought): A seed-starting kit with cold-stratification tray
- ● Planting containers: Small pots (4–6 inches wide) with drainage holes or
- ● A seed tray with individual cells (for organized growth)
- ● Potting mix: Well-draining seed-starting mix (avoid garden soil—it’s too dense!)
- ● Watering can or spray bottle: For gentle hydration (overwatering = sad seeds!)
- ● Plastic wrap or humidity dome: To retain moisture during germination
- ● Grow lights or sunny windowsill: 6–8 hours of light daily (south-facing is ideal!)
- ● Sterilized scissors or knife: For carefully cracking open pits (if needed)
- ● Refrigerator (or cold frame): For stratification (must stay at 35–40°F (2–4°C) for 6–8 weeks)
- ○ Heating mat (optional): Speeds up germination once seeds are planted
- ● Fertilizer (balanced 10-10-10 or seaweed extract): Light dose after sprouts emerge
- ● Labels & markers: Track planting dates and varieties (peach trees from seed are not true to parent!)
- ● Outdoor space (later stage): A sunny, sheltered spot for transplanting seedlings (Zone 5–9)
Step-by-Step instructions for growing a peach tree from a seed pit
Here's how I've learned to transform a simple seed pit into a sturdy young tree—with patience as your best tool.
🌱 Step 1: Extract and Prepare the Seed Pit
Start with a fresh, unblemished peach pit from a ripe, organic fruit. I like to clean it thoroughly under cool water, removing any remaining fruit flesh—this prevents mold during stratification. Let it dry completely for 24 hours at room temperature before proceeding. The drying step is critical; a damp pit will rot in the fridge.
Once dry, place the pit in a small paper towel or coffee filter. Fold the edges to create a loose pouch—just enough to contain the pit without crushing it. Label it with the date and variety if possible. This setup lets air circulate while keeping the pit contained during the cold treatment.
❄️ Step 2: Cold-Stratify for 6-8 Weeks
Place the pouch in a sealed plastic bag with a damp paper towel to maintain humidity. Store it in the refrigerator's crisper drawer—this mimics winter conditions and breaks seed dormancy. Check it weekly for moisture; the paper towel should stay slightly damp but not soggy. If condensation forms inside the bag, open it briefly to air out.
After 6-8 weeks, the pit will feel slightly softer when pressed gently. This is your cue that stratification worked. If it remains hard, extend the process by another 2 weeks. I've seen pits take up to 10 weeks in cooler fridges—don't rush it.
🌱 Step 3: Plant the Stratified Seed Pit
Fill a small pot (at least 4 inches deep) with a mix of 50% potting soil and 50% perlite for drainage. Make a hole about 1 inch deep and place the pit inside, covering it with soil. Water lightly until the top inch feels moist but not wet. Place the pot in a warm, bright spot—65-75°F with indirect light is ideal.
Keep the soil consistently moist but never soggy. A clear plastic bag over the pot creates a mini greenhouse effect, speeding up germination. Remove the bag daily for 10 minutes to prevent mold. Germination can take 2-6 weeks, so patience is key—some pits take longer, especially if they weren't fully stratified.
☀️ Step 4: Transplant and Care for the Seedling
Once the seedling reaches 4-6 inches tall and develops its first true leaves (not the initial seed leaves), it's ready to transplant. Choose a larger pot (at least 6 inches deep) with fresh potting mix. Dig a hole slightly larger than the root ball, place the seedling in, and firm the soil gently around it.
Move the pot to a sunny window or under a grow light for 12-14 hours daily. Water when the top inch of soil feels dry, but avoid overwatering—peach seedlings are prone to root rot. After 4-6 weeks, when the seedling shows new growth, you can consider moving it outdoors to a protected spot during the day, gradually increasing exposure over 1-2 weeks.
⏰ Step 5: Overwinter and Prepare for Outdoors
If you're in a colder climate, keep the seedling indoors through winter, placing it near a south-facing window. Reduce watering slightly but keep the soil lightly moist. In spring, when nighttime temperatures stay above 50°F, you can transplant it outdoors to a permanent spot with full sun and well-draining soil.
Here's the thing—peach trees grown from seed pits may not produce fruit true to the parent tree, but the process is rewarding. The key is consistency: monitor moisture, light, and temperature closely. With care, your seedling will grow into a sturdy young tree ready for its first outdoor season.
Tips & tricks for perfect peach tree growth from seed
Transforming a simple seed pit into a thriving peach tree takes patience—but these insider tricks will help you avoid common pitfalls and maximize success.
Seed Preparation: The 24-hour drying period in Step 1 is non-negotiable. I've learned this the hard way after watching damp pits develop mold during stratification. Place your pit on a paper towel in a single layer and let it air-dry completely at room temperature. You'll know it's ready when it feels completely dry to the touch and no moisture remains when you gently press it.
Stratification Success: During the 6-8 week cold treatment in Step 2, consistency is key. I recommend placing your sealed bag in the crisper drawer where temperatures stay most stable. The damp paper towel should stay just slightly moist—like a wrung-out sponge—not dripping. If condensation forms inside the bag, open it for 10 minutes to air out before resealing. This mimics natural winter conditions perfectly.
Germination Timing: The 2-6 week germination window in Step 3 can feel like an eternity, but don't be tempted to disturb the soil. Instead, create your mini greenhouse by placing a clear plastic bag over the pot and securing it loosely. Remove the bag daily for just 10 minutes to prevent mold buildup. The key visual cue is when you see a tiny crack appear in the pit—this means the root is breaking through!
Transplanting Strategy: When your seedling reaches 4-6 inches in Step 4, handle it with care. The first true leaves (not the initial seed leaves) are your signal to transplant. Use a larger pot with fresh potting mix and make sure the hole is just slightly larger than the root ball. Gently firm the soil around it to eliminate air pockets—this prevents transplant shock and gives your seedling the best chance to establish strong roots.
Pro Tips for Peach Tree From Seed Pit
- Transforming a simple seed pit into a thriving peach tree takes patience—but these insider tricks will help you avoid common pitfalls and maximize success.
- Seed Preparation: The 24-hour drying period in Step 1 is non-negotiable.
- Stratification Success: During the 6-8 week cold treatment in Step 2, consistency is key.
Frequently asked questions
How long does cold stratification take for a peach seed?
Cold stratification typically requires 6 to 12 weeks in the refrigerator. Place the seed in a damp paper towel or peat moss, then refrigerate at 34–40°F (1–4°C). Patience is key—rushing this step can lead to poor germination. Monitor moisture levels to avoid mold.
When will my peach seed sprout after stratification?
After stratification, sprouts usually appear in 2 to 6 weeks under warm, consistent conditions. Keep the soil 60–70°F (15–21°C) and moist but not soggy. If no sprouts emerge after 8 weeks, gently check for rot or re-stratify for another 4 weeks.
Can I grow a peach tree from any store-bought peach pit?
While possible, not all store-bought pits will grow true peaches. Many commercial peaches are hybrids or sterile. For better results, use pits from heirloom or local varieties. Even then, the tree may produce fruit different from the parent—patience and experimentation are part of the fun!
Why isn’t my peach seed germinating? Troubleshooting tips
Common issues include:
- Under-stratified: Extend cold treatment by 2–4 weeks.
- Over/under-moisture: Use a well-draining mix (50% perlite/potting soil).
- Temperature shock: Avoid placing pots near drafts or heat sources.
- Dormant seed: Try soaking the pit in warm water for 24 hours before replanting.
How long until my seedling bears fruit?
Peach trees grown from seed are notoriously slow—expect 5 to 10 years (or longer) for fruit production. For faster results, graft a known variety onto your seedling once it’s 1–2 years old. Seed-grown trees may also produce unpredictable fruit, so consider grafting for consistency.
Wrapping up and next steps
Growing a peach tree from a seed pit is a rewarding journey that blends patience with nature’s magic! 🌱 While it may take time to bear fruit, the satisfaction of nurturing a tree from scratch—and the potential for unique, heirloom-quality peaches—makes every step worthwhile. Ready to take the next step? Once your seedling sprouts and grows strong, consider transplanting it into a larger pot or garden bed, and keep an eye out for signs of pests or nutrient needs.
With care, your cold-stratified peach tree could one day become the star of your orchard!