
Lawn
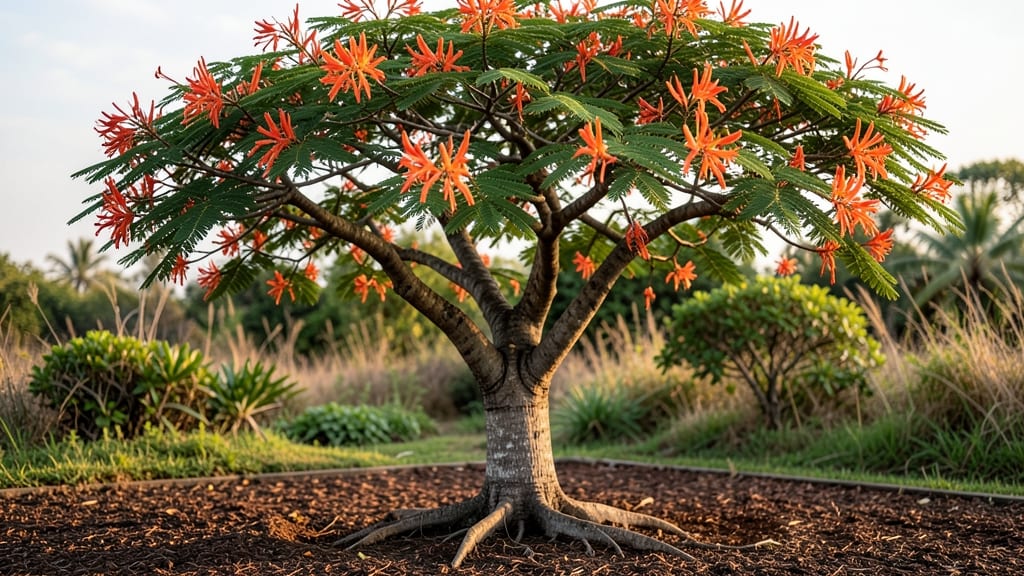
Extracting those velvety brown Poinciana seed pods unlocks a chance to grow one of the most dramatic tropical trees—if you know the trick. 🌿 The pods are deceptively tough, but with the right technique, you'll reveal seeds ready for germination within days, not months.
I've cracked open dozens, and the key is patience combined with a little strategic force.
Start by collecting mature pods—dark brown and slightly papery—when they naturally release seeds in late fall or early winter. Soak them in warm water for 24-48 hours to soften the fibers, then gently pry open the seams with a knife.
Inside, you'll find flat, dark seeds that need warmth and moisture to break dormancy, not cold stratification like many tropical seeds.
Plant the seeds ¼-inch deep in a well-draining mix of equal parts potting soil and perlite, keeping the soil consistently moist but never soggy. Place the container in a warm, bright spot (75-85°F) under grow lights or on a sunny windowsill.
Germination takes 2-4 weeks, but be prepared for slow growth—these saplings are built for endurance, not speed.
The real test comes when seedlings reach 6 inches tall: harden them off gradually before transplanting outdoors after the last frost. They'll need full sun, rich soil, and protection from strong winds in their first year.
With proper care, you'll see vibrant yellow blooms by year three—proof the wait was worth it.
📚 In This Guide
- What you need
- Instructions
- Tips and common mistakes
- Wrapping up and next steps
What you need
- ● Mature Poinciana seed pods – Collect 5–10 fully dried, brown pods (ensure they’re hard and papery, not soft or moldy).
- ● Heavy-duty gloves – A pair to protect your hands from sharp pod edges and potential sap irritation.
- ● Hammer or mallet – A 1–2 lb tool for gently cracking open the pods (avoid sledgehammers—precision matters!).
- ● Flat, sturdy surface – A concrete slab, thick wooden board, or even a large cutting mat to prevent slipping.
- ○ Tongs or pliers – For safely handling seeds once the pods are open (optional but helpful!).
- ● Bucket or large bowl – To collect seeds and debris (1–2 gallons should suffice).
- ● Fine-mesh strainer or sieve – A ¼-inch or smaller mesh to separate seeds from chaff (a kitchen strainer works in a pinch!).
- ● Paper towels or newspaper – For drying seeds and cleaning up spills.
- ● Spray bottle with water – To mist seeds if they’re too dry during cleaning.
- ● Seed tray or shallow container – For organizing seeds post-cleaning (e.g., a plastic takeout container with drainage holes).
- ● Labeling markers – To tag seeds with the date and pod source (great for tracking germination progress!).
- ● Safety goggles – If you’re extra cautious about flying debris (or just squinty-eyed from hammering!).
- ● Fan or dehumidifier – For speeding up seed drying in humid climates.
Step-by-step instructions for extracting Poinciana seeds
Here's the precise method I use to coax viable seeds from those iconic, velvety pods—no guesswork involved.
🪴 Step 1: Harvest and Prepare the Pods
Collect pods when they turn brown and papery but haven't split open naturally. The ideal moment is when they begin to crack along the seams but still retain their shape. Place them in a dry, well-ventilated area for 3-5 days to complete drying—this prevents mold and makes the outer casing brittle enough to crack open cleanly.
Real talk: If you skip this drying step, the pods will resist splitting and you'll waste time forcing them. I like to spread them on a screen or mesh tray so air circulates underneath. Once completely dry, they'll rattle when shaken—your signal they're ready for processing.
✂️ Step 2: Crack Open the Pods Safely
Wear thick gloves—those seed pods contain hard, sharp edges that can draw blood. Place a pod on a hard, flat surface (like a concrete slab or thick cutting board) and strike it firmly with a small hammer or mallet. Aim for the thickest seam where the two halves meet—this is the natural fracture line.
Don't crush the entire pod. You're not trying to pulverize it; you're separating the two halves cleanly. If you hear a clean crack rather than a dull thud, you've done it right. Open the pod carefully—you'll find 4-6 seeds per pod, each encased in its own brown, leathery membrane.
💧 Step 3: Remove and Soak the Seeds
Gently peel away the outer pod halves, then separate the individual seed pods. Each seed is still wrapped in a thick, fibrous coating that needs removal. Soak the seeds in lukewarm water for 24 hours—this softens the coating and makes it easier to strip away without damaging the seed itself.
After soaking, use your fingers to rub the coating off under running water. You'll know you've done it right when the seed inside is smooth and dark brown, resembling a small, polished bean. Discard any seeds that remain wrinkled or shriveled—they won't germinate. Rinse the viable seeds thoroughly and let them dry on a paper towel for 12 hours before storing.
🌱 Step 4: Stratify for Germination Success
Poinciana seeds require stratification to break dormancy. Mix the cleaned seeds with damp peat moss or coconut coir in a ziplock bag, then place the bag in your refrigerator for 6-8 weeks. Check the moisture level weekly—it should feel like a wrung-out sponge. If it dries out, mist it lightly.
Here's the thing—skipping stratification means waiting months for germination, if it happens at all. The cold period mimics winter conditions, tricking the seed into thinking it's time to grow. After the stratification period, plant the seeds ½ inch deep in well-draining potting mix and keep them in a warm, humid environment (around 75°F).
☀️ Step 5: Provide Ideal Germination Conditions
Cover the planted seeds with a clear plastic dome or plastic wrap to retain humidity, then place them under grow lights (or in a south-facing window) for 12-16 hours of light daily. Keep the soil consistently moist—not soggy, but never dry. Germination can take 4-12 weeks, so patience is key.
Once seedlings emerge, remove the dome and provide bright, indirect light until they develop 2-3 sets of true leaves. This is when you'll know they're ready to transplant into individual 4-inch pots with well-draining soil. Watch for leggy growth—if stems stretch toward the light, they need stronger light intensity or a shorter distance to the bulb.
Tips & tricks for perfect Poinciana seed extraction
Here's what nobody tells you about handling these tricky seed pods—these tricks will save you hours of frustration.
Drying Strategy: The 3-5 day drying period is non-negotiable for clean extraction. I've tried skipping it, and the pods become tough as leather, forcing me to waste time with a hammer or even a vise. Place them on a mesh tray in a warm, dry spot—this creates airflow that prevents mold while accelerating the drying process. The "rattle test" is your best friend: shake a pod and listen for that hollow sound before cracking it open.
Safety First: Those sharp edges are no joke—I've had to bandage cuts from impatient cracking. Use a small hammer or mallet (not a heavy sledgehammer) and strike the pod's thickest seam with controlled force. A clean crack means you're on the right track; a dull thud means you're about to crush the seeds inside. Thick gardening gloves are worth their weight in gold here—trust me, you'll thank me when you avoid that bloody mess.
Seed Selection: After the 24-hour soak in lukewarm water, you'll find some seeds look plump and smooth while others remain wrinkled. This is your quality control moment—discard the shriveled ones immediately. The viable seeds should have a dark brown, almost glossy appearance when the fibrous coating is removed. I like to float-test them in water: good seeds sink, bad ones float. This simple trick saves me from planting duds.
Stratification Hack: The 6-8 week cold treatment is where the magic happens, but many people skip it. I've learned that placing the ziplock bag in the crisper drawer of your fridge maintains more consistent moisture than the main compartment. Check weekly and mist if needed—your seeds should feel like a wrung-out sponge, not bone-dry. This cold period mimics winter conditions, breaking dormancy and ensuring germination within weeks rather than months.
Pro Tips for Poinciana Tree Seed Pods
- Here's what nobody tells you about handling these tricky seed pods—these tricks will save you hours of frustration.
- Drying Strategy: The 3-5 day drying period is non-negotiable for clean extraction. I've tried skipping it, and the po...
- Safety First: Those sharp edges are no joke—I've had to bandage cuts from impatient cracking. Use a small hammer or m...
Frequently asked questions
Got questions about Poinciana tree seed pods?
You’re not alone! Here are answers to the most common queries—from cracking them open to troubleshooting germination hiccups.
How do I know when Poinciana seed pods are ready to harvest?
Harvest pods when they’re dry, brown, and papery (usually late fall/winter). Tap them—they should rattle with seeds inside. Avoid green or moist pods, as they won’t crack easily and may mold. Pro tip: Wear gloves! The pods release orange dye that stains skin and fabrics.
What’s the best way to crack open Poinciana seed pods without damaging the seeds?
Use a hammer or mallet to gently tap the pods (place them in a towel or bag first to contain debris). Avoid crushing—aim for a clean split along the seam. For stubborn pods, soak them in water for 24 hours to soften the fibers. Warning: The seeds inside are hard and dense—wear safety glasses!
How long does it take for Poinciana seeds to germinate after cracking?
Germination can take 2–6 weeks in warm (75–85°F), moist conditions. Pre-soak seeds for 24 hours to speed it up. Use a seedling tray with drainage and keep soil consistently damp (not soggy). Patience is key—some seeds may take months or need a cold stratification period (mimic winter by refrigerating seeds for 4–6 weeks).
Can I plant Poinciana seeds directly in the ground, or do they need to start indoors?
Direct sowing works in warm climates (USDA Zones 9–11), but for cooler areas, start seeds indoors 8–12 weeks before the last frost. Use a light, well-draining mix (like cactus soil). Seedlings are slow-growing—give them space! If outdoors, plant after the last frost when soil temps are above 60°F.
What should I do if my Poinciana seeds aren’t germinating?
Try these fixes:
- Check moisture: Overwatering causes rot; underwatering halts growth. Aim for consistently damp (not wet) soil.
- Test viability: Fill a glass with water—viable seeds sink; floaters are likely dead.
- Adjust conditions: Increase warmth (use a heat mat) or try cold stratification (refrigerate seeds for 4–6 weeks).
- Fresh pods: If seeds are from recently harvested pods, they may need more time.
If all else fails, source new seeds—some batches have lower viability.
Wrapping up and next steps
From their striking appearance to their surprising germination potential, poinciana tree seed pods 🌱 With the right tools and a little patience, you can unlock the seeds inside and nurture them into a stunning addition to your landscape.
Now that you’re equipped with the know-how, why not take the next step? Grab those pods, follow the steps, and watch your green thumb grow even greener!
Ready to plant? Start small—even one seed pod could be the beginning of a thriving poinciana tree!