
Lawn
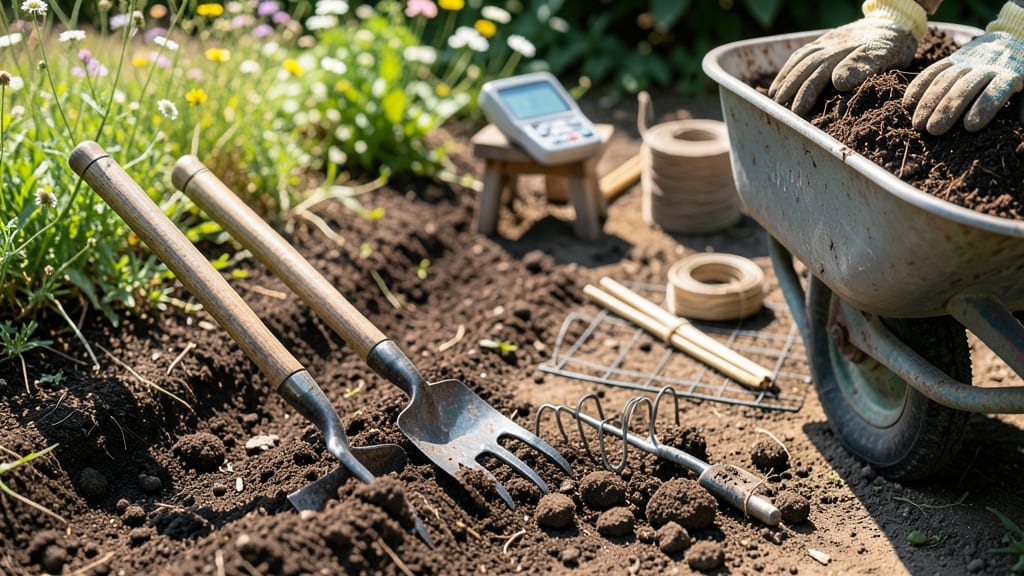
Loose soil is the secret to seedlings that don’t flop. ✨ I’ve seen weak, leggy plants struggle in compacted ground—until I learned how to prepare a seed bed properly. The difference between a thriving garden and a disappointment often comes down to what’s happening just below the surface.
You’ll need basic tools—a fork or tiller, a rake, and a leveling board—and a clear area free of weeds or rocks. The goal is to create a 6-inch-deep layer of loose, crumbly soil that’s perfect for seed germination.
For clay-heavy soil, mix in 2-3 inches of compost to improve drainage; sandy soil benefits from a light layer of organic matter to retain moisture.
Start by removing debris, then loosen the soil with your fork or tiller, breaking up clumps until it feels like crumbled cake. Level the bed with your rake or board, and water lightly before planting.
The result? Seeds that sprout faster, roots that grow strong, and plants that stand tall instead of leaning.
Works for lawns, flower beds, or vegetable patches—just adjust the depth for larger seeds. Pro tip: Test your soil’s moisture before planting; it should feel like a damp sponge, not a soggy mess. Ready to transform your seed bed?
📚 In This Guide
- What you need
- Instructions
- Tips and common mistakes
- Wrapping up and next steps
What you need
- ● Garden fork or broadfork: 1 (for aerating and loosening compacted soil without turning it over).
- ● Hoe (stirrup or standard): 1 (for breaking up clods and removing weeds).
- ● Rake (bow or leaf rake): 1 (8-12" wide) for leveling and smoothing the soil surface.
- ● Garden trowel: 1 (for precision work, like removing small debris or adjusting soil depth).
- ● Wheelbarrow or large bucket: 1 (for hauling soil amendments or compost).
- ● Garden gloves: 1 pair (heavy-duty, for protection and grip).
- ○ Knee pads or cushion: 1 (optional but highly recommended for comfort).
- ● Compost: 2-3 inches (well-aged, to improve soil structure and fertility).
- ○ Organic matter (e.g., peat moss, coconut coir, or leaf mold): 1-2 inches (optional, for sandy or clay-heavy soils).
- ● Slow-release fertilizer: 1-2 lbs per 100 sq. ft. (balanced NPK, like 10-10-10 or 5-10-10).
- ○ Gypsum (calcium sulfate): 10-20 lbs per 100 sq. ft. (optional, for breaking up clay soil).
- ● Lime (if soil is acidic): Amount based on soil test (typically 10-20 lbs per 100 sq. ft.).
- ● Soil test kit: 1 (to check pH and nutrient levels before amending).
- ● Clear weather forecast: 2-3 dry days (to avoid working wet soil).
- ○ Marking tools: Stakes and string (optional, for outlining seed bed areas).
- ● Water source: Hose with adjustable nozzle or watering can (for post-prep hydration).
Step-by-step instructions for preparing a seed bed
Loose, well-aerated soil is the foundation for strong roots—here's how to get it right.
🪴 Step 1: Clear and Mark Your Planting Area
Start by removing any grass, weeds, or debris from your 4-foot by 4-foot area. I like to use a garden rake to pull out weeds at the roots—this prevents them from competing with your seedlings later. Mark the boundaries with wooden stakes or spray paint if you're working in a larger space. The goal is a clean slate where you can focus entirely on soil prep.
For existing garden beds, simply rake away surface debris and loosen the top 2-3 inches of soil. If you're working in new ground, you'll need to dig deeper—about 6-8 inches—to break up compacted subsoil. This extra depth gives roots room to establish before they hit denser layers below.
🌱 Step 2: Loosen the Soil to the Right Depth
Use a broadfork or digging fork to aerate the soil without turning it over. I push the tines 6-8 inches deep and wiggle them side to side to break up compacted layers. This creates vertical channels for roots to grow downward naturally. Avoid using a shovel here—it can create a hardpan layer when you replace the soil.
For clay-heavy soil, I add 1-2 inches of compost to the top layer after loosening. Work it in gently with a garden fork until it blends with the existing soil. You'll know you've done it right when the soil crumbles easily between your fingers and has a slightly springy feel—like a well-used sponge.
💧 Step 3: Level and Smooth the Surface
Rake the loosened soil to create an even, level surface. I use a bow rake to drag the soil in one direction first, then cross-rake to break up any remaining clumps. This step is crucial—uneven seed beds can lead to water pooling in low spots, which causes rot or uneven germination.
For larger areas, I run a level board across the bed to check for high or low spots. Adjust by adding soil to low areas or scraping off excess from high spots. The finished surface should be smooth enough to walk across without tripping, but still loose enough that your finger can press 1 inch deep without resistance.
☀️ Step 4: Add Organic Matter and Conditioners
Spread a 2-inch layer of compost evenly across the bed. I like to use well-aged compost because it adds nutrients without burning tender seedlings. For sandy soil, mix in 1-2 inches of peat moss to improve moisture retention. In clay soil, I add coarse sand to help drainage—just enough to make the soil feel lighter when you squeeze a handful.
Work these amendments into the top 4-6 inches of soil using a garden fork. You're not trying to create a perfect blend—just enough to improve structure. The soil should now hold together when lightly squeezed but still break apart easily. This is the "ideal" texture for seeds: loose enough for roots to push through, but stable enough to support young plants.
⏰ Step 5: Water and Wait Before Planting
Give the bed a thorough watering 24 hours before planting. This allows the soil to settle and helps any remaining amendments blend naturally. I water until the soil is deeply moist—about 6 inches down—so roots can access moisture immediately when seeds germinate. Let it drain completely before proceeding.
If you're planting immediately, water again just before sowing to create a moist environment for seeds. You'll know the timing is right when the soil surface looks dark and slightly glistening but doesn't form puddles. This moisture level encourages quick germination while preventing waterlogged conditions that can rot seeds.
Tips & tricks for perfect seed bed preparation
Real talk: The difference between struggling seedlings and thriving plants often starts with how you prep the soil. Here's what nobody tells you—
Tool Selection Matters: If you don't have a broadfork, a digging fork works just as well—but only if you wiggle the tines side to side to break up compacted layers. I've tried using a shovel for this step, and it actually makes things worse by creating a hardpan layer when you replace the soil. The key is to create vertical channels without turning the soil completely. For stubborn clay soil, rent a tiller for the initial loosening, then finish with the fork to preserve structure.
Soil Texture Test: After working in your amendments, squeeze a handful of soil—it should hold together when lightly pressed but still crumble easily when you open your hand. This "ideal" texture gives roots both stability and room to grow. If it feels too gritty, add more compost; if it sticks together like wet clay, mix in some coarse sand. The 4-6 inch depth mentioned in Step 4 is perfect for this test—you're working with the top layer where most roots will establish.
Watering Wisdom: That 24-hour watering in Step 5 isn't just about settling the soil—it's about creating the perfect moisture balance. Water until it's deeply moist about 6 inches down, then let it drain completely. You'll know you've nailed it when the surface looks dark and slightly glistening but doesn't form puddles. This prevents waterlogged conditions that can rot seeds while ensuring roots have immediate access to moisture when they start growing.
Optional Add-Ins: For extra nutrient boost, consider adding a thin layer of worm castings (about ½ inch) before your 2-inch compost layer. Worm castings improve soil structure and provide gentle, balanced nutrition. If you're planting heavy feeders like tomatoes or peppers, mix in a handful of bone meal (about ½ cup per 4-foot square) for phosphorus—just work it into the top 2 inches of soil where roots will access it first.
Pro Tips for Prepare Seed Bed
- Real talk: The difference between struggling seedlings and thriving plants often starts with how you prep the soil. H...
- Tool Selection Matters: If you don't have a broadfork, a digging fork works just as well—but only if you wiggle the t...
- Soil Texture Test: After working in your amendments, squeeze a handful of soil—it should hold together when lightly p...
Frequently asked questions
Got questions about preparing the perfect seed bed?
You’re not alone! Here are answers to the most common concerns—so you can get your lawn or garden off to a root-tastic start.
What’s the best time of year to prepare a seed bed?
The ideal window depends on your climate, but spring and early fall are prime for most regions. In warm climates, aim for late winter to early spring before summer heat sets in. Cool-season grasses (like fescue) thrive with fall prep, while warm-season grasses (like Bermuda) need spring attention. Pro tip: Test soil moisture—it should be damp but not soggy when you start!
How long should I wait after tilling before planting seeds?
Give your soil 3–7 days to settle after tilling. This lets loose particles compact slightly and eliminates large clods. For no-till methods (like hand-weeding), wait 1–2 days to avoid disturbing the soil too much. If the weather’s dry, lightly water the bed the day before planting to encourage seed contact with moist soil.
Can I prepare a seed bed in hot or cold weather?
Avoid extreme temps! Ideal conditions are 50–85°F (10–30°C). In hot weather, work early morning or late evening to prevent soil drying. For cold snaps, wait until frost risk passes—cold soil can stunt seed germination. If you’re in a hurry, use a row cover or mulch to moderate temps post-prep.
What if my soil is too rocky or compacted?
Don’t stress! Start by removing large rocks (they’ll block roots). For compacted soil, amend with compost or peat moss (2–3 inches mixed in) and aerate with a garden fork. If rocks are small but numerous, use a sifted topsoil layer (4–6 inches) over the bed. Pro tip: Rent a rototiller with a rock separator for heavy-duty prep!
Do I need to fertilize before preparing the seed bed?
Not always! If your soil is poor or depleted, add a balanced fertilizer (10-10-10) or compost during prep. For new lawns, a starter fertilizer (high in phosphorus) helps roots establish. Skip fertilizer if your soil test shows high nutrients—too much can burn seeds. Test first!
Wrapping up and next steps
A well-prepared seed bed is the foundation of a thriving lawn—loose, nutrient-rich soil ensures strong roots, faster germination, and healthier plants. 🌱 By following the right techniques, you’re not just planting seeds; you’re setting the stage for a lush, resilient green space.
Now that you’re armed with the knowledge, roll up your sleeves and get to work!
Your next step? Test your soil to fine-tune your approach—whether it’s adjusting pH, adding compost, or choosing the perfect seed mix. Every great lawn starts with great prep, and you’ve got this! 💪