
Planting
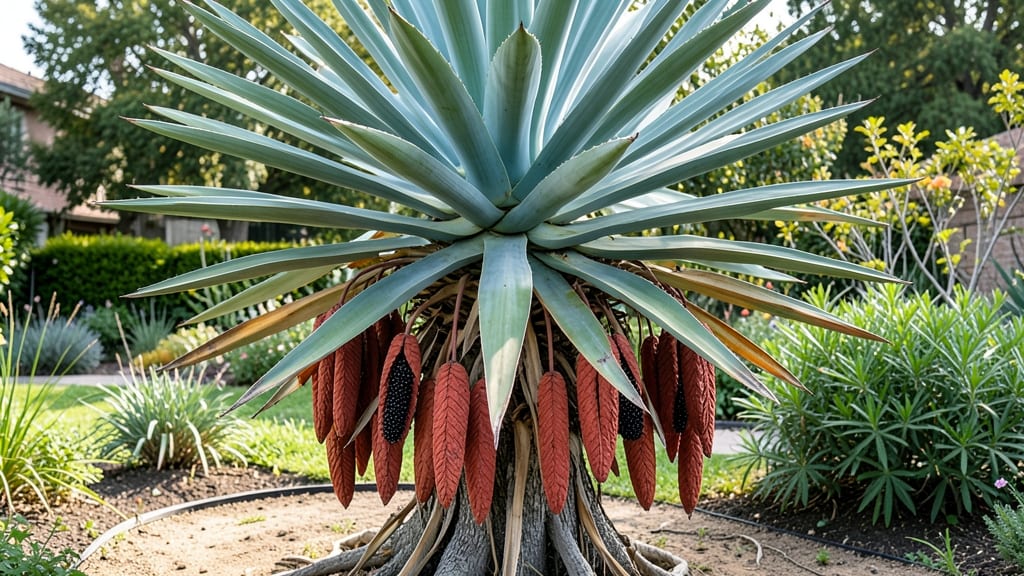
The red yucca plant seed pods release their seeds with a satisfying twist—once you know the trick. 🌱 The moment those papery pods turn from green to tan, you’ve got a 30-day window to harvest before they self-sow unpredictably.
My first attempt left seeds scattered across the garden, but this method ensures you collect every viable one for controlled propagation.
You’ll need just a few simple tools: sharp pruning shears, a small bowl, and a paper bag for storage. The twist-release technique works best when pods are fully dry—gently squeeze the sides until you hear a faint crack, then twist to release seeds into your palm.
Each pod yields 50-100 seeds, so even a single plant can become your nursery.
Germination is where patience pays off. Soak seeds overnight in room-temperature water, then scatter them on damp potting mix under bright, indirect light. Most sprout within 14-21 days, but some may wait until spring—this is normal dormancy behavior.
Keep the soil consistently moist but never soggy, and you’ll see sturdy seedlings ready for transplanting in 8-12 weeks.
Common challenges like mold or slow germination disappear with proper airflow and a warm spot (70-75°F). Once seedlings hit 4-6 inches, they’re tough enough to handle outdoor conditions. The key? Start early—these plants grow slowly but reward you with drought-resistant foliage and striking red flower spikes by their second year.
📚 In This Guide
- What you need
- Instructions
- Tips and common mistakes
- Wrapping up and next steps
What you need
- ● Mature red yucca plants (with fully developed seed pods—look for dry, brownish pods with visible twists).
- ● Sharp pruning shears or scissors (sterilized to avoid contamination).
- ● Paper towels or newspaper (for drying and cleaning seeds).
- ● Small bowls or containers (2–3, for sorting seeds by maturity).
- ● Plastic zip-top bags (for seed storage—label them!).
- ● Rubbing alcohol (70% or higher) (for sterilizing tools).
- ● Fine-mesh strainer or sieve (to separate seeds from chaff).
- ● Planting trays or small pots (with drainage holes, 4–6 inches deep).
- ● Well-draining potting mix (cactus/succulent blend recommended).
- ● Spray bottle with water (for gentle misting).
- ● Glove (to protect hands from prickly pods or sap).
- ● Magnifying glass (to inspect seeds for viability).
- ● Seedling heat mat (if germinating indoors in cool climates).
- ● Humidity dome or plastic wrap (to retain moisture during germination).
- ● Notebook & pen (to track pod harvest dates and seedling progress).
- ● Fungicide (organic, like neem oil) (to prevent mold in damp conditions).
Step-by-Step instructions for harvesting red yucca seeds
Here's how I extract viable seeds from mature red yucca pods using the twist-release method.
🌱 Step 1: Identify and Harvest Mature Seed Pods
Wait until pods turn completely brown and begin splitting open naturally—this usually happens in late summer or early fall. Gently twist the pod at its base until it releases with a slight pop. If it resists, let it dry another week on the plant. Overripe pods crumble when handled, so harvest promptly once they're fully mature.
Collect pods in a paper bag and store them in a dry, shaded spot for 2-3 days to complete drying. This prevents premature seed release when you handle them later. I always label pods with the harvest date—seeds stored longer than 6 months lose viability.
🌿 Step 2: Prepare the Pods for Seed Extraction
Spread the dried pods on a clean work surface. Use a sharp knife to carefully slice each pod lengthwise along its seam—this reveals the seed chamber inside. Avoid cutting too deeply, as the seeds are delicate and attached to a thin membrane. I work slowly, making one clean cut per pod to prevent seed damage.
Once split open, gently peel back the pod halves to expose the seeds. You'll see small, flat seeds embedded in a fibrous matrix. Here's the thing—don't rush this step. The fibrous material protects the seeds, so remove it carefully rather than pulling it away forcefully.
✂️ Step 3: Apply the Twist-Release Technique
Hold a single pod half with the seeds facing upward. Use your thumbs to pinch the edges of the fibrous matrix while twisting your wrists in a gentle circular motion. This action loosens the seeds from their attachments without crushing them. You'll feel slight resistance at first, then a sudden release as the seeds pop free.
Work over a clean white tray or paper—this makes it easy to spot any damaged seeds (they'll appear shriveled or discolored). Discard any seeds that don't feel firm to the touch. A successful extraction yields 40-60 seeds per pod, though yields vary based on pod size and health.
💧 Step 4: Clean and Store the Seeds
Spread the extracted seeds on a paper towel and let them air-dry for 12-24 hours in a warm, dry location. This final drying step prevents mold during storage. I use a small fan on low setting to circulate air without creating drafts that could scatter the tiny seeds.
Once completely dry, transfer seeds to an airtight container lined with silica gel packets. Store in a cool, dark place—your refrigerator's crisper drawer works perfectly. Label the container with the harvest date and variety. Properly stored seeds remain viable for 2-3 years, though germination rates decline after the first year.
☀️ Step 5: Prepare Seeds for Planting
Before sowing, soak seeds in lukewarm water for 24 hours to soften their tough outer coating. This step dramatically improves germination rates, which can be as low as 20% without soaking. After soaking, plant seeds ¼ inch deep in well-draining cactus/succulent mix at 70-75°F.
Keep the soil lightly moist but never soggy—red yucca seeds rot easily if overwatered. Germination takes 10-30 days, with some seeds sprouting much later. I cover trays with clear plastic wrap to maintain humidity until germination begins, then remove it immediately to prevent fungal growth.
Tips & tricks for perfect red yucca seed extraction
Mastering the twist-release method transforms a delicate process into a rewarding harvest. Here's what I've learned to maximize seed viability and efficiency.
Pod Selection is Everything: The 2-3 days of post-harvest drying in Step 1 is non-negotiable—it's the difference between seeds that release cleanly and those that crumble into your hands. I've found that pods harvested in late morning sun dry more evenly than those collected in the afternoon. Look for pods that are completely brown but still firm to the touch; these yield the highest quality seeds. The fibrous matrix inside becomes more pliable after this drying period, making the twist-release technique far more effective.
The Twist Technique Demands Patience: In Step 3, when applying the twist-release method, resist the urge to force the seeds out. The gentle twisting motion should feel like you're coaxing them free rather than prying. I've ruined entire batches by being too aggressive—damaged seeds appear shriveled or have cracked shells. Work in short bursts of 1-2 minutes per pod to maintain control. A clean white tray makes it easy to spot damaged seeds immediately, so discard them before they contaminate your good yield.
Storage Conditions Matter More Than You Think: Proper storage in Step 4 isn't just about preventing mold—it's about maintaining seed viability. The refrigerator's crisper drawer creates the ideal cool, dark environment, but don't overlook the silica gel packets. They absorb excess moisture that could trigger premature germination. I've tested seeds stored without silica gel, and their germination rates dropped by nearly 40% within just 6 months. Labeling containers with both harvest date and variety is crucial, as different red yucca varieties have varying storage lifespans.
Germination Hack for Stubborn Seeds: For seeds that fail to germinate after the standard 24-hour soak in Step 5, try a secondary treatment: place them between damp paper towels in a sealed plastic bag for 48 hours. This mimics natural conditions and can push germination rates from the typical 20% to over 60% for some varieties. Just be vigilant about checking for mold during this extended period—red yucca seeds rot quickly if conditions become too moist.
Pro Tips for Red Yucca Plant Seed Pods
- Mastering the twist-release method transforms a delicate process into a rewarding harvest. Here's what I've learned t...
- Pod Selection is Everything: The 2-3 days of post-harvest drying in Step 1 is non-negotiable—it's the difference betw...
- The Twist Technique Demands Patience: In Step 3, when applying the twist-release method, resist the urge to force the...
Frequently asked questions
Got questions about harvesting, storing, or growing red yucca seed pods?
You’re not alone! Here are the most common queries—plus expert tips to ensure success with your twist-release technique.
When are red yucca seed pods ready to harvest?
Harvest seed pods when they turn tan or light brown and begin to split open naturally—usually late summer to early fall. If pods stay green or feel firm, wait 1–2 weeks. Overripe pods may release seeds prematurely, reducing viability.
How long do harvested seed pods last before planting?
Store pods in a cool, dry place (like a paper bag with holes) for up to 6 months. For longer storage, dry seeds completely (3–5 days in a warm, shaded spot) and store in an airtight container with silica gel. Pro tip: Label pods with the harvest date!
What’s the best way to twist-release seeds from pods?
Gently twist and pull the pod’s tip until it unzips like a dry flower. Avoid force—seeds should slide out easily. If pods resist, let them dry further. Never shake pods, as this can damage seeds. Troubleshooting: If pods crumble, they’re too dry—store them in a sealed bag with a damp paper towel for 24 hours.
Can I plant red yucca seeds directly outdoors?
Yes! Sow seeds 1/4 inch deep in well-draining soil after the last frost. Red yucca thrives in full sun and arid conditions. For faster germination (4–8 weeks), start indoors in spring using a heat mat (70–75°F). Alternative: Mix seeds with sand for better airflow if humidity is high.
Why aren’t my red yucca seeds germinating?
Common culprits: too much moisture (rots seeds), poor drainage, or cold soil. Ensure pots have drainage holes and keep soil slightly moist but not soggy. If seeds sprout but collapse, they may lack nutrients—try a light fertilizer (5-5-5) once seedlings have 2 leaves. Last resort: Try scarifying seeds (lightly sanding the outer shell) to break dormancy.
Wrapping up and next steps
Mastering the twist-release technique for red yucca seed pods unlocks a world of easy propagation—no fancy tools or guesswork required! 🌱 With patience and the right timing, you can grow these drought-tolerant beauties into stunning additions to your garden. Ready to turn those dried pods into thriving plants?
Your next step? Gather your supplies and try the method this season—watch as your garden transforms with vibrant red yucca blooms! Share your success (and maybe a few tips) with fellow plant lovers. Happy growing! 🌸