
Lawn
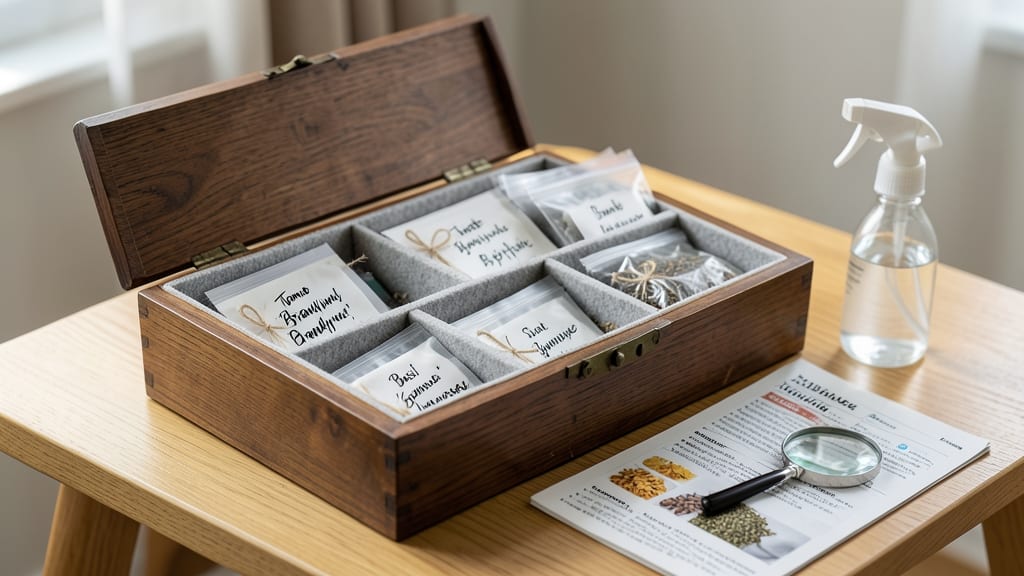
A seed bank box preserves your garden's future for years to come. 🌱 I learned the hard way that store-bought seeds can't match the varieties I've grown—so I built a system to save my own.
The right conditions keep seeds viable for 5+ years, letting you replant heirlooms exactly as you love them.
You'll need an airtight container (glass jars or plastic bins work), silica gel packets, and a permanent marker for labels. The key is low moisture, cool temps, and darkness—just like a seed's natural dormancy. I store mine in a basement closet where temps stay steady around 40°F.
By organizing seeds by type and variety, you'll avoid confusion when planting season rolls around. A simple spreadsheet tracks germination rates and storage dates—my tomato seeds from 2018 still sprout at 90% success. The payoff? A garden that stays true to your vision year after year.
This works for any gardener, from beginners saving packets to seasoned growers preserving rare varieties. The upfront effort saves you money and keeps your garden's legacy alive. Let's get those seeds stored properly!"
📚 In This Guide
- What you need
- Instructions
- Tips and common mistakes
- Wrapping up and next steps
What you need
- ● Air-tight storage box: A rigid, moisture-proof container (e.g., metal, glass, or heavy-duty plastic). Size: 12" x 12" x 6" (adjustable based on seed volume).
- ● Silica gel packets: 5–10 packets (20–30g each) to absorb humidity. Pro tip: Label them "DO NOT EAT!"
- ● Desiccant: 1–2 lbs of uncooked rice or dried beans (natural, budget-friendly alternative to silica gel).
- ● Seed envelopes or paper bags: 100+ kraft paper or manila envelopes (acid-free to prevent degradation).
- ● Permanent markers: 2 (for labeling seeds with variety names and dates).
- ● Zip-top bags: 50+ (quart-size) for grouping seeds by type before final storage.
- ● Scissors or box cutter: For trimming envelopes/bags to size.
- ● Ruler: 12" (for measuring seed depth in storage).
- ● Freezer or cool, dark space: Ideal storage temp: 32–41°F (0–5°C). A home freezer works best for long-term viability.
- ○ Seed viability test kit (optional but recommended): A small packet of tissue paper or paper towels for occasional germination checks.
- ● Digital hygrometer: To monitor humidity levels (10–15% ideal).
- ● Vacuum-sealing machine: For ultra-long-term storage (extends seed life by decades!).
- ● Custom labels: Printed tags with QR codes linking to seed-saving resources.
- ● Backup power: A small battery-operated fan (if storing in a non-freezer space to circulate dry air).
Step-by-step instructions for building a seed bank box
Here's the foolproof method I use to preserve seeds for decades—no fancy equipment needed.
🪴 Step 1: Select and Prepare Your Storage Box
Choose an airtight, moisture-resistant container like a 5-gallon food-grade bucket with a tight-sealing lid. I prefer opaque containers to block light, which degrades seed viability over time. Clean the container thoroughly with warm, soapy water and rinse well—any residual chemicals could harm seeds.
Add a desiccant packet or uncooked rice to absorb excess moisture. Place it at the bottom before adding seeds—this prevents condensation from forming when temperature shifts occur. For extra protection, line the container with a breathable paper towel to cushion seeds and prevent physical damage during handling.
🌱 Step 2: Dry and Package Seeds Properly
Spread seeds in a single layer on a clean, dry surface and let them air-dry for 3-5 days in a well-ventilated area. You'll know they're ready when they feel brittle and break easily between your fingers. Moisture is the enemy—even slightly damp seeds will mold or sprout prematurely in storage.
Package seeds in small, resealable mylar bags or glass vials with airtight lids. Label each with the seed variety, date, and germination instructions. I include a tiny silica gel packet in each bag to absorb any lingering moisture. Seal everything tightly—even a tiny gap lets humidity creep in and ruin years of work.
💧 Step 3: Control Temperature and Humidity
Store your seed bank box in a cool, dark place with consistent temperatures between 32-41°F. A refrigerator works well, but avoid the crisper drawer where humidity fluctuates. Check the box every 6 months to ensure the desiccant is still dry and the seals are intact. If you notice condensation on the container walls, remove seeds immediately and redry them.
For long-term storage beyond 10 years, consider a seed vault-style setup with multiple containers. I keep one set at home and another in a friend's basement—this backup system protects against power outages or equipment failures. Never store seeds in a freezer; the temperature swings during defrosting can damage viability.
⏰ Step 4: Test Viability Periodically
Every 2-3 years, conduct a germination test by planting a small sample of each seed variety. You'll need to sow 10-20 seeds in moist potting mix and monitor for sprouts under ideal growing conditions. If germination drops below 80%, it's time to refresh that seed batch—older seeds simply won't perform reliably.
Document your results in a simple spreadsheet tracking variety, storage date, and germination percentage. This creates a living record of your seed bank's health. I've had heirloom tomato seeds last 15+ years** in this system—proof that proper storage makes all the difference. The key is consistency: once you establish your routine, maintaining seed viability becomes second nature.
Tips & tricks for perfect seed bank boxes
Building a seed bank that lasts decades isn't just about following steps—it's about understanding the science behind seed preservation. Here's what I've learned after years of perfecting my own system.
Light Protection: While opaque containers block light effectively, even small gaps can let harmful UV rays penetrate. I use aluminum foil to line the inside of my 5-gallon food-grade bucket before adding seeds. This creates an extra barrier against light degradation. For glass vials, store them in a completely dark cabinet—any light exposure, even indirect sunlight, accelerates seed aging.
The 3-5 Day Drying Secret: Those 3-5 days of air-drying might seem long, but rushing this step is a common mistake. I've seen seeds mold within weeks when dried too quickly. Test dryness by gently crushing a seed between your fingers—it should shatter completely. If it feels pliable at all, extend the drying time. A small fan on low speed helps maintain airflow without creating drafts that could scatter seeds.
Temperature Consistency: The 32-41°F range is critical, but what matters most is stability. I've had seeds stored in refrigerators where the temperature fluctuated between 35°F and 50°F due to door openings, and viability dropped significantly. Use a thermometer in your storage area to monitor conditions. A basement with consistent 40°F temperatures often works better than a refrigerator where the door opens frequently.
Backup System Strategy: The idea of keeping a backup seed bank might seem extreme, but I've seen power outages and even refrigerator malfunctions destroy entire collections. My solution: divide seeds into three groups. Store one set in my home refrigerator, another in a friend's basement (who lives in a different neighborhood), and keep a third set in my garden shed wrapped in multiple layers of insulation. This three-tier system protects against any single point of failure.
Pro Tips for Seed Bank Box
- Building a seed bank that lasts decades isn't just about following steps—it's about understanding the science behind ...
- Light Protection: While opaque containers block light effectively, even small gaps can let harmful UV rays penetrate....
- The 3-5 Day Drying Secret: Those 3-5 days of air-drying might seem long, but rushing this step is a common mistake. I...
Frequently asked questions
Got questions about storing seeds long-term?
You’re not alone! Here are answers to the most common queries about seed bank boxes—so you can keep your garden dreams growing, even years from now.
How long can seeds last in a seed bank box?
With the right conditions—cool (35–40°F), dry (<10% humidity), and dark—many seeds stay viable for 5 to 10+ years. Vegetables like tomatoes or peppers often last 3–5 years, while beans and peas can stretch to a decade. Always label seeds with their harvest date to track freshness!
Do I need a special fridge or freezer for my seed bank box?
Nope! A standard home fridge (with a consistent temp) works perfectly—just avoid the crisper drawer (too humid). For ultra-long-term storage, a seed vault-style freezer (or even a root cellar) can push viability to 20+ years. Pro tip: Use a hygrometer to monitor humidity—keep it below 10%!
Can I use a regular airtight container instead of a dedicated seed bank box?
Mason jars, Mylar bags with oxygen absorbers, or even vacuum-sealed containers work—just ensure they’re hermetically sealed and stored properly. Dedicated seed bank boxes often include humidity packs and UV-protective layers, but DIY setups can be just as effective with the right prep.
What if my seeds sprout mold or look “off” when I open the box?
Toss ‘em! Mold, musty smells, or discolored seeds mean they’ve lost viability (or worse, could harbor pathogens). If seeds feel damp or clumpy, they’ve absorbed moisture— this is a sign your storage failed. Always inspect seeds before planting, and never store them in plastic bags alone (traps moisture!).
How do I know if my stored seeds are still good?
Test a few seeds by planting them in soil—if 50–75% germinate within 7–14 days, the rest of the batch is likely still viable. For slow germinators (like parsley), soak seeds overnight first. Label each packet with the seed type, harvest year, and germination test date to stay organized!
Wrapping up and next steps
Building your own seed bank box is a rewarding way to preserve heirloom varieties and ensure a sustainable garden for years to come. 🌱 With the right materials—like moisture control, temperature stability, and proper labeling—you’re not just storing seeds; you’re safeguarding biodiversity and future harvests.
Now that you’re equipped with the knowledge, it’s time to take action! Start small with a few of your favorite seeds, experiment with different storage methods, and watch your garden thrive with generations of plants.
🚀 Ready to Begin?
Grab your supplies, follow the steps, and join the community of gardeners who are growing and preserving. Happy seed banking! 🌟