
Planting
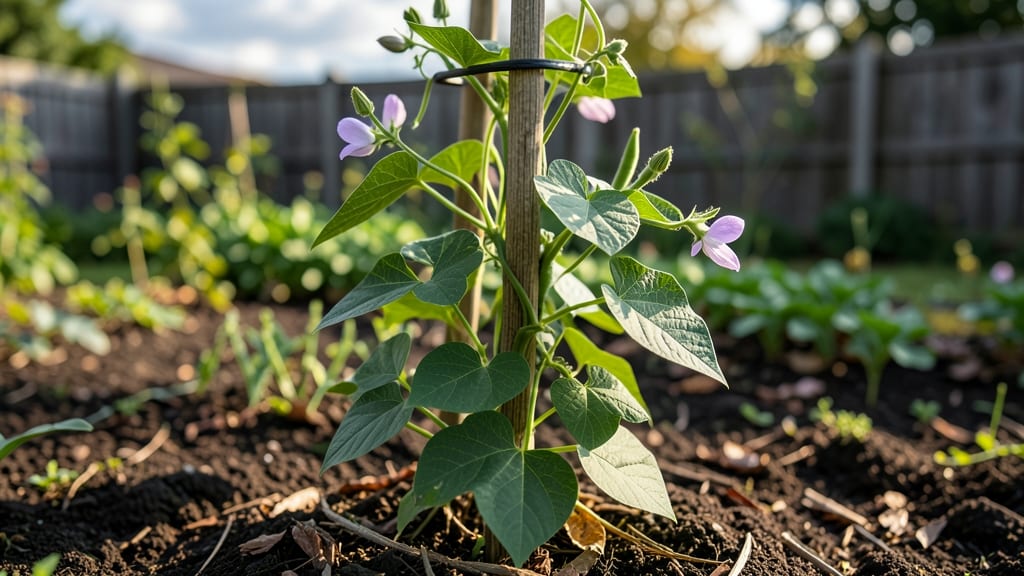
Watch a tiny seed grow into a plant right before your eyes—it’s the most rewarding part of gardening. 🌱 The journey from seed to sprout might seem mysterious, but it’s actually a predictable, seven-stage process that even beginners can master with the right conditions.
You’ll need just a few simple supplies: seeds, well-draining soil, a container, water, and a sunny spot. The magic happens when you keep the soil moist (not soggy) and provide consistent warmth—most seeds need temperatures between 60-75°F to germinate.
Light comes later, but the right setup at the start makes all the difference. By the time you see those first green leaves, you’ll be hooked.
Each stage—from the seed swelling to roots forming—builds on the last, and with proper care, you’ll have a healthy young plant ready for transplanting in just a few weeks. The best part? You’ll learn how to troubleshoot common issues like slow germination or leggy sprouts before they become problems.
This process works for nearly any seed—vegetables, flowers, or herbs—so you can apply these same steps to your entire garden. The key is patience and attention to basic needs: water, warmth, and light. Once you understand the stages, you’ll spot what’s going right (or wrong) at every turn.
If you’ve ever wondered how a seed becomes a plant, this is your chance to see it happen firsthand. Start with easy seeds like marigolds or beans, and soon you’ll be growing anything your heart desires. The first sprout is just the beginning—imagine what comes next!
📚 In This Guide
- What you need
- Instructions
- Tips and common mistakes
- Wrapping up and next steps
What you need
- ● Seeds: Choose fast-growing varieties like bean seeds, radish seeds, or marigold seeds (5–10 seeds per experiment).
- ● Seed-starting trays or small pots: 2–4 biodegradable or plastic trays (2–3 inches deep).
- ● Seed-starting mix: 1–2 bags of sterile, lightweight potting soil (avoid garden soil—it’s too dense!).
- ● Watering can or spray bottle: A gentle spray nozzle helps avoid disturbing seeds.
- ● Clear plastic wrap or dome: 1 sheet (to retain moisture and warmth).
- ○ Grow lights or sunny windowsill: A 12–16 inch LED grow light (optional but ideal) or a south-facing window.
- ● Labels and markers: Small tags or popsicle sticks + a pen to track seed types.
- ● Humidity dome: A clear plastic cover for trays to create a mini greenhouse effect.
- ● Heat mat: A 10x20 inch mat (70–80°F) to speed up germination.
- ● Fertilizer (seedling-specific): A diluted liquid fertilizer (like fish emulsion) for later stages.
- ● Tweezers: For delicate seed placement (great for tiny seeds like basil!).
- ● Notebook: To log growth progress, soil temps, and watering schedules.
How to watch a seed transform into a thriving plant
Here's how every seed makes its journey—simple, magical, and full of surprises.
🌱 Step 1: Start with the Right Seed and Conditions
Pick a seed that suits your climate and experience level. Fast growers like radishes or beans are perfect for beginners—they sprout in just 3-5 days. Place your seed in a small pot filled with moistened potting mix (not garden soil) and press it in about twice its width deep. For example, a bean seed goes in 1 inch deep.
Cover it lightly with more soil—just enough to hide it completely. Water gently until the soil feels damp but not soggy. You’ll know it’s ready when water runs through the bottom without pooling. Place the pot in a warm spot, ideally around 70-75°F, like on top of the fridge or near a sunny window.
💧 Step 2: Wait for the First Signs of Life
Patience is key here. Most seeds need 3-14 days to sprout, depending on the type. Watch for tiny cracks in the soil or a slight bump where the seedling is pushing through. You’ll see the first sign when a small loop—called the radicle—breaks the surface, followed by the shoot.
Keep the soil consistently moist but never waterlogged. Overwatering now can drown the delicate sprout before it even gets a chance to grow. If the soil feels dry to the touch, add a little water—just enough to keep it damp. This is the most critical stage, so avoid moving the pot or disturbing the soil.
☀️ Step 3: Encourage the First True Leaves
Once the seedling has its first set of leaves (called cotyledons), it’s time to give it more light. Move it to a spot with bright, indirect light for at least 6 hours a day. If you’re using a grow light, keep it 4-6 inches above the plant and on for 12-16 hours daily.
You’ll notice the leaves start to open wider and turn a deeper green. This is your plant’s way of saying, “I’m ready for more!” If the leaves look pale or stretched out, it’s getting too little light. Adjust the position or add a stronger light source. Avoid direct sunlight at this stage—it can scorch tender new growth.
🌿 Step 4: Strengthen the Stem and Roots
After the first true leaves appear (the second set, not the cotyledons), it’s time to focus on root and stem development. Gently firm the soil around the base of the plant to encourage roots to spread outward. If you’re using a small pot, roots may start circling, so consider repotting into a slightly larger container if needed.
Water when the top inch of soil feels dry. You’ll see the stem thicken and the leaves grow stronger. This is when your plant starts to look like the mature version you imagined. If the stem feels weak or bends easily, it’s not getting enough light or nutrients. Add a balanced fertilizer at half strength to give it a gentle boost.
✂️ Step 5: Support Growth with Pruning and Training
Once your plant has 3-4 sets of true leaves, it’s time to start guiding its growth. Pinch off the tips of leggy stems to encourage bushier growth. For plants like tomatoes or cucumbers, use small stakes or trellises to support them early—this prevents strain later. You’ll see new side shoots form within 7-10 days.
If your plant is growing too fast or leaning, it’s likely reaching for light. Rotate the pot a quarter turn daily so it grows straight and even. Watch for signs of overcrowding—if leaves start rubbing together, it’s time to thin out weaker stems. This ensures the strongest plant gets all the resources it needs.
🪴 Step 6: Transition to Outdoor Conditions
When your plant has 5-6 true leaves and the weather is consistently warm (above 50°F at night), it’s ready for the great outdoors. Start by placing it outside in a shaded spot for 1-2 hours the first day. Gradually increase the time over 7-10 days until it’s getting full sun.
You’ll notice the leaves darken and the plant stands taller. This is your plant adjusting to wind, sunlight, and temperature changes. If you see wilting or yellowing leaves, it’s getting too much sun too soon. Bring it back inside for a few hours and try again the next day. Hardening off is the last step before your plant is fully independent.
🌞 Step 7: Maintain and Enjoy Your Thriving Plant
Now that your plant is outdoors, focus on consistent care. Water deeply 1-2 times a week, depending on the weather, making sure the soil stays moist but not waterlogged. Mulch around the base to retain moisture and keep roots cool. You’ll see new leaves, flowers, or even fruit forming—this is the payoff!
Keep an eye out for pests or diseases. Early intervention is key—remove affected leaves immediately and treat with neem oil or insecticidal soap if needed. With proper care, your plant will thrive, grow strong, and reward you with everything from beautiful blooms to delicious harvests. This is where the real magic happens!
Tips & tricks for perfect seed germination
These simple insights will help you turn every seed into a thriving plant with confidence.
The Warmth Factor: That ideal 70-75°F range in Step 1 is crucial for breaking seed dormancy. I keep my seedling pots on top of the fridge during cooler months—it maintains consistent warmth without overheating. If your home runs cold, consider using a seedling heat mat for just 1-2 weeks until sprouts appear. The faster the seed warms up, the quicker it'll send down that first root.
Lighting Strategy: In Step 3, when you're moving to bright, indirect light, I've found that east-facing windows provide perfect morning sun without the harsh afternoon rays. For indoor grow lights, LED bulbs with a 6500K color temperature mimic natural sunlight best. If your seedlings stretch toward the light (called "legginess"), it's time to move them closer or increase light intensity—just don't let them touch the bulb.
Soil Science: The instructions mention moistened potting mix, but here's what nobody tells you: tap the pot gently after watering. If water drips out the bottom immediately, it's too wet. You want moisture that feels like a wrung-out sponge—not a swamp. For Step 2, I use a spray bottle to mist the soil rather than pouring water directly, which helps prevent disturbing the delicate sprouts while keeping them consistently damp.
Hardening Off Hack: During the 7-10 day outdoor transition in Step 6, I place my seedlings on a protected patio during the day but bring them back inside at night. This mimics natural temperature fluctuations without shocking them. If you notice wilting during this process, it's normal—the plant is adjusting. Just give it a few hours to recover before the next outdoor session.
Pro Tips for Seed Grows Into A Plant
- These simple insights will help you turn every seed into a thriving plant with confidence.
- The Warmth Factor: That ideal 70-75°F range in Step 1 is crucial for breaking seed dormancy. I keep my seedling pots ...
- Lighting Strategy: In Step 3, when you're moving to bright, indirect light, I've found that east-facing windows provi...
Frequently asked questions
Got questions about watching a seed transform into a plant? You’re not alone! Here are answers to the most common curiosities—whether you’re a first-time gardener or just eager to troubleshoot.
How long does it take for a seed to grow into a plant?
The timeline varies by plant type, but most seeds sprout within 5–14 days under ideal conditions (warmth, moisture, and light). Fast growers like radishes sprout in 3–5 days, while slower ones (e.g., beans or tomatoes) may take 7–21 days. Check your seed packet for specifics!
Why isn’t my seed sprouting? What should I do?
Don’t panic! Common culprits include too little water (keep soil moist but not soggy), low temperatures (most seeds need warmth, ideally 65–75°F), or old seeds (test viability by soaking in water—if they float, they’re likely dead). Try replanting or adjusting conditions.
Can I grow a plant from any seed, or are some better for beginners?
Not all seeds are created equal! Easy wins for beginners include fast-growing, forgiving varieties like:
- Green beans
- Zucchini
- Marigolds
- Lettuce
How much water does a seedling need?
Seedlings are delicate—overwatering can drown them, while underwatering stunts growth. Aim for consistent moisture: water gently when the top inch of soil feels dry. Use a spray bottle or watering can with a fine nozzle to avoid disturbing tender roots. Pro tip: A humidity dome or plastic wrap can help retain moisture in early stages!
What’s the fastest way to speed up seed germination?
Boost your seed’s confidence with these tricks:
- Soak seeds overnight (especially large ones like peas or beans) to kickstart hydration.
- Use a heat mat (set to 70–80°F) to mimic spring warmth.
- Plant in well-draining, sterile soil (mix in perlite or coconut coir).
- Try scarification (lightly sanding hard seed coats) for tough seeds like tomatoes.
Can I use kitchen scraps (like avocado pits) to grow plants?
Many food scraps regrow into plants—just follow the right method:
- Avocado pit: Insert 3 toothpicks, suspend over water, and wait for roots to sprout (4–6 weeks).
- Green onions: Place the base in water; new shoots appear in 1–2 weeks.
- Potatoes: Sprout “eyes” in sunlight, then plant the whole tuber.
Wrapping up and next steps
Watching a tiny seed transform into a thriving plant is one of nature’s most rewarding processes—and now, you’re ready to nurture that magic! 🌱 From selecting the right soil to patiently waiting for those first sprouts, every stage builds confidence in your green thumb. You’ve got this!
The next step? Start small—pick a seed, a pot, and a sunny spot, then let the growing begin. Whether you’re growing herbs, flowers, or veggies, each plant you cultivate is a step toward a greener, more vibrant world. Happy planting! 🌟