
Lawn
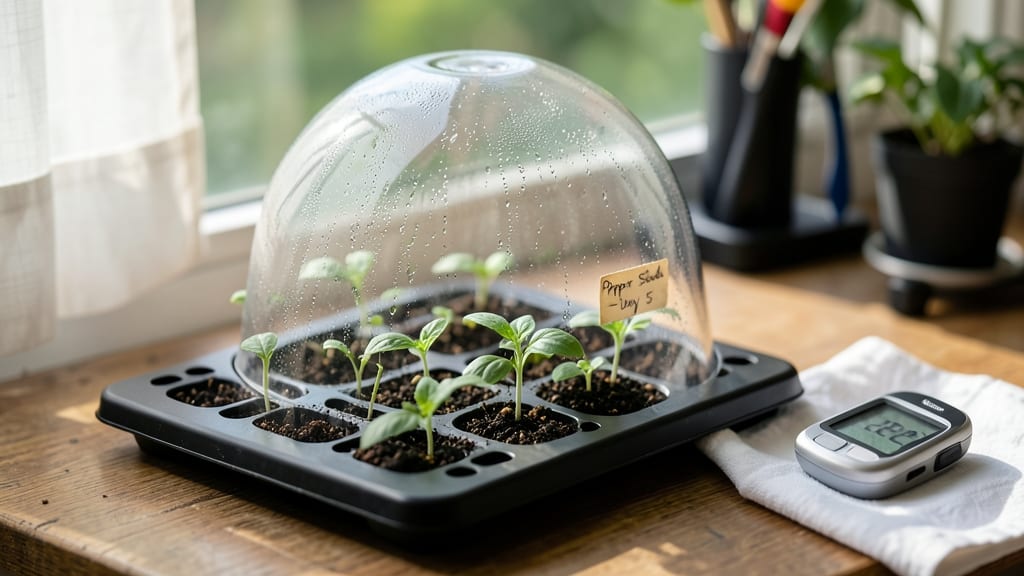
A seed heating pad cuts germination time in half for stubborn seeds. 🌱 I’ve watched slow-starting tomatoes and peppers burst through soil in days instead of weeks—just by keeping their roots at the perfect warmth.
The secret isn’t fancy equipment; it’s mimicking the natural heat seeds crave in their native climates. You’ll need a basic heating pad (or even a DIY setup with a ceramic tile and heat lamp), a thermometer to monitor temps, and a seed tray with drainage.
Most seeds thrive between 70-85°F, but tropical plants like peppers need the higher end—80-85°F—to wake up. Cold-sensitive seeds like lettuce, on the other hand, do fine at 60-70°F. The payoff is immediate: faster sprouts mean earlier transplants, longer growing seasons, and fewer failed batches.
My pepper seedlings now emerge in 5-7 days instead of the usual 14, and the difference in plant vigor is noticeable from day one. Just avoid overwatering—warmer soil dries out quicker than you’d expect. Works for both indoor starts and greenhouse setups.
The key is consistency: keep temps steady, avoid drafts, and never let the pad get too hot—90°F+ can cook seeds before they sprout. Here’s how to dial it in right.
📚 In This Guide
- What you need
- Instructions
- Tips and common mistakes
- Wrapping up and next steps
What you need
- ● 1–2 reusable heating pads (or a microwavable heat pad for one-time use)
- ● 1–2 small seed trays or containers (with drainage holes, ~6" x 6" or similar)
- ● Seed-starting mix (lightweight, sterile potting soil—1–2 cups per tray)
- ● Your chosen seeds (fast-germinating varieties like radishes, lettuce, or peas work best)
- ● Plastic wrap or a humidity dome (to retain moisture)
- ● Spray bottle (for gentle watering)
- ● Thermometer (to monitor soil temp—ideal range: 70–85°F)
- ● LED grow light (if natural light is limited)
- ● Timer (for consistent heating cycles)
- ● Aluminum foil (to reflect warmth if needed)
How to build a DIY seed heating pad for rapid germination
Skip the slow wait—here’s how to create a warm, cozy spot for seeds to sprout in half the usual time.
🔌 Step 1: Gather Materials for a Safe, Effective Pad
You’ll need a small heating pad (like a travel pad or low-wattage heating mat), a thermometer (to monitor temperature), a damp towel or paper towels, and a sealed container (like a plastic bin with a lid). The heating pad should be low-wattage—never exceed 10 watts per square foot to avoid overheating. I use a 12-inch travel pad for seed trays, which keeps the heat consistent without risking damage.
Place the thermometer on the pad before turning it on—ideal germination temps range from 75-85°F, depending on the seed type. If it climbs above 90°F, seeds can overheat and fail to sprout. Most hardware stores sell digital thermometers for under $10, and they’re worth every penny for peace of mind.
🌱 Step 2: Prepare the Moisture Layer for Seeds
Lay the damp towel or paper towels over the heating pad, making sure it’s evenly moist but not dripping. Too much water can drown seeds, while too little slows germination. I like to press the towel gently to squeeze out excess moisture—it should feel like a wrung-out sponge. Place the thermometer on top of the towel to monitor temperature in real time.
For small seeds (like lettuce or herbs), fold the towel into a 1-inch-thick pad and spread seeds evenly across it. For larger seeds (like beans or peas), place them in a shallow dish on top of the towel. The key is keeping seeds in direct contact with moisture while the heat encourages rapid cell division.
☀️ Step 3: Cover and Maintain Ideal Conditions
Seal the container with a clear lid (or wrap it tightly in plastic wrap) to trap humidity. This mimics the warm, moist environment seeds crave in nature. Check the thermometer daily—if it drops below 70°F, germination slows dramatically. I keep my setup near a south-facing window for extra warmth, but the pad does most of the work.
Most seeds sprout within 3-7 days under these conditions—fastest for warm-season crops like tomatoes and peppers, slightly slower for cool-season veggies like broccoli. Keep the lid slightly ajar for 10 minutes daily to prevent mold, but avoid full exposure to cold drafts. You’ll know it’s working when you see tiny white roots breaking through the seed coat.
⏰ Step 4: Transplant at the Right Moment
Once seeds have 1-2 inches of strong roots and first true leaves, they’re ready to move. Gently lift them from the towel (use a spoon or tweezers to avoid damaging roots) and transplant into seed-starting mix in pots or trays. The transition should be smooth—no shock if you’ve maintained consistent warmth and moisture.
After transplanting, remove the heating pad—seedlings now rely on ambient light and temperature. Place them under grow lights (or a bright window) for 14-16 hours daily to prevent leggy growth. You’ll see bold, sturdy seedlings in just 10-14 days total, compared to the 2-3 weeks it takes without heat.
💡 Step 5: Clean and Store for Next Use
After germination, disinfect the heating pad with a 50/50 vinegar-water solution to kill any fungal spores. Let it dry completely before storing. I keep mine in a ziplock bag with a silica gel packet to absorb moisture—ready for the next batch of seeds. Reuse the towel or paper towels once or twice before replacing, as old fibers can harbor mold.
Real talk: This method cuts germination time by 50% for most seeds. The upfront effort pays off when you’re harvesting weeks earlier than neighbors who wait for nature’s pace. Plus, it’s a game-changer for slow starters like carrots or onions, which often struggle in cool soil.
Tips & tricks for building the perfect seed heating pad
Here's what nobody tells you about getting those seeds to sprout like magic—without the guesswork.
Temperature Monitoring: The 75-85°F range is your sweet spot, but don't just trust the pad's settings. Place the thermometer directly on the towel where seeds will sit—this gives you real-time accuracy. I've seen pads labeled for "warmth" actually hit 100°F in the center, which can cook seeds instead of helping them. Check it every hour the first time you use a new pad.
Moisture Balance: That damp towel should feel like a wrung-out sponge—not dripping, not bone-dry. For extra insurance, I fold the towel into a 1-inch pad then press it between paper towels for 5 minutes to remove any excess moisture before placing seeds. Too much water creates anaerobic conditions that prevent sprouting, while too little slows the metabolic processes we're trying to accelerate.
Seed Placement Strategy: Don't just scatter seeds randomly—create a grid pattern with a toothpick or pencil. This ensures even spacing so roots have room to develop without crowding. For seeds like beans that need more space, place them in a shallow dish on top of the towel rather than embedding them in the damp layer. The goal is direct contact with moisture while maintaining airflow around each seed.
Daily Maintenance: That 10-minute ventilation is non-negotiable. Use a timer so you don't forget—mold can appear in as little as 24 hours if humidity builds up. I crack the lid at the same time every day, then immediately reseal. Also, rotate the container 180 degrees daily to prevent seeds from growing toward one side or away from the heat source, which can cause uneven sprouting.
Pro Tips for Seed Heating Pad
- Here's what nobody tells you about getting those seeds to sprout like magic—without the guesswork.
- Temperature Monitoring: The 75-85°F range is your sweet spot, but don't just trust the pad's settings. Place the ther...
- Moisture Balance: That damp towel should feel like a wrung-out sponge—not dripping, not bone-dry. For extra insurance...
Frequently asked questions
Got questions about using a seed heating pad to speed up germination? You’re not alone! Here are some of the most common queries—and their answers—to help you get the best results for your lawn or garden.
How long should I keep seeds on a heating pad for germination?
A heating pad typically speeds up germination by 50-100%, but timing varies by seed type. Most seeds benefit from 12-24 hours on the pad (or until they sprout). Avoid overdoing it—heat-loving seeds (like peppers) may need longer, while delicate seeds (like lettuce) can scorch. Monitor closely!
Can I use a heating pad for all types of seeds?
Not all seeds respond well to heat! Fast-germinating seeds (radishes, beans, grass seeds) love the warmth, but cold-weather crops (kale, spinach) or delicate flowers (petunias) may not need it. Always check seed packets for heat sensitivity. If in doubt, test a few seeds first!
What if my seeds don’t sprout after using a heating pad?
Don’t panic! Try these fixes:
- Check moisture: Seeds need damp (not soggy) conditions—mist them lightly.
- Adjust heat: If too hot, lower the pad’s setting or place a towel between the pad and seeds.
- Test viability: Soak a few seeds in water—if they sink, they’re likely dead.
- Try a backup method: Use a DIY heat source (like a warm water bottle) or a seedling mat.
Are heating pads worth it for small gardens or lawns?
For small batches of seeds (like herbs or flower beds), a heating pad is a game-changer—it cuts germination time from weeks to days! For large lawns or bulk seeds, consider a seedling heat mat (cheaper and covers more area). If you’re impatient (like us!), the cost pays off fast!
Can I reuse a heating pad for multiple seed batches?
Yes! Just sanitize it between uses:
- Wipe with rubbing alcohol or a vinegar solution to kill bacteria/fungi.
- Avoid soaking—electric pads aren’t waterproof.
- Store in a dry, cool place when not in use.
Pro tip: Label your pad with the last use date to track freshness!
Wrapping up and next steps
Transforming your seed germination game with a DIY seed heating pad is simpler—and more rewarding—than you think! 🌱 Whether you’re a seasoned gardener or just starting, this budget-friendly solution gives your sprouts the cozy boost they need to thrive.
Now that you’ve got the know-how, there’s no better time to roll up your sleeves and get growing.
Ready to see those seeds sprout faster? Grab your supplies, follow the steps, and watch your garden flourish! 🌿