
Flowers
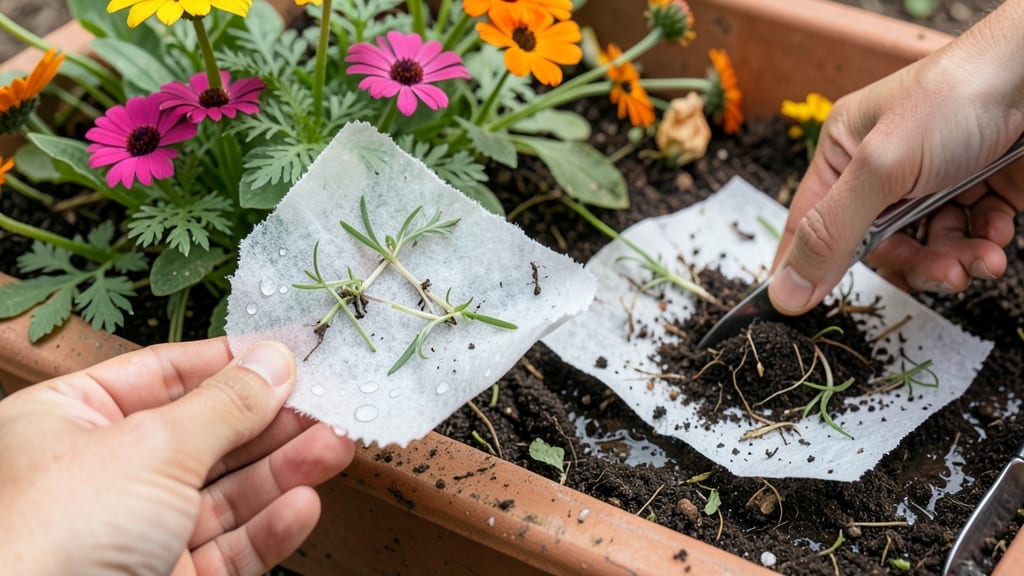
Your flowers can bloom, brighten a moment, and then disappear without a trace—just like magic. 🌸 Seed paper flowers are more than just paper; they're a seed-embedded canvas that turns into living plants when you plant them.
I've made everything from wedding confetti to wildflower bouquets this way, and the best part? They break down completely, leaving nothing but happy memories and new growth behind.
The secret to success lies in keeping them moist until germination—usually within 7-14 days—and giving them bright, indirect light. Too much sun dries them out before sprouts appear, while too little slows everything down.
I've even planted mine in water to watch roots grow firsthand before transferring to soil. The paper dissolves naturally, so no digging required.
Imagine scattering them at a party, using them as biodegradable place cards, or planting them in a garden where they'll self-seed for years. The flowers themselves might fade, but the seeds keep giving.
You'll end up with delicate blooms like cosmos or sunflowers that grow right from the paper you held in your hands.
Works for both indoor and outdoor projects, and the paper lasts months if stored dry. Here's how to make them last—and bloom—exactly as you envision.
📚 In This Guide
- What you need
- Instructions
- Tips and common mistakes
- Wrapping up and next steps
What you need
- ● Seed paper: Pre-made seed paper (or DIY blend of wildflower seeds and paper pulp—about 1 sheet per flower). Look for biodegradable options like blank">EcoFlora or blank">Wildflower Seed Paper.
- ● Water: Distilled or boiled (cooled) water to prevent mold—about 1-2 tbsp per sheet.
- ○ Glue (optional for DIY): Non-toxic, water-soluble glue like blank">Mod Podge or blank">white craft glue (if mixing your own seed paper).
- ● Flower-shaped template: Printed or hand-drawn stencils (or use cookie cutters for simple shapes!).
- ● Rolling pin or smooth surface: For flattening the paper evenly.
- ● Drying rack or parchment paper: To let flowers dry without sticking.
- ● Natural dyes: Turmeric, beet juice, or coffee for colored seed paper.
- ● Glitter or biodegradable confetti: For a festive touch (sparingly!).
- ● Twine or ribbon: To attach stems for hanging displays.
- ● Spray bottle: For misting dried flowers before planting.
Step-by-step instructions for making seed paper flowers
Here's how to craft beautiful, eco-friendly blooms that grow and dissolve naturally—no mess, no guilt.
🌱 Step 1: Prepare Your Seed Mixture
Start by combining 1 cup of wildflower seeds (choose a mix with varying bloom times for continuous color) with 2 cups of water in a bowl. Let it soak for 10 minutes—this helps the seeds cling together later. In a separate bowl, mix 1 cup of unbleached paper pulp (or shredded office paper) with 1 cup of water until it forms a smooth, thick slurry.
Pour the soaked seeds into the paper pulp mixture and stir gently. You want the seeds evenly distributed but not clumped—think of it like a seed-pulp smoothie. The goal is a thick, paint-like consistency that will hold its shape when spread thin. If it's too runny, add a little more pulp; if too stiff, a splash of water helps. This is your flower "paint."
💧 Step 2: Shape the Petals
Lay out 4-6 sheets of parchment paper (or silicone baking mats) on a flat surface. Using a plastic knife or wooden stick, spread a thin, even layer of the seed mixture onto each sheet—about 1/16 inch thick. For petal shapes, gently drag the knife outward from the center in semi-circular strokes to create flower-like patterns. Work quickly; the mixture dries fast.
Let the petals dry completely—this takes 2-3 hours in a warm, dry place. You'll know they're ready when they feel stiff to the touch and no longer stick to your fingers. For extra durability, lightly brush them with diluted cornstarch solution (1 part starch to 2 parts water) once dry. This adds a subtle sheen and helps them hold their shape.
☀️ Step 3: Assemble the Flowers
Once dry, carefully peel the petals off the parchment. Arrange 4-5 petals in a circular pattern around a small wooden or cardboard center (like a flower core). Use a dab of flour paste (equal parts flour and water) as glue to secure the petals in place. Press gently to hold, then let the paste dry for 30 minutes. This creates a sturdy base that mimics a real bloom.
For a more natural look, crumple small pieces of green seed paper (made separately with grass or clover seeds) to form leaves or stems. Attach these with the same flour paste. The key here is patience—rush the glue, and the petals may shift as they dry. Let them set fully before handling.
🪴 Step 4: Plant and Water
To bloom your flowers, simply plant them directly in soil (or a biodegradable pot) with the petals facing upward. Press lightly to ensure contact with the earth. Water gently but thoroughly—soak the soil until water runs out the drainage holes—then let it drain completely. Place in a spot with at least 4-6 hours of sunlight daily for best germination.
Keep the soil evenly moist (not soggy) for the first 7-10 days. You'll see tiny green shoots peeking through the petals in about 5-7 days, signaling success. Once the flowers sprout, they’ll slowly dissolve as the plants grow, leaving behind vibrant blooms that fade naturally into the earth. No cleanup needed—just magic.
⏰ Step 5: Maintain and Enjoy
After planting, water every 2-3 days until the petals fully decompose (usually 3-4 weeks). The plants will need regular care like any garden flowers—fertilize lightly with compost tea once they sprout to encourage strong growth. Watch as the petals crumble away, revealing lush greenery that eventually bursts into color.
Here’s the fun part: These flowers make perfect gifts. Tie a ribbon around the stem before planting, and your recipient can enjoy watching the blooms emerge. Or scatter them in a garden bed for a surprise pop of color next spring. Just remember—no two will bloom identically, and that’s the charm.
Tips & tricks for perfect seed paper flowers
Real talk: These delicate blooms require patience and precision—but the magic happens when you nail the little details. Here's what nobody tells you about crafting seed paper flowers that actually bloom.
Seed Mixture Consistency: The 10-minute soak for your wildflower seeds is non-negotiable—it's what makes them cling properly when mixed with the pulp. I've ruined three batches by skipping this step, so trust me on this. For that perfect paint-like consistency, aim for something that holds its shape when you lift your knife but still spreads smoothly. If it's too stiff, a splash of water works wonders, but don't overdo it—too much water weakens the structure.
Drying Time Matters: Those 2-3 hours of drying time are crucial for sturdy petals. I learned this the hard way after trying to peel petals too soon and ending up with crumbly messes. Place your parchment sheets in a warm, dry spot away from direct sunlight—too much heat can cause cracking. Once dry, test by gently pressing a petal: if it doesn't bend easily, it's ready for assembly.
Assembly Secret: The 30-minute drying time for your flour paste is your friend—don't rush it! I used to press too hard and end up with crooked flowers. Instead, place just a tiny dab of paste at the base of each petal, then gently press with your finger. The paste should dry clear, not leave visible marks. For extra stability, I like to add a second layer of paste after 15 minutes, but only if the first layer feels too wet.
Sunlight Strategy: Those 4-6 hours of daily sunlight are non-negotiable for germination. If you're in a shady spot, consider supplementing with a grow light for 2-3 hours in the evening. I've seen flowers planted in partial shade take twice as long to sprout—if they sprout at all. For best results, place your flowers in the sunniest spot you have, even if it's just a windowsill.
Pro Tips for Seed Paper Flowers
- Real talk: These delicate blooms require patience and precision—but the magic happens when you nail the little detail...
- Seed Mixture Consistency: The 10-minute soak for your wildflower seeds is non-negotiable—it's what makes them cling p...
- Drying Time Matters: Those 2-3 hours of drying time are crucial for sturdy petals. I learned this the hard way after ...
Frequently asked questions
Got questions about seed paper flowers? You’re not alone! Here are some of the most common queries—and their answers—to help you craft, care for, and enjoy these eco-friendly blooms with ease.
How long does it take for seed paper flowers to grow?
Seed paper flowers typically take 4 to 6 weeks to germinate and bloom, depending on sunlight, water, and soil conditions. Plant them in well-draining soil, keep the area moist (but not soggy), and watch for tiny sprouts within 2–3 weeks. Patience pays off—these delicate blooms are worth the wait!
Do I need special soil or fertilizer for seed paper flowers?
Nope! Use regular potting soil or even repurposed garden soil. Seed paper flowers thrive in moderate sunlight (4–6 hours daily) and don’t require fertilizer. Over-fertilizing can harm them—think of it as a low-maintenance, natural gift to the earth.
What if my seed paper flowers don’t sprout?
Don’t worry—seed viability varies. Try these fixes:
- Check moisture: Keep the soil damp (like a wrung-out sponge).
- Test sunlight: Move to a sunnier spot if indoors.
- Patience: Some seeds need weeks to break dormancy.
- Replant: If no sprouts after 6 weeks, try a fresh sheet.
Can I reuse or recycle seed paper if it doesn’t grow?
If the seeds fail to sprout, toss the paper in compost or use it as mulch—it’ll break down naturally. You can also replant the seeds in a new spot (just press them lightly into soil). Think of it as a zero-waste win!
Are seed paper flowers safe for kids or pets?
Yes! Seed paper is non-toxic and pet-friendly, but supervise young kids to prevent accidental ingestion (though it’s harmless). Avoid wildflower mixes containing foxglove, oleander, or lily of the valley—stick to labeled, pet-safe varieties. Happy planting!
What’s the best way to preserve seed paper flowers before planting?
Store them in a cool, dry place (like a sealed envelope or airtight container) away from direct sunlight. Avoid humidity—moisture can trigger premature sprouting. Most seed paper stays viable for 6–12 months if stored properly. Treat them like delicate origami until planting day!
Wrapping up and next steps
Seed paper flowers aren’t just a creative craft—they’re a sustainable way to bring beauty and life to your space while giving back to the planet. Whether you’re gifting them, decorating your home, or simply enjoying the process, these biodegradable blooms prove that small actions can make a big difference. 🌱
Ready to turn your passion into action? Start small—try making a few seed paper flowers this weekend and watch your green thumb grow! Share your creations with friends or even host a DIY workshop to inspire others to join the eco-friendly movement.