
Lawn
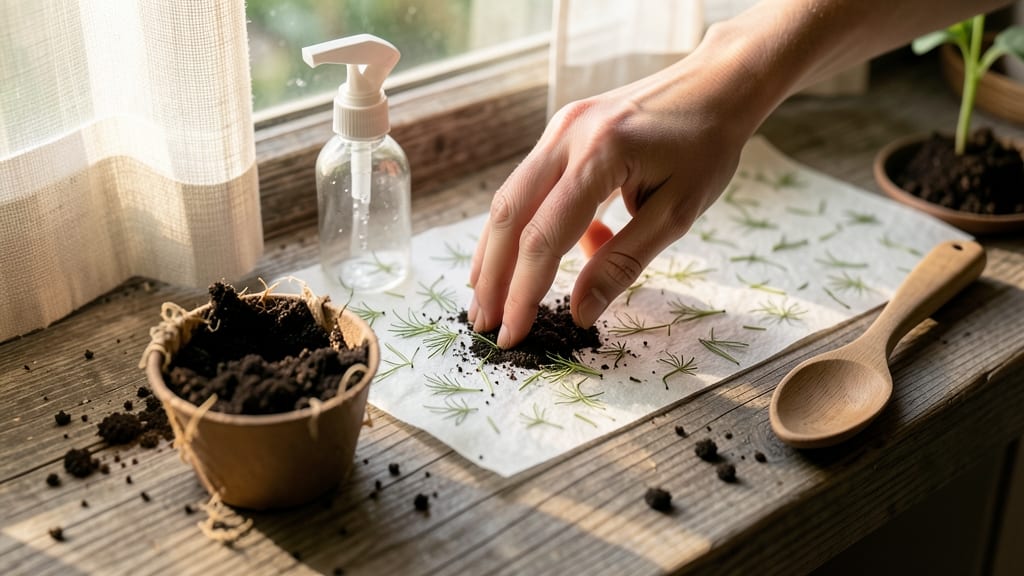
Seed paper planting instructions turn your mail into vibrant blooms with zero waste. 🌱 I've been using it for years—it's like receiving a gift that grows, and the process is simpler than you'd expect. Just sprinkle, press, and wait for tiny sprouts to appear in just 7-14 days. The beauty of seed paper lies in its versatility: plant it directly in soil or use it for creative projects like wreaths or confetti. You'll need a sunny spot, well-draining soil, and a light misting can—no fancy tools required. Most seed papers include wildflowers, herbs, or vegetables, so you can customize your garden's look and function. Once planted, keep the soil consistently moist (not soggy) and watch as delicate green shoots push through the paper. Within 4-6 weeks, you'll have lush foliage and blooms that attract pollinators. The paper decomposes naturally, leaving no trace behind. Perfect for beginners, eco-conscious gardeners, or anyone who loves a good DIY project. Here's how to make it work every time!
📚 In This Guide
- What you need
- Instructions
- Tips and common mistakes
- Wrapping up and next steps
What you need
- ○ Seed paper – Pre-made (check for wildflower, herb, or vegetable varieties) or DIY (see optional section below). Quantity: 1–5 sheets (depending on your project).
- ● Water – Room-temperature or slightly warm (avoid cold water). Quantity: 1–2 cups per sheet.
- ● Shallow container or tray – A baking dish, plastic tub, or even a repurposed takeout container (8"x12" or larger). Tip: Ensure it has drainage holes or use a mesh screen to prevent soggy paper!
- ○ Spray bottle – For gentle misting (optional but helpful for even moisture).
- ● Planting location – A sunny spot with well-draining soil (or a pot with potting mix). Sunlight needs: 6+ hours/day for most flowers/herbs.
- ● Potting soil or compost – For transplanting or growing directly in soil. Type: Lightweight, seed-starting mix.
- ● Plastic wrap or humidity dome – To retain moisture while seeds germinate (remove once sprouts appear!).
- ● DIY seed paper supplies (if making your own): Unbleached paper (printer paper or cardstock).
- ● Wildflower/vegetable seeds (e.g., marigolds, basil, or clover). Quantity: 1 tsp seeds per sheet.
- ● Water + cornstarch or flour (as a binder). Ratio: 1 cup water + 1 tbsp cornstarch.
- ● Fertilizer – A light dose of organic fertilizer (like fish emulsion) once plants are established.
Step-by-step instructions for growing seed paper blooms
Here's how to transform those delicate seed papers into vibrant, zero-waste plants that thrive with minimal fuss.
🌱 Step 1: Prepare the Seed Paper for Planting
First, gently tear the seed paper into individual squares—each should contain about 4-6 seeds—using clean fingers or small scissors. Handle them carefully; the paper is fragile when damp. Fill a shallow tray or pie plate with room-temperature water about ¼ inch deep and place the seed paper squares flat on the surface. Let them soak for 15-20 minutes until fully saturated but not disintegrating.
While soaking, check the paper occasionally—it should soften enough to bend slightly without breaking. If you notice any squares floating, press them gently with a clean finger to ensure full contact with water. This step is critical: uneven soaking can lead to patchy germination or seeds sticking together.
💧 Step 2: Plant in Moistened Soil or Growing Medium
Prepare a shallow tray or small pots filled with well-draining potting mix—avoid garden soil, which can compact and suffocate delicate seedlings. Moisten the soil until it feels evenly damp (like a wrung-out sponge). Press the soaked seed paper squares gently into the surface, spacing them about 1 inch apart. The paper will break down naturally over time, releasing seeds into the soil.
Lightly cover the planted squares with a thin layer (¼ inch) of additional soil—just enough to obscure the paper but not bury the seeds too deeply. Mist the surface with water until the soil looks uniformly damp. Place the tray in a warm, bright location (around 70-75°F), but avoid direct sunlight for the first 3-5 days—this prevents the paper from drying out too quickly.
☀️ Step 3: Maintain Consistent Moisture and Light
Keep the soil consistently moist (not soggy) by misting daily or covering the tray with a clear plastic dome to retain humidity. You’ll see the first tiny green sprouts emerge in 7-14 days, depending on the plant variety. Once seedlings appear, remove the dome immediately to prevent fungal growth—damping-off (a mold that collapses stems) is the biggest threat at this stage.
Move the tray to a sunny windowsill or under grow lights for 12-14 hours daily. Seed paper plants often include wildflowers or herbs, so check the packet for specific light needs—most need bright, indirect light to avoid leggy growth. Rotate the tray quarter-turn daily so seedlings grow straight toward the light.
✂️ Step 4: Transplant and Care for Mature Plants
When seedlings develop 2-3 sets of true leaves (about 4-6 weeks), they’re ready to transplant. Gently lift each seedling with a small spoon or your fingers, being careful not to tear the fragile roots. Plant them in their final location—whether a garden bed, container, or hanging basket—spacing them 6-12 inches apart depending on the mature size.
Water deeply after transplanting to settle the soil around roots. Seed paper plants often include self-seeding annuals (like cosmos or sunflowers), so deadhead spent blooms to encourage continuous flowering. Fertilize lightly with a balanced organic fertilizer every 4-6 weeks—these plants thrive on minimal care but appreciate a boost during peak growth.
🌿 Step 5: Enjoy and Extend the Bloom Cycle
Once established, these plants require minimal maintenance. Water 1-2 times weekly, depending on rainfall and heat—let the top inch of soil dry between waterings to prevent root rot. If growing in containers, ensure pots have drainage holes and use a well-draining mix to mimic their natural habitat.
To prolong blooms, prune back spent flowers regularly. Many seed paper mixes include pollinator-friendly varieties, so you’ll attract bees and butterflies effortlessly. At season’s end, allow some plants to self-seed for next year’s zero-waste garden—or compost the remaining paper for a nutrient boost.
Tips & tricks for perfect seed paper blooms
These simple yet game-changing tricks will help you coax the most vibrant, healthy blooms from your seed paper—without the guesswork.
Soaking Secret: The 15-20 minute soak is your foundation, but here's what nobody tells you—use room-temperature water (not cold tap) to prevent shocking the seeds. I like to add a few drops of unflavored liquid seaweed extract (optional) to the water for a gentle growth boost. This step ensures even saturation without over-soaking, which can cause the paper to disintegrate before planting.
Light Management: During those first critical 3-5 days when you're avoiding direct sunlight, position your tray near a north-facing window or under fluorescent lights. The goal is bright, indirect light—think of it as a seedling spa day. If your space is dim, a simple LED grow light on a timer for 12-14 hours daily works wonders for preventing leggy seedlings that flop over when they finally get sunlight.
Transplant Timing: Wait for those 2-3 sets of true leaves before transplanting—don't rush it! I've learned this the hard way: seedlings with only one set of leaves are still vulnerable to shock. When you do transplant, handle the fragile roots like you're cradling a newborn—gently tease apart any tangled roots with your fingers rather than pulling. The paper will break down naturally, but giving roots room to spread prevents future crowding issues.
Humidity Hack: That clear plastic dome mentioned in Step 3 is your secret weapon against damping-off, but here's the pro move: prop the dome up slightly with toothpicks or a small stick to allow airflow. This prevents condensation from sitting on the leaves, which creates the perfect environment for that dreaded fungal mold. Once sprouts appear, remove the dome completely—no exceptions—to prevent future problems.
Pro Tips for Seed Paper Planting Instructions
- These simple yet game-changing tricks will help you coax the most vibrant, healthy blooms from your seed paper—without the guesswork.
- Soaking Secret: The 15-20 minute soak is your foundation, but here's what nobody tells you—use room-temperature water (not cold tap) to prevent shocking the seeds.
- Light Management: During those first critical 3-5 days when you're avoiding direct sunlight, position your tray near a north-facing window or under fluorescent lights.
Frequently asked questions
Got questions about growing plants from seed paper? You’re not alone—this eco-friendly method is full of possibilities! Here are some of the most common queries to help you get started with confidence.
How long does it take for seeds in paper to sprout?
Most seed paper sprouts within 7 to 21 days, depending on the seed type, moisture, and warmth. Check the paper daily for tiny green shoots—keep it damp (not soggy) to speed up germination. Patience is key!
Do I need to soak the seed paper before planting?
No soaking required! Simply place the paper directly on moist soil (or water it lightly) and press gently. The paper will break down naturally as it absorbs moisture. Overwatering can cause mold, so aim for consistent dampness, not saturation.
Can I plant seed paper in containers or just outdoors?
Seed paper works in both gardens and containers. For pots, use well-draining soil and ensure the container has drainage holes. Outdoors, choose a spot with 6+ hours of sunlight (check your seed packet for specific needs). Just avoid windy areas until sprouts are sturdy.
What if my seed paper freezes or gets too cold?
Cold weather can slow germination. If temps drop below 40°F (4°C), move the paper to a warmer, sheltered spot (like a greenhouse or sunny windowsill). Once sprouts emerge, they’ll tolerate cooler conditions better. Never freeze dry seed paper—it kills viability.
What happens to the paper after planting?
The paper biodegrades naturally as roots grow, leaving no waste! It acts like a temporary mulch, retaining moisture and nutrients. If you notice it disintegrating too fast, cover it lightly with soil or mulch to protect young seedlings.
Wrapping up and next steps
Seed paper is more than just a creative way to grow plants—it’s a simple, eco-friendly step toward greener living. Whether you’re a gardening newbie or a seasoned green thumb, these zero-waste blooms bring joy with minimal effort.
Now that you know how to plant and care for your seed paper, why not turn your space into a flourishing garden? Start small—plant a few sheets today and watch your green thumb grow! 🌱
- Next step: Share your blooms with friends or expand your garden by trying new seed paper varieties!