
Lawn
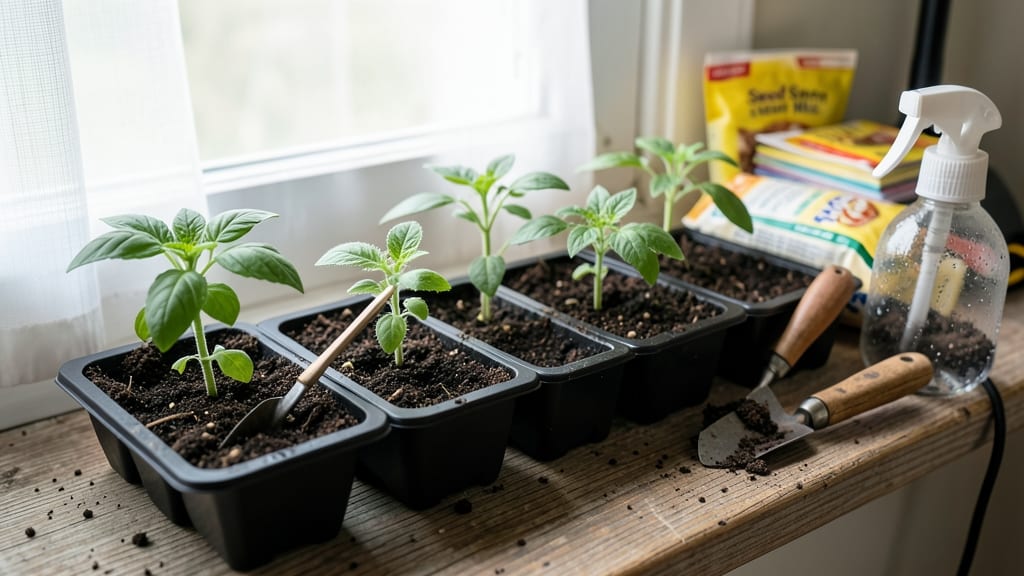
My seed starter potting soil mix is the difference between weak, leggy seedlings and sturdy, fast-growing plants ready for transplanting. ✨ Unlike regular garden soil, this lightweight blend stays loose, drains perfectly, and holds just enough moisture to keep seeds happy without drowning them.
The secret lies in its airy texture—think fluffy clouds for roots rather than dense, compacted dirt. You’ll need a sterile mix (no weeds or pathogens), 50% peat or coco coir for moisture retention, 40% perlite or vermiculite for drainage, and 10% compost or worm castings for nutrients.
I swear by a simple DIY recipe: combine these ingredients in a clean bucket, fluff thoroughly, and store in an airtight container until use. The goal is a medium that crumbles easily between your fingers—neither sticky nor rock-hard.
Once mixed, fill seed-starting trays or small pots, plant your seeds at the right depth, and keep the soil consistently moist (not soggy). Within 7-10 days, you’ll see those first true leaves—fast and strong—because the roots aren’t struggling to breathe.
The key is avoiding overwatering; seedlings rot faster than they grow when soil stays too wet. When transitioning outdoors, harden off seedlings gradually over 7-10 days by moving them to brighter light and cooler temps. My biggest mistake? Skipping this step and shocking tender seedlings with full sun.
Now, I prioritize patience—it’s the only way to ensure they thrive after transplanting.
📚 In This Guide
- What you need
- Instructions
- Tips and common mistakes
- Wrapping up and next steps
What you need
- ● Seed starter potting soil – 50% of the mix (look for a lightweight, sterile blend labeled "seed starting" or "potting mix"). Quantity: 4 cups (for a 1-quart batch).
- ● Perlite or vermiculite – 25% of the mix (for aeration and moisture retention). Quantity: 2 cups. Tip: Perlite adds more air space, while vermiculite holds moisture better—choose based on your climate!
- ● Coco coir or peat moss – 25% of the mix (for structure and water retention). Quantity: 2 cups. Note: Coco coir is a sustainable, peat-free alternative!
- ● Gloves – To protect your hands from soil and sharp perlite.
- ● Large mixing bowl or clean bucket – For blending ingredients evenly.
- ● Small hand trowel or spoon – For stirring and layering.
- ● Spray bottle with water – To lightly moisturize the mix before use.
- ○ Seed starter trays or small pots – Optional but recommended for organized planting. Size: 2–4 inches deep.
- ● Worm castings or compost – 5–10% of the mix (boosts nutrients for seedlings). Quantity: ½–1 cup.
- ● Mycorrhizal fungi – Enhances root growth (follow package instructions).
- ● Slow-release fertilizer – 1 tsp per quart (for extra nourishment).
- ● Calcium carbonate (limestone) – Balances pH if your soil is acidic.
How to create an air-porous seed starter mix for vigorous seedlings
This is the secret to faster germination and stronger roots—skip the store-bought blends and make your own.
🌱 Step 1: Combine Base Materials for Optimal Drainage
Start with 50% peat moss or coconut coir—this holds moisture while allowing airflow. I measure by volume, not weight, because compression changes density. Add 25% perlite (the white, pebble-like material) for aeration that prevents soil compaction. Perlite creates tiny air pockets that seedling roots desperately need to breathe.
Next, incorporate 20% vermiculite—this holds moisture better than perlite but still stays loose. The combination of perlite and vermiculite gives you the perfect balance: perlite for drainage, vermiculite for moisture retention. Mix these three components thoroughly in a large bin until you see an even distribution of all three materials.
🌱 Step 2: Add Nutrients and Microbial Support
Stir in 5% worm castings—this adds natural nutrients and beneficial microbes that boost seedling immunity. I sift the castings first to remove any large chunks, because uneven texture can create air pockets that trap too much moisture. Add 1 tablespoon of balanced organic fertilizer (like 5-5-5) per 4 gallons of mix—this gives seedlings a gentle nutrient boost without burning tender roots.
For extra insurance, sprinkle in 1/4 teaspoon of mycorrhizal fungi per gallon of mix. These microscopic fungi form symbiotic relationships with roots, helping seedlings absorb water and nutrients more efficiently. Mix everything gently with a clean garden trowel to distribute the mycorrhizal fungi evenly without breaking up the airy structure.
💧 Step 3: Moisten Without Compacting the Mix
Gradually add warm water while mixing—you want the texture of a damp sponge, not wet sand. Too much water destroys the air pockets, while too little leaves seeds struggling to germinate. I use a spray bottle for the final adjustment, misting until the mix holds together when squeezed but doesn't form a tight clump.
Let the mix sit for 10-15 minutes before using. This allows any excess moisture to redistribute evenly. Press your hand into the mix—if water beads up on the surface, it's too wet. If it crumbles when you poke it, add a little more water and remix. The perfect mix should feel light yet moist, like a cloud that holds its shape.
✂️ Step 4: Sterilize and Store for Future Use
To prevent damping-off disease, microwave 1 cup portions of your mix for 2 minutes (stir halfway through). This kills pathogens without destroying the beneficial microbes you just added. For larger batches, bake at 200°F for 30 minutes—just don't let it dry out completely during the process.
Store your mix in airtight containers with a moisture-retaining liner (like a damp paper towel) to maintain the ideal consistency. Label with the date—this mix stays fresh for up to 6 months if stored properly. When you're ready to use it, fluff it gently with your hands to restore those crucial air pockets before filling seed trays.
Tips & tricks for perfect seed starter soil
Between us, these small tweaks make all the difference when crafting your ideal seed starter mix—especially if you want those seedlings to pop up fast and strong.
Mixing Technique: When combining your 50% peat moss or coconut coir with 25% perlite and 20% vermiculite in Step 1, use a clean garden trowel to gently fold rather than stir vigorously. This preserves those critical air pockets while ensuring even distribution. I learned this the hard way after ruining three batches by compacting the mix during mixing—trust me, those roots need that aeration! The goal is a fluffy texture that looks like it could float.
Nutrient Distribution: In Step 2, don't just sprinkle your worm castings and mycorrhizal fungi on top—work them into the mix in thin layers as you combine. This prevents clumping and ensures every seedling gets access to those beneficial microbes. For the mycorrhizal fungi specifically, use a fine-mesh strainer to break up any clumps before adding, as even distribution is key to their effectiveness.
Moisture Testing: That 10-15 minute resting period in Step 3 is your chance to get the moisture just right. After mixing, press your hand firmly into the soil—if it springs back slowly (like a memory foam mattress), you're golden. If it holds the imprint, add a tiny bit more water and remix. Too much moisture creates anaerobic conditions that can suffocate your seeds, while too little leaves them struggling to germinate.
Sterilization Shortcut: For larger batches needing the 200°F for 30 minutes bake, spread your mix on a baking sheet first. This prevents uneven heating in the center of containers, which can leave some portions under-sterilized. I use a wire rack inside the oven to ensure all sides get properly heated—this is especially important if you're dealing with disease-prone seeds.
Pro Tips for Seed Starter Potting Soil
- Between us, these small tweaks make all the difference when crafting your ideal seed starter mix—especially if you want those seedlings to pop up fast and strong.
- Mixing Technique: When combining your 50% peat moss or coconut coir with 25% perlite and 20% vermiculite in Step 1, use a clean garden trowel to gently fold rather than stir vigorously.
- Nutrient Distribution: In Step 2, don't just sprinkle your worm castings and mycorrhizal fungi on top—work them into the mix in thin layers as you combine.
Frequently asked questions
Got questions about seed starter potting soil?
You’re not alone! Here are answers to the most common queries to help you grow confidently.
What’s the difference between seed starter soil and regular potting soil?
Seed starter soil is lighter and more porous than regular potting mix, designed to promote rapid root growth and prevent damping-off disease. It’s formulated with higher organic matter (like peat or coco coir) and less dense materials like perlite or vermiculite to encourage aeration. Regular potting soil is heavier and better suited for mature plants.
How long can I keep seed starter soil before it goes bad?
Unopened seed starter soil lasts 1–2 years if stored in a cool, dry place (like a garage or shed). Once opened, use it within 6 months for best results. Over time, it may compact or lose moisture-retention properties. If it smells musty or looks moldy, toss it and start fresh!
Is it worth buying pre-mixed seed starter soil, or should I make my own?
Pre-mixed seed starter soil is convenient and reliable, especially for beginners, as it’s balanced for germination. However, DIY mixes (like 50% peat moss + 50% perlite/vermiculite) can be cheaper and customizable. If you’re growing a large volume of seeds, mixing your own may save money—but ensure it’s sterile to avoid pathogens.
Why are my seeds rotting in the seed starter soil?
Seed rot (or damping-off) usually happens from overwatering, poor drainage, or compacted soil. To fix it:
- Use a sterile mix and avoid reusing old soil.
- Water gently from the bottom (use a tray) to prevent soggy soil.
- Add perlite or sand to improve aeration.
- Keep trays in a warm spot (70–75°F) with indirect light.
Can I reuse seed starter soil for new seeds?
Reusing soil is risky because it may harbor fungi, bacteria, or depleted nutrients from previous seedlings. If you must reuse it, sterilize it first by baking at 200°F for 30 minutes or microwaving in 30-second bursts. However, for best results, always use fresh, sterile soil for new seeds.
Wrapping up and next steps
Choosing the right seed starter potting soil with an air-porous mix is your secret weapon for nurturing healthy, vigorous seedlings. 🌱 The key takeaway? A lightweight, well-draining blend packed with organic matter and proper aeration gives your tiny sprouts the best shot at thriving.
Whether you’re growing herbs, flowers, or veggies, this foundation sets the stage for faster growth and stronger roots.
Now that you’re armed with the know-how, roll up those sleeves and get planting! Start small with a few containers, experiment with your mix, and watch your seedlings flourish. Happy growing—your future garden will thank you! 🌿