
Propagation
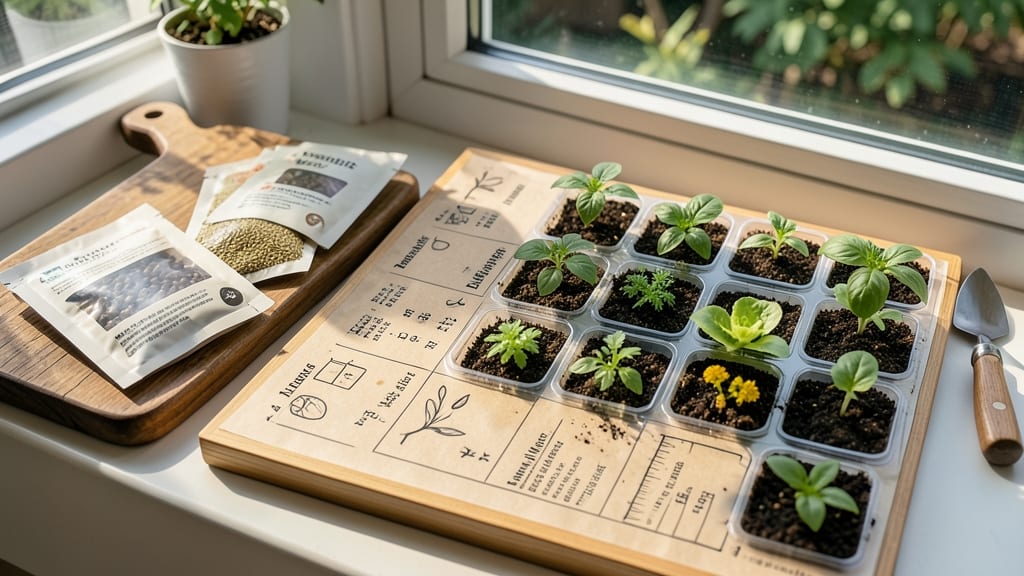
Your seed starting chart isn't just a schedule—it's the roadmap to a garden bursting with homegrown veggies and flowers by summer. 🌱 I've used this exact timeline for five seasons, and it's the difference between seedlings that thrive and ones that flop when transplanting.
The chart breaks down exactly when to start each plant indoors, when to move them outside, and how to adjust for your specific frost date—no more guessing or wasted seed packets.
Most beginners struggle with timing because they don't account for their zone or whether a plant needs indoor head starts. This chart handles that for you, with clear columns for indoor sowing dates, outdoor planting windows, and hardiness zone adjustments.
For example, tomatoes in Zone 5 need to start indoors by March 1st, while in Zone 9, you can direct-sow them in February.
The visual layout makes it easy to spot these differences at a glance, so you're never left wondering if you planted too early or too late.
What you'll end up with is a garden that produces earlier harvests and stronger plants because they're acclimated to outdoor conditions. The chart even includes notes on extending seasons with cold frames or row covers, so you can push your planting windows further.
No more bolting lettuce or leggy herbs—just reliable growth that matches your climate. Plus, you'll save money by avoiding store-bought seedlings that cost more and often perform worse than homegrown ones.
Whether you're a first-timer or a seasoned gardener tweaking your routine, this chart adapts to your needs. Print it out, tape it to your fridge, or save it on your phone for quick reference during seed-starting season.
The key is starting early enough to avoid the rush, but not so early that your seedlings get stretched and weak. This timeline keeps everything on track—no more panicked last-minute starts or seedlings that outgrow their containers.
📚 In This Guide
- What you need
- Instructions
- Tips and common mistakes
- Wrapping up and next steps
What you need
- ● Seed trays or containers: 10-20 (depending on volume) – 6"x12" plastic or biodegradable trays work best.
- ● Seed-starting mix: 1-2 bags (sterilized, lightweight, and well-draining). Avoid garden soil!
- ● Seeds: Choose varieties suited for your climate and season (check your seed starting chart!).
- ● Grow lights or a sunny windowsill: 1-2 grow lights (if indoors) or a south-facing window with 6+ hours of sunlight.
- ● Spray bottle: 1 (for gentle watering).
- ● Labels and markers: 20+ (to track varieties and planting dates).
- ○ Heat mat (optional but helpful): 1 (for warm-season seeds like peppers or tomatoes).
- ● Humidity dome: 1-2 (to retain moisture for delicate seedlings).
- ● Fertilizer (low-dose): 1 (like fish emulsion or diluted liquid fertilizer).
- ● Fan: 1 (for airflow to prevent damping-off disease).
- ● Thermometer/hygrometer: 1 (to monitor temperature and humidity).
- ● Transplanting pots: 2-4" pots (for hardening off seedlings later).
Step-by-step instructions for planning your seed starting timeline
Here's how I map out my seed-starting schedule to avoid overwhelm and maximize success.
📅 Step 1: Determine Your Last Frost Date
Find your average last frost date by checking local weather records or using a planting zone calculator. This is your anchor point—everything else builds from it. I always mark it on my calendar with a bright sticker because it tells me when seedlings can safely move outdoors.
Count backward from that date: 4-6 weeks before is when most cool-season crops need to be transplanted. For warm-season plants like tomatoes and peppers, start 8-10 weeks before. This timing ensures seedlings mature just as soil warms.
⏰ Step 2: Create a Month-by-Month Planting Schedule
Break your growing season into monthly blocks and assign crops accordingly. January and February are for cool-season crops like lettuce, spinach, and peas—these can handle indoor growing until spring. March kicks off warm-season starts like tomatoes and peppers, which need early head starts.
I keep a simple spreadsheet with columns for "Month," "Plant Type," "Start Indoors," and "Transplant Outdoors." This visual layout helps me spot gaps or overlaps. For example, basil can go straight in the ground after frost, so I don’t waste time starting it early.
🌱 Step 3: Group Seeds by Germination Speed
Fast-germinating seeds like radishes or beans can wait until 2-3 weeks before transplanting, while slow starters like parsley or onions need 6-8 weeks of indoor time. I sort seeds into "Fast," "Medium," and "Slow" categories and assign them to specific months.
This prevents overcrowded seed trays or seedlings that outgrow their pots. For instance, I start slow-germinating seeds in February, while fast ones go in March. Watch for first true leaves to confirm germination progress—this tells me if I need to adjust timing.
☀️ Step 4: Adjust for Light and Space Constraints
If you’re limited by grow lights or shelf space, prioritize starting high-value crops first (like heirloom tomatoes) and save lower-maintenance plants (like lettuce) for later. I use a seed-starting heat mat for early months when natural light is weak, which speeds up germination.
Rotate seedlings under lights daily to prevent leggy growth. You’ll notice stems bending toward the light—this is your cue to move them closer or add a second light. Keep a log of which crops thrive in which months so you can refine next year’s schedule.
✂️ Step 5: Plan for Succession Planting
Succession planting fills gaps left by harvested crops. For example, after pulling early peas in May, I replant with bush beans or carrots. I mark these second plantings in my schedule with a different color to avoid confusion.
This keeps your garden productive all season. Watch for soil temperature—most seeds won’t germinate well below 50°F. If your ground is still cold, hold off on outdoor sowing until conditions improve.
Tips & tricks for perfect seed starting timing
Took me years to figure out these timing tricks—here's how to avoid the most common seed-starting headaches.
The Frost Date Foundation: Your last frost date is the single most important number in your garden calendar. I can't stress enough how critical it is to verify this locally—online calculators can be off by weeks in your specific microclimate. Once you've got that date locked in, mark it boldly on your calendar. This is your "go" date for transplanting seedlings outdoors, and everything else builds backward from it. The 4-6 weeks before for cool-season crops and 8-10 weeks for warm-season plants are your non-negotiable starting points.
Seasonal Grouping Strategy: Here's what nobody tells you—don't just plant by month, plant by season and germination speed. I've ruined batches of slow-starting seeds by giving them the same treatment as fast germinators. Create three clear categories: Fast (radishes, beans), Medium (lettuce, spinach), and Slow (parsley, onions). This prevents overcrowding and ensures you're not starting seeds too early when they'll outgrow their pots before transplant time. The first true leaves appearance is your best indicator of progress—watch for these to adjust your schedule.
Light and Space Optimization: If you're working with limited grow lights, prioritize your high-value crops first. I always start heirloom tomatoes and peppers in January even if it means sacrificing some lettuce spots. Use a seed-starting heat mat for those early months when natural light is weak—it can cut germination time by nearly half. And for the love of gardening, rotate your seedlings daily under lights. That bending toward the light? That's your plant telling you it needs more even exposure. I keep a simple log of which crops thrive under my specific light setup so I can replicate it next year.
Succession Planting Secret: The key to continuous harvests is color-coding your succession plantings in your schedule. I use green for initial plantings, blue for succession, and yellow for quick harvest crops. This visual system helps me spot gaps instantly. For example, after my early peas are done in May, I immediately mark bush beans or carrots for that same space. And remember—soil temperature matters more than dates. If your ground is still below 50°F, hold off on outdoor sowing no matter what your calendar says.
Pro Tips for Seed Starting Chart
- Took me years to figure out these timing tricks—here's how to avoid the most common seed-starting headaches.
- The Frost Date Foundation: Your last frost date is the single most important number in your garden calendar. I can't ...
- Seasonal Grouping Strategy: Here's what nobody tells you—don't just plant by month, plant by season and germination s...
Frequently asked questions
Got questions about starting seeds like a pro? You’re not alone! Here are some of the most common concerns—and their answers—to help you master your seed-starting timeline.
What’s the best way to use a seed-starting chart?
A seed-starting chart is your roadmap to success! Start by identifying your last frost date (check local averages or use the USDA Plant Hardiness Zone Map). Then, work backward from harvest time to determine when to plant seeds indoors or outdoors. Adjust for your specific climate—cooler regions may need earlier starts.
Can I start seeds too early or too late?
Starting too early risks leggy, weak seedlings (they’ll stretch toward light and become top-heavy). Starting too late means smaller plants that may not mature in time. Your chart accounts for this by listing ideal and flexible windows—stick to the “sweet spot” for best results.
What if my seed-starting window is shorter than the chart suggests?
No worries! Opt for fast-maturing varieties (check seed packets for “days to maturity”). You can also try succession planting: sow small batches every 2–3 weeks for a continuous harvest. Cool-season crops like lettuce or spinach tolerate light frosts and can be direct-sown later in the year.
How do I troubleshoot seedlings that aren’t germinating?
First, check moisture—soil should stay consistently damp (not soggy). Temperature matters too: most seeds need warmth (70–85°F) to sprout. If using trays, ensure they’re in a warm spot (like on top of the fridge). For stubborn seeds, try scarification (lightly sanding the seed coat) or soaking overnight in warm water.
Are seed-starting charts different for each climate zone?
Yes! Charts are often tailored to average last frost dates, but your local microclimate (urban heat islands, high altitudes, etc.) can shift timelines. Use your zone as a starting point, then adjust based on past experience. Online tools like the Old Farmer’s Almanac can refine estimates.
Wrapping up and next steps
Mastering your seed starting chart is the first step toward a thriving garden! By following this month-by-month guide, you’ll gain confidence in timing, conditions, and care—ensuring your seedlings grow strong and healthy.
Whether you’re a beginner or a seasoned gardener, every little effort now will pay off with a bountiful harvest. 🌱
Ready to dive in? Start small—pick 2-3 plants to test your new skills, then expand next season. Grab your chart, mark your calendar, and let’s grow something amazing together!