
Propagation
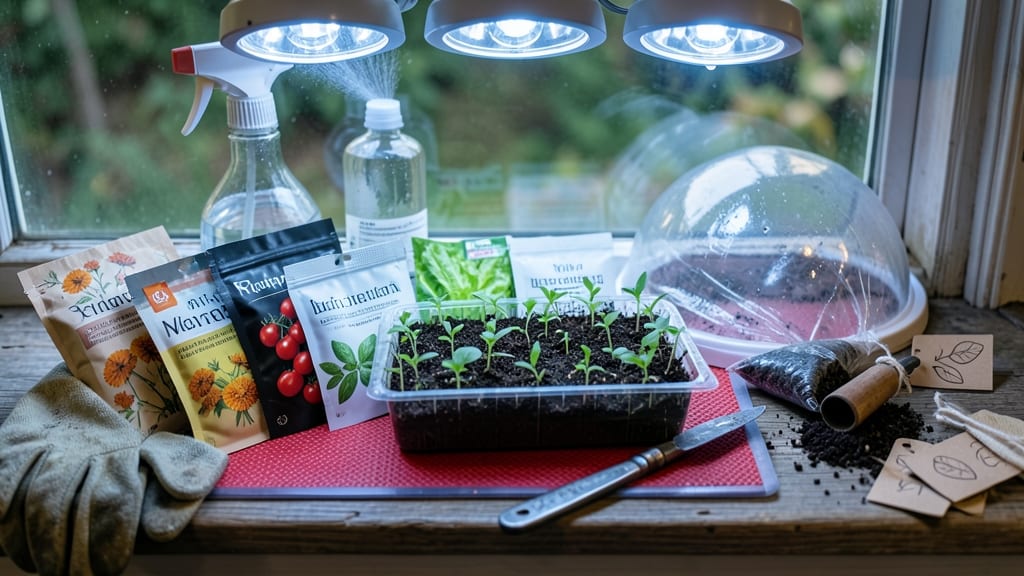
Starting seed starting for beginners turns a $3 packet into a foot-tall plant that outshines store-bought seedlings. ✨ The trick isn't fancy equipment—it's matching seeds to their ideal conditions, and I've simplified the process after years of trial and error.
You'll see your first sprouts in just 5-14 days when you nail these basics.
You only need four things: seed-starting mix (not garden soil), small containers, a heat mat (optional but helpful), and a grow light or sunny windowsill. Skip the expensive setups—even a repurposed egg carton works for tiny seeds like lettuce.
The real secret is keeping things warm and moist until those first green hooks appear above the soil.
By the time you transplant, you'll have stocky seedlings with 4-6 true leaves that thrive in the garden. No more wimpy, leggy plants from big-box stores. The best part? You control exactly what grows—from heirloom tomatoes to rare peppers—without paying nursery prices.
This method works for any climate, from cold frames in Alaska to apartment windowsills in Texas. Let's get those seeds sprouting—your future harvest starts now.
📚 In This Guide
- What you need
- Instructions
- Tips and common mistakes
- Wrapping up and next steps
What you need
- ● Seeds: Choose high-quality, fresh seeds (check the packet for germination rates). Start with easy varieties like basil, marigolds, or cherry tomatoes.
- ● Growing Trays or Containers: Seed trays (1020 trays or biodegradable options) OR
- ● Small pots (2–4 inches deep) with drainage holes (6–12 per variety).
- ● Seed Starting Mix: Lightweight, sterile potting mix (avoid garden soil—it’s too dense!). A 5–10 gallon bag covers most beginners.
- ● Grow Lights or Sunny Window: Grow lights: LED or fluorescent (12–16 hours/day). A 12–24 inch fixture works for most setups.
- ● Sunny spot: South-facing window (6+ hours of light).
- ● Watering Can or Spray Bottle: A small spray bottle (for gentle watering) or a can with a fine rose nozzle.
- ○ Heat Mat (Optional but Helpful): For slow-germinating seeds (e.g., peppers, tomatoes). A 70–80°F mat speeds up growth.
- ● Labels & Markers: Wooden sticks or plant tags + waterproof marker to track varieties.
- ● Misting Bottle: Keeps humidity high for germination (especially for tiny seeds).
- ● Trowel or Small Shovel: For transplanting seedlings later.
- ● Humidity Dome or Plastic Wrap: Creates a mini greenhouse effect (remove once sprouts appear!).
- ● Fertilizer (Balanced or Starter): Diluted fish emulsion or a 5-10-5 formula (use sparingly—too much burns seedlings!).
Step-by-step instructions for seed starting for beginners
Here's the straightforward method I rely on to turn tiny seeds into thriving seedlings every season.
🌱 Step 1: Gather Your Supplies and Prep Containers
Start with clean, 2-3 inch deep containers—plastic cell packs or small pots work perfectly. I like to use seed-starting mix (not garden soil) because it's sterile and drains well. Fill each container about ¾ full with the mix, leaving room for seeds and watering. Press down gently so the soil is firm but not compacted—this helps roots anchor properly.
For moisture control, place a tray underneath to catch excess water. I always label my containers right away with the plant type and date—once those first sprouts appear, identical seedlings can look identical until they develop true leaves. Use a fine-tip marker or plant labels to avoid smudging.
💧 Step 2: Plant Seeds at the Correct Depth
Check your seed packet for depth recommendations, but a general rule is to plant seeds twice as deep as their diameter. Tiny seeds like lettuce go just ¼ inch under, while larger ones like beans need 1 inch of coverage. Use your finger to make a small hole, drop in 1-2 seeds (just in case), and cover lightly—don't pack it down.
Mist the soil surface with water until it's evenly damp but not soggy. A spray bottle works best here—it prevents displacing seeds or burying them too deep. Once watered, place the containers in a warm spot (70-75°F) like on top of your fridge. This warmth jumpstarts germination, which can take anywhere from 3 days to 2 weeks depending on the plant.
☀️ Step 3: Provide Light and Monitor Growth
As soon as you see the first signs of sprouts—tiny green hooks breaking through the soil—move your containers to a bright, indirect light spot. A south-facing window is ideal, but if your seedlings start stretching toward the light (called "legginess"), they need more intensity. I use a grow light on a timer for 14-16 hours daily to prevent weak growth.
Keep the soil consistently moist but never waterlogged—you'll know it's right when the top inch feels damp to the touch. Avoid watering from above once seedlings emerge; instead, use a watering can with a narrow spout to direct water at the soil level. This prevents disturbing delicate stems.
🌿 Step 4: Thin Seedlings and Strengthen Stems
When seedlings develop their first true leaves (the second set after the initial cotyledons), it's time to thin. Use small scissors to snip the weaker seedlings at soil level—this prevents disturbing the roots of the ones you're keeping. If you're planting in cells, you can transplant the extras to separate containers.
To encourage sturdy growth, I gently brush the stems with my fingers or use chopsticks to create a slight bend. This mimics wind exposure and helps seedlings develop stronger cell walls. Rotate the containers ¼ turn daily so they don't lean toward the light source.
⏰ Step 5: Harden Off Before Transplanting
About 2 weeks before your last frost date, start hardening off your seedlings. Begin by placing them outside in a sheltered spot for 1-2 hours the first day, gradually increasing their time outdoors by 1 hour daily. This acclimates them to wind, sun, and temperature fluctuations.
Watch for signs of stress like wilting or yellowing leaves—these indicate they're not ready yet. Once seedlings can handle a full day outside without wilting, they're ready for the garden. Transplant on a cloudy day or in the late afternoon to reduce shock, and water deeply at the base to help them establish roots.
Tips & tricks for perfect seed starting
Here's what nobody tells you about turning seeds into thriving plants—these tricks will help you avoid the most common pitfalls.
Container Depth Matters: While 2-3 inch deep containers work for most seedlings, taller containers are better for larger plants like tomatoes or peppers. Deeper roots mean stronger plants later! For these, use 4-5 inch deep pots to prevent root binding. I've seen seedlings outgrow their containers and become root-bound before they even hit the garden.
Germination Temperature Secrets: That 70-75°F range is ideal, but some seeds need warmth to germinate. Place containers on a seedling heat mat (available for under $20) if your home stays cooler. For seeds like beans, a warm spot like on top of the fridge works perfectly. Pro tip: Group containers together—they create their own microclimate and maintain consistent warmth.
Lighting Troubleshooting: If your seedlings are stretching toward the light (called legginess), it's a sign they're not getting enough intensity. Move them closer to the window or adjust your grow light to 2-3 inches above the seedlings. I've seen leggy seedlings grow 6 inches tall in just 3 days when they're desperate for light—this weakens their structure and makes them more prone to falling over.
Thinning Made Easy: When it's time to thin those crowded seedlings, don't just pull them out—use small scissors to snip at soil level. This prevents disturbing the roots of the seedlings you're keeping. For container-grown seedlings, you can transplant the extras to separate containers and grow them as microgreens or herbs instead of wasting them.
Pro Tips for Seed Starting For Beginners
- Here's what nobody tells you about turning seeds into thriving plants—these tricks will help you avoid the most commo...
- Container Depth Matters: While 2-3 inch deep containers work for most seedlings, taller containers are better for lar...
- Germination Temperature Secrets: That 70-75°F range is ideal, but some seeds need warmth to germinate. Place containe...
Frequently asked questions
Got questions?
Seed starting can feel overwhelming at first, but don’t worry—we’ve got answers to the most common ones! Here’s what beginners ask most often.
When is the best time to start seeds indoors?
The ideal time depends on your plants and last frost date. Most veggies (like tomatoes or peppers) need 6-8 weeks before transplanting. Check seed packets for specific guidelines—some, like lettuce, prefer cooler temps and can start earlier. A handy rule: Start seeds when you’d plant them outside minus their growing time.
What if my seedlings look leggy or weak?
Leggy seedlings happen when they stretch toward light. Fix it by moving them closer to a bright window (south-facing is best) or under grow lights. Keep them 1-2 inches from the light source and avoid overcrowding. If they’re already stretched, bury deeper—up to the first true leaves—to encourage stronger stems.
Can I start seeds without fancy equipment?
You don’t need a greenhouse or expensive setups. Use recycled containers (egg cartons, yogurt cups, or even toilet paper rolls) and fill them with seed-starting mix. A simple spray bottle for watering and a sunny windowsill (or a DIY light stand with a lamp) work wonders. Just ensure good drainage—poke holes in the bottom!
How do I prevent mold or damping-off in my seedlings?
Mold and damping-off (a fungal disease) thrive in damp, crowded conditions. To prevent it:
- Water from below (use trays with water) to avoid wetting leaves.
- Space seedlings 1-2 inches apart for airflow.
- Use sterilized soil (bake it in the oven for 30 mins at 200°F) or buy fresh seed-starting mix.
- Avoid overwatering—let the top inch of soil dry out between waterings.
What’s the easiest plant for beginners to start from seed?
Start with fast-growing, forgiving plants like:
- Basil – Thrives in warmth and loves sunlight.
- Radishes – Sprout in just 3-4 weeks and tolerate cooler temps.
- Zucchini or Cucumbers – Large seeds are easy to handle.
- Marigolds – Bright, pest-repelling, and resilient.
Wrapping up and next steps
You’ve got everything you need to start your seed journey with confidence! Remember, the key to success is patience, consistency, and a little love—your tiny sprouts will soon reward you with lush, thriving plants. 🌱✨
Ready to take the next step? Try starting with easy seeds like basil, marigolds, or cherry tomatoes—they’re forgiving and perfect for building your green thumb. Once you’ve mastered the basics, explore transplanting tips or dive into more advanced techniques like seed saving!