
Propagation
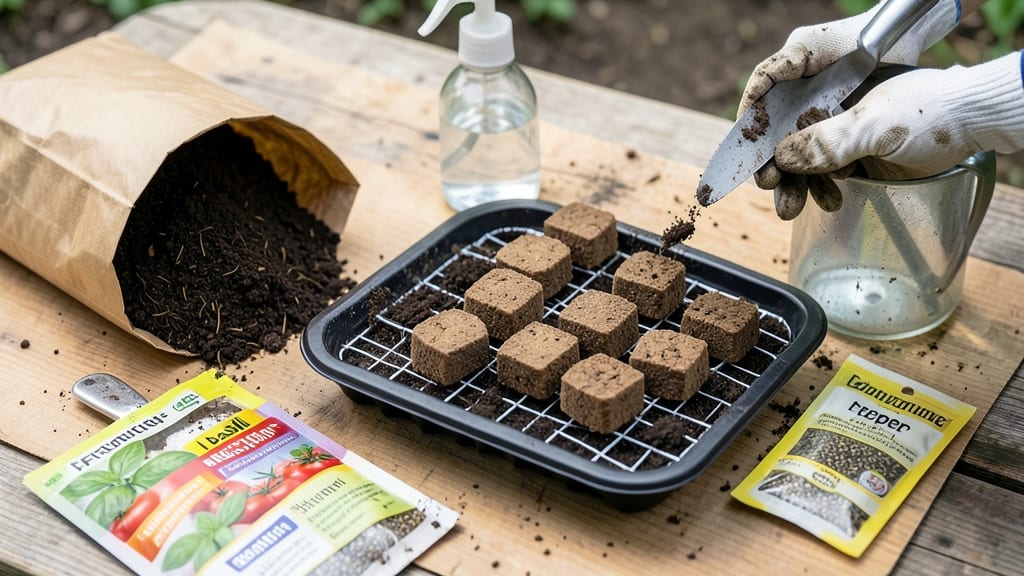
This seed starting mix for soil blocks transforms simple ingredients into the perfect seed starter—no waste, no fuss, and roots that grow strong from day one. 🌱 After years of killing seedlings in fluffy mixes, I switched to this dense, airy loam that mimics nature’s perfect balance of moisture and aeration.
The secret? Just three ingredients and a handful of tools you likely already own.
The magic happens when you blend coco coir, perlite, and compost in a 2:1:1 ratio—this creates blocks that hold moisture without drowning roots while letting air circulate freely. Sterilizing the mix with a quick boiling water bath kills pathogens, and the blocks form effortlessly in reusable molds.
No more seedling drown-outs or leggy sprouts—just sturdy plants ready for transplanting in 4-6 weeks.
What you’ll end up with is a zero-waste system that works for everything from tiny herbs to towering tomatoes. The blocks break down naturally in the soil, eliminating transplant shock entirely. Plus, the earthy, clean scent of fresh blocks is a gardener’s reward—proof you’re doing it right.
Works for any seed—just adjust moisture based on plant type—and scales from a windowsill setup to a full greenhouse. Here’s how to make it foolproof the first time.
📚 In This Guide
- What you need
- Instructions
- Tips and common mistakes
- Wrapping up and next steps
What you need
- ● Base Soil: 1 part coco coir (pearl or brick) – 50-70% of the mix (hydrated, not compressed)
- ● OR 1 part peat moss (if coco coir isn’t available)
- ● Structural Additives: 1 part compost (well-aged, worm castings preferred)
- ● 1 part perlite or vermiculite (for aeration; 5-10% of total mix)
- ○ Optional Boosters (pick 1-2): 1 tbsp mycorrhizal fungi (per gallon of mix) for root health
- ● 1 tbsp kelp meal or fish emulsion (for trace minerals)
- ● 1 handful of crushed eggshells (for calcium, if starting seedlings like tomatoes)
- ● Mixing Container: A 5-gallon bucket or sterilized wheelbarrow (for hygiene)
- ● Measuring Tools: A garden trowel or measuring cup for precise ratios
- ○ A pH meter (optional but helpful; ideal range: 6.0-7.0)
- ● Soil Block Tools: Soil block maker (or DIY molds from cardboard egg cartons)
- ● Spray bottle (for misting moisture)
- ● Safety Gear: Gloves (to avoid irritation from coco coir/perlite)
- ● Mask (if mixing in dusty conditions)
- ● Space: A clean, flat surface (outdoor table or indoor countertop)
- ● Time: 10-15 minutes for mixing (plus drying time if needed)
- ● Water: Dechlorinated (let tap water sit for 24 hours or use filtered)
- ● Sterilization: Sanitize tools with 10% bleach solution or rubbing alcohol (prevents mold)
Step-by-Step guide to making soil blocks for seed starting
Here's how to create a no-waste, root-friendly loam that gives seedlings a stronger start than traditional mixes.
🪴 Step 1: Gather and Prepare Your Base Materials
Start with equal parts coco coir, compost, and perlite—this ratio ensures perfect moisture retention while preventing compaction. I sift the coco coir first to remove any large fibers, which can create uneven blocks. The compost should be well-aged to avoid introducing pathogens that could harm your seedlings.
Mix these dry ingredients thoroughly in a large bin. You'll need about 2 gallons total for 40 standard-sized blocks. I like to use my hands to break up any clumps, ensuring the texture is fine and uniform. This step is critical—uneven mixing leads to inconsistent moisture and block strength.
💧 Step 2: Add Water Gradually for Ideal Moisture
Slowly add warm water to the dry mix while stirring continuously. The goal is a consistency like damp sand—it should hold together when squeezed but not drip water. Too much water makes the mix mushy, while too little creates crumbly blocks that fall apart.
I test moisture by grabbing a handful: if it forms a loose ball that doesn't crumble immediately, you're good. If it sticks to your fingers or drips, let it dry out slightly. This is the moment that matters—proper moisture ensures blocks hold their shape during the seed-starting process.
☀️ Step 3: Press Blocks Using the Soil Block Maker
Fill the soil block maker's hopper with your moistened mix. Press down firmly but evenly—the pressure should be consistent to create uniform blocks. I use a small hand tamper to compact the mix before pressing, which prevents air pockets and ensures strong blocks.
Remove each block carefully from the maker's mold. They'll be soft at first but will firm up as they dry. Place them on a mesh tray or elevated surface to allow airflow around the bottom, which prevents mold. Here's the thing—don't rush this step. Rushing causes blocks to crack or collapse during germination.
⏰ Step 4: Let Blocks Dry and Prepare for Seeding
Allow the blocks to dry for 24-48 hours until they're firm to the touch but not hard. You'll know they're ready when a gentle squeeze leaves no imprint. I place them near a fan for even drying, which prevents surface crusting.
Once dry, create a small indentation in the top of each block with your finger. This tiny pocket holds seeds perfectly without burying them too deep. The reason we do this is that soil blocks dry out faster than traditional mixes, so seeds need to be placed just below the surface for consistent moisture.
🌱 Step 5: Plant Seeds and Maintain Optimal Conditions
Drop 1-2 seeds into each indentation, then cover lightly with a pinch of the same soil mix. Mist the surface gently with water to settle the seeds. I use a spray bottle to avoid disturbing the blocks—overwatering now will cause them to disintegrate.
Place the tray in a warm, humid environment with 70-75°F temperatures. You'll see germination in 5-14 days, depending on the seed type. The beauty of soil blocks is that they encourage strong root systems—no need for transplanting later, which reduces shock and stress on seedlings.
Tips & tricks for perfect soil blocks
These little tricks will transform your seed-starting game—stronger roots, healthier seedlings, and zero waste. Here's what I've learned after years of trial and error.
Ingredient Selection: For the coco coir in Step 1, choose a high-quality, peat-free version if possible—it holds moisture better and breaks down more slowly. I've found that compost with a slightly sandy texture prevents compaction, so avoid overly fine compost that can create dense blocks. Perlite is non-negotiable here; it's what gives your blocks that crucial airiness for root development.
Moisture Mastery: In Step 2, when testing the damp sand consistency, think "squeeze to hold but not drip." I've ruined batches by adding water too quickly—always let the mix absorb gradually. Warm water (not hot) helps activate beneficial microbes in the compost, giving your seedlings a head start. If your mix feels too wet, spread it thinly on a tray and let it air-dry slightly before proceeding.
Block Strength: The pressure in Step 3 is everything—too little and blocks crumble, too much and they become rock-hard. I use a small hand tamper to pre-compact the mix in the hopper, then press firmly but evenly. For extra strength, add 1 tablespoon of unflavored gelatin to the 2-gallon mix (optional). It acts like a natural binder without affecting plant growth. Remove blocks slowly from the mold to prevent cracking.
Drying Wisdom: During the 24-48 hour drying period in Step 4, resist the urge to speed this up with heat. A gentle fan on low setting is perfect—it prevents surface crusting while maintaining even moisture. I place blocks on a wire rack over a baking sheet to catch any drips. Once dry, store extras in a sealed container with a damp paper towel to maintain humidity until use.
Pro Tips for Seed Starting Mix For Soil Blocks
- These little tricks will transform your seed-starting game—stronger roots, healthier seedlings, and zero waste.
- Ingredient Selection: For the coco coir in Step 1, choose a high-quality, peat-free version if possible—it holds moisture better and breaks down more slowly.
- Moisture Mastery: In Step 2, when testing the damp sand consistency, think "squeeze to hold but not drip."
Frequently asked questions
Got questions about crafting the perfect seed starting mix for soil blocks? You’re not alone! Here are answers to the most common queries—so you can dive in with confidence and zero guesswork.
What’s the best ratio of materials for a no-fail soil block mix?
A balanced mix typically uses 50% coco coir, 30% compost, and 20% perlite or vermiculite for moisture retention and aeration. Adjust slightly based on your climate—drier areas may need more perlite. Pro tip: Test your mix by squeezing a handful; it should hold shape but crumble easily.
How long does the mix last before it degrades?
Your DIY soil block mix stays fresh for 2–4 weeks if stored in a sealed container in a cool, dry place. After that, compost or reuse it for transplanting. For longer shelf life, add 10% worm castings—they extend freshness and boost nutrients!
Can I skip coco coir and use regular potting soil?
Not ideal! Regular potting soil compacts too easily, stifling root growth. If you’re in a pinch, blend it 50/50 with perlite or sand, but coco coir or peat moss is the gold standard for soil blocks. Why? It mimics natural loam while preventing clumping.
My blocks are cracking—what went wrong?
Cracks usually mean too much moisture or overworking the mix. Fix it by:
- Adding 5–10% extra perlite for structure.
- Pressing blocks gently (like a firm handshake).
- Storing blocks in a shady, humid spot (like a plastic bin with a damp towel) to slow drying.
Are soil blocks better than seedling trays for delicate seedlings?
Soil blocks reduce transplant shock by encouraging deep, robust roots. They’re especially great for fussy plants like tomatoes, peppers, and herbs. Just avoid tiny seeds (e.g., lettuce)—they’re better in trays until they’re 2–3 inches tall.
Wrapping up and next steps
Creating your own seed starting mix for soil blocks is a game-changer—it’s eco-friendly, cost-effective, and packed with root-boosting benefits for your seedlings! 🌱 With just a few simple ingredients and a little time, you’ll craft a nutrient-rich, waste-free growing medium that supports strong, healthy roots from day one.
Whether you’re a seasoned gardener or just starting out, this method makes seed starting effortless and rewarding.
Ready to take the next step? Grab your materials, follow the steps, and watch your seeds thrive! Happy growing! 🌿✨