
Lawn
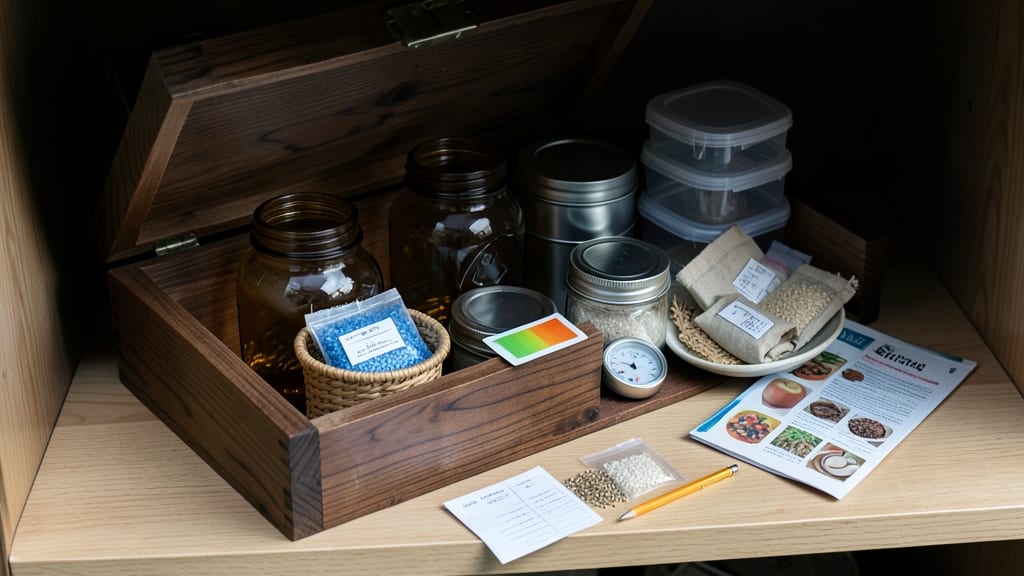
Storing seeds properly can extend their life from 2-3 years to decades—and it starts with the right conditions. 🌱 I’ve learned the hard way that damp, warm storage turns seeds into dust, but the right setup keeps them viable for planting seasons to come.
The key? Cool, dry, and dark environments that mimic nature’s perfect preservation conditions.
For short-term storage, a sealed airtight container in your fridge works wonders—ideal for seeds you’ll use within a year. Long-term storage demands a deeper freeze, ideally at 0°F or below, where seeds can last 10+ years if kept bone-dry.
Humidity is the silent killer: even a slight dampness triggers mold or sprouting, so silica gel packets or moisture absorbers are your best friends.
You’ll know your seeds are still good when they pass the float test (viable seeds sink in water) or sprout within 7-10 days when tested. Label everything with the date and variety—trust me, that saves headaches in spring.
The payoff? A seed stash that outlasts store-bought packets and guarantees fresh starts every season.
Common mistakes? Storing seeds in the basement (too humid), using plastic bags without desiccants, or forgetting to rotate older batches. Pro tip: Write “Use First” dates on your containers to avoid wasting seeds you’ve forgotten about. With these conditions, your garden’s future is already in the bag.
📚 In This Guide
- What you need
- Instructions
- Tips and common mistakes
- Wrapping up and next steps
What you need
- ● Air-Tight Containers: Mylar bags (5–10 mil thickness) – 1–2 per seed type
- ● Food-grade buckets with gamma-seal lids (5–10 gallon) – 1–2 for bulk storage
- ● Glass jars with rubber seals (quart or gallon size) – 1–2 per seed type
- ● Desiccant Packets: Silica gel (5–10 lbs) – 1 packet per container
- ● Clay cat litter (unscented) – Alternative to silica gel
- ● Sealing Supplies: Heat sealer (for Mylar bags) – 1 unit
- ○ Vacuum sealer (optional but recommended) – 1 unit
- ● Labeling Supplies: Waterproof labels or masking tape – 10–20 labels
- ● Permanent markers – 1–2
- ● Storage Environment: Cooler or climate-controlled room (32–41°F / 0–5°C)
- ● Dark, dry space (avoid basements with humidity)
- ● Humidity indicator cards – 1 per container (to monitor moisture levels)
- ● Oxygen absorbers – 1–2 per large container (for extra longevity)
- ● Seed storage charts or logs – 1 notebook (to track seed viability dates)
- ● Portable dehumidifier – 1 unit (if storing in less-than-ideal spaces)
Step-by-step guide to creating optimal seed storage conditions
Here's how I preserve seed viability for years—no fancy equipment needed, just smart climate control.
🪴 Step 1: Select the Right Containers for Airtight Protection
Choose hermetically sealed containers like glass jars with rubber gaskets or Mylar bags with oxygen absorbers. I avoid plastic because it can degrade over time and let in moisture. For small quantities, coin envelopes work for short-term storage, but for long-term viability, airtight is non-negotiable.
Clean containers thoroughly before use—any residual moisture or chemical residue will compromise seed quality. Label each container with the seed variety and storage date. Trust me, you'll thank yourself when you open a jar next spring and see perfectly preserved seeds instead of crumbling remnants.
☀️ Step 2: Control Temperature Within Ideal Ranges
Store seeds in a location with consistent temperatures between 35-45°F. A refrigerator's crisper drawer works well, but avoid the freezer—extreme cold can damage seed membranes. For even better results, I use a dedicated seed vault in my basement where temperatures stay stable year-round.
Never store seeds near heat sources like ovens or windows that get direct sunlight. Fluctuating temperatures accelerate aging. If your home runs warm, consider a dehumidifier nearby to maintain that critical 35-45°F range without fail.
💧 Step 3: Maintain Proper Humidity Levels
Seeds need 5-10% relative humidity to stay viable. Too much moisture causes mold; too little makes seeds brittle. I use silica gel packets in each container to absorb excess moisture without creating a desert environment. You can find these at craft stores or online.
Check humidity levels periodically with a digital hygrometer. If condensation forms inside the container, remove the seeds immediately and let them dry in a cool, dark place for 24 hours before resealing. This simple precaution prevents the #1 cause of seed failure—moldy, unusable stock.
⏰ Step 4: Organize by Viability Timeline
Group seeds by their natural shelf life. Most vegetables last 2-5 years, while seeds like onions and leeks only stay viable for 1 year. I keep a spreadsheet tracking each variety's storage date and test germination every 2 years by planting a few seeds to see if they sprout.
For long-term storage beyond 5 years, consider vacuum-sealing in addition to airtight containers. The double protection extends viability even further. Just remember: even the best storage conditions can't preserve seeds forever—eventually, you'll need to replenish your collection.
🌱 Step 5: Monitor and Refresh Storage Conditions
Check stored seeds annually for any signs of moisture, pests, or container degradation. I rotate containers every 6 months to ensure no single jar sits in the same spot too long. If you notice any musty smells or condensation, it's time to remove the seeds and start fresh.
This is where most gardeners fail—they store seeds and forget about them. Set a reminder in your phone or gardening journal to check your seed stash each year. A little maintenance now means you'll always have fresh, viable seeds when you need them most.
Tips & tricks for perfect seed storage conditions
Took me years of trial and error to perfect these seed-saving strategies—here's how to avoid the mistakes I made.
Container Selection: Glass jars with rubber gaskets are my top recommendation because they create a true airtight seal that plastic can't match. For maximum protection, pair them with oxygen absorbers—these tiny packets remove all oxygen from the container, which is the #1 enemy of long-term seed viability. I've seen seeds last twice as long using this combination compared to regular storage.
Temperature Consistency: The 35-45°F range isn't just arbitrary—it's where seeds enter a state of suspended animation, slowing their metabolic processes to a crawl. In my basement seed vault, I've maintained this range year-round using a simple thermometer and occasional adjustments. If your home fluctuates, consider a small, dedicated refrigerator just for seeds—it's worth the investment for serious gardeners.
Humidity Monitoring: That 5-10% relative humidity range is critical, but achieving it requires vigilance. I've ruined batches of seeds by either letting them get too dry (making them brittle) or too moist (leading to mold). A digital hygrometer becomes your best friend here—check it monthly. If you notice condensation forming inside containers, remove seeds immediately and let them dry for the full 24 hours before resealing.
Organizational Strategy: The 2-year germination test isn't just about checking viability—it's your early warning system. When I first started, I ignored this step and ended up with seeds that wouldn't sprout when I needed them most. Now I plant a small test batch every two years, and it's saved me from planting entire gardens with seeds that would have failed. Keep a simple spreadsheet with varieties, storage dates, and test results—it's the secret to a reliable seed collection.
Pro Tips for Seed Storage Conditions
- Took me years of trial and error to perfect these seed-saving strategies—here's how to avoid the mistakes I made.
- Container Selection: Glass jars with rubber gaskets are my top recommendation because they create a true airtight sea...
- Temperature Consistency: The 35-45°F range isn't just arbitrary—it's where seeds enter a state of suspended animation...
Frequently asked questions
Got questions about storing seeds for maximum viability?
Here are some of the most common concerns—and straightforward answers—to help you keep your seeds fresh and ready for planting.
How long can seeds last in ideal storage conditions?
With proper seed storage conditions—cool (32–41°F), dry (<5% humidity), and dark—most seeds stay viable for 1–10+ years. Vegetable seeds (like tomatoes or peppers) typically last 2–5 years, while hardy perennials (e.g., beans or peas) can endure 5–10 years or longer. Always check seed packets for specific lifespan guidelines!
Can I store seeds in my freezer instead of a fridge?
Yes! Freezing seeds (<0°F) is an excellent alternative for long-term storage, especially for delicate varieties. Use airtight, moisture-proof containers (like Mylar bags with oxygen absorbers) to prevent frost damage. Just thaw seeds slowly before planting—never expose them to sudden temperature swings.
What do I do if my seeds sprout mold or smell bad?
Mold or a musty odor means excess moisture or poor airflow—toss those seeds immediately. To prevent this, never store seeds in plastic bags alone; use desiccant packets or silica gel. If humidity is the issue, transfer seeds to a dehumidifier-safe container or repack with fresh moisture absorbers.
How often should I check on stored seeds?
Check seeds every 6–12 months to ensure they’re still dry and pest-free. Rotate stock by planting older seeds first (FIFO: First In, First Out). If you notice shriveling, discoloration, or pests, those seeds may have degraded—test a few in damp paper towels to confirm viability before committing to a full planting.
Are there any DIY seed storage hacks for small spaces?
For limited space, try:
- Vacuum-sealed bags (remove air first to slow oxidation).
- Mason jars with uncooked rice (natural desiccant) at the bottom.
- Cool, dark pantry corners (like above the fridge) for short-term storage (<1 year).
Wrapping up and next steps
Proper seed storage conditions are the secret to unlocking long-term viability—whether you're a gardener, farmer, or hobbyist. By controlling temperature, humidity, and oxygen levels, you can preserve seeds for years, ensuring healthy growth when you’re ready to plant. Don’t let your hard work go to waste—take action today!
🌱 Next Steps:
- Audit your current storage setup—adjust as needed.
- Invest in quality containers and moisture absorbers.
- Label and organize seeds for easy access.
Your future garden starts with the seeds you store today—get started now! 🌱