
Lawn
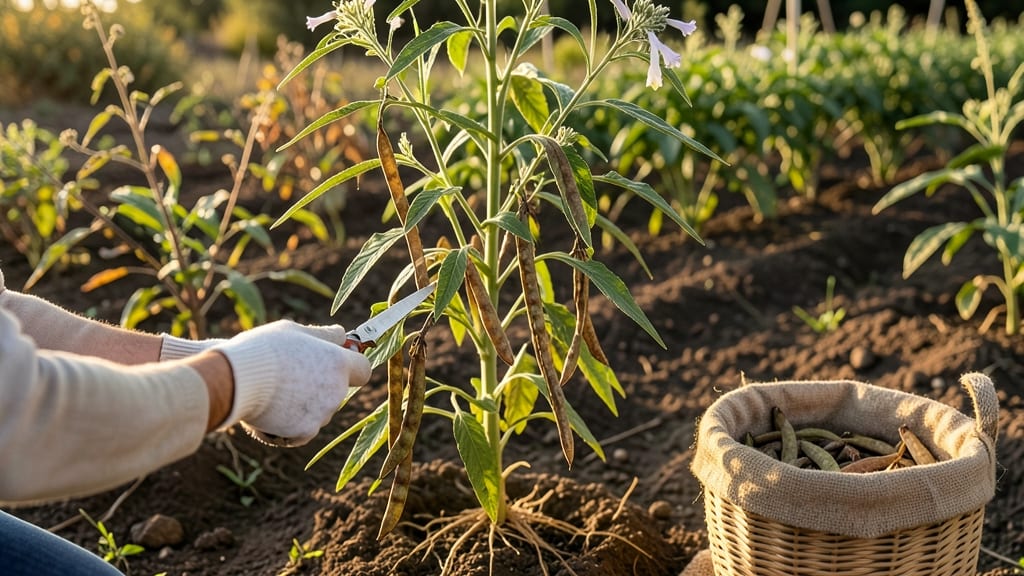
Growing sesame plants for their fragrant seed pods is simpler than you’d expect—just 90 days of warm weather and a little patience. 🌱 I’ve grown sesame for years, and the key is mimicking its native dry, sunny climate.
These plants thrive where summers stretch long and hot, but even cooler zones can pull it off with the right timing.
The secret to success starts with soil that drains fast and stays loose—sesame hates soggy roots. Plant seeds an inch deep, spaced 6 inches apart, once nighttime temps stay above 60°F. They’re drought-tolerant once established, but keep soil moist during germination.
Within weeks, you’ll see those signature feathery leaves, and by mid-summer, you’ll have plants reaching 3-4 feet tall.
Harvest comes when pods turn golden-brown and rattle easily—usually 100-120 days after planting. Snap them off by hand, then spread pods on screens to dry for 3-5 days. Once fully dry, store them in airtight containers where they’ll keep their nutty aroma for months.
The first time you crack open a pod and smell that fresh sesame scent, you’ll understand why gardeners go back every year.
Watch for spider mites in dry heat, and avoid overwatering—those are the only real hurdles. With proper care, you’ll end up with enough pods to store for next season’s planting or even share with neighbors who’ll ask how you got them to grow so well.
The process is straightforward once you know the tricks.
📚 In This Guide
- What you need
- Instructions
- Tips and common mistakes
- Wrapping up and next steps
What you need
- ● Sesame seeds: 1–2 packets (organic, non-GMO preferred; check for heirloom varieties like Sesamum indicum). Growing containers: Large pots (12–18 inches deep) or In-ground garden bed (full sun, well-draining soil).
Step-by-step guide to growing and harvesting sesame seed pods
Turn your garden into a fragrant sesame haven with these simple steps.
🌱 Step 1: Plant Sesame Seeds in Warm, Well-Drained Soil
Sesame thrives in full sun and warm soil, so wait until nighttime temperatures stay above 60°F before planting. Scatter seeds ¼ inch deep and 12 inches apart in rows spaced 18 inches apart. I like to plant them after the last frost when the soil is warm enough to touch—it should feel like a cozy bath, not a cold shower.
Lightly cover the seeds with soil and water gently until the surface is moist but not soggy. Sesame seeds germinate best in 70-85°F soil, so if your spring is cool, consider using black plastic mulch to warm the soil faster. You'll see sprouts in 7-14 days, but don’t be surprised if germination takes longer in cooler conditions.
☀️ Step 2: Provide Consistent Care for Healthy Growth
Sesame plants need at least 6 hours of direct sunlight daily to produce those fragrant blooms. Keep the soil consistently moist but not waterlogged—sesame is drought-tolerant once established, but young plants need steady moisture. Water at the base of the plant in the morning to let foliage dry quickly, preventing fungal issues.
Watch for 18-24 inch tall plants with narrow leaves—this is when they’re ready for their next growth phase. Sesame is sensitive to overwatering, so let the top inch of soil dry out between waterings. You’ll know it’s time when the soil feels slightly dry to the touch, like a well-worn leather glove.
✂️ Step 3: Harvest Mature Seed Pods at Peak Ripeness
Harvest sesame pods when they turn yellowish-brown and the seeds rattle inside when shaken gently. This usually happens 90-120 days after planting, depending on your climate. Use clean pruning shears to cut the entire stem and hang it upside down in a dry, well-ventilated area for 2-3 weeks to fully dry.
Real talk: Don’t rush the drying process. If pods are still green or damp, they’ll mold in storage. You’ll know they’re ready when the pods split open easily and the seeds inside are dry and hard. Once fully dry, remove the seeds from the pods by hand or gently rub them through a fine mesh sieve.
🪴 Step 4: Store Seeds Properly for Next Year’s Planting
Store sesame seeds in an airtight container, like a glass jar with a tight-sealing lid, in a cool, dark place. The seeds will stay viable for 1-2 years if kept dry and protected from pests. Label the container with the variety and harvest date—sesame seeds lose viability over time, so planting fresh seeds ensures better germination.
Here’s the thing—sesame seeds are sensitive to moisture, so avoid refrigeration unless you’re storing them long-term. A pantry shelf works just fine. Check the seeds annually for signs of mold or pests; if you see any, discard them immediately to avoid contamination.
Tips & tricks for perfect sesame seed pod cultivation
Common pitfalls—and how to sidestep every one—when growing fragrant sesame plants from seed to storage.
The Heat Factor: Those 60°F nighttime temperatures are non-negotiable for germination. I've learned this the hard way after planting too early in cool springs—seeds either rot or take weeks to sprout. Use a soil thermometer to confirm temperatures. If your spring is chilly, black plastic mulch isn't just helpful—it's essential. Lay it down 1-2 weeks before planting to warm the soil faster.
Sunlight Strategy: Sesame plants need those 6 hours of direct sunlight daily, but here's what nobody tells you—they actually thrive with more. If your garden gets afternoon shade, consider growing them near your south-facing fence or in containers that can be moved to follow the sun. The more light, the more fragrant those blooms will be.
Harvesting Cues: The yellowish-brown color is your primary indicator, but don't rely on it alone. Shake a pod gently—if seeds rattle inside, that's your green light. I also look for the pods to start splitting open naturally. If you harvest too early, seeds won't dry properly; too late, and they'll scatter on the ground. Timing is everything here.
Drying Wisdom: That 2-3 week drying period might seem long, but rushing it is a recipe for mold. Hang stems in a spot with good airflow—think garage with open doors or a covered porch. If you're in a humid climate, consider using a small fan on low to circulate air. Proper drying preserves seed viability for years.
Pro Tips for Sesame Seed Pod
- Common pitfalls—and how to sidestep every one—when growing fragrant sesame plants from seed to storage.
- The Heat Factor: Those 60°F nighttime temperatures are non-negotiable for germination. I've learned this the hard way...
- Sunlight Strategy: Sesame plants need those 6 hours of direct sunlight daily, but here's what nobody tells you—they a...
Frequently asked questions
Got questions about growing, harvesting, or storing sesame seed pods?
Here are some of the most common ones—and their answers—to help you grow a thriving crop!
How long does it take for sesame seed pods to mature?
Sesame plants typically take 70 to 100 days to mature, depending on the variety and climate. You’ll know they’re ready when the pods turn yellow-brown and split open slightly. Harvest before they shatter to avoid seed loss!
What’s the best climate for growing sesame seed pods?
Sesame thrives in warm, sunny conditions with temperatures between 70–90°F (21–32°C). They’re sensitive to frost, so plant after the last frost in spring and avoid areas with high humidity or heavy rainfall.
How do I harvest sesame seed pods for drying?
Gently twist or cut pods when they’re dry and crisp. Avoid pulling—this can damage the plant. Lay them in a single layer on a paper-lined tray in a well-ventilated, dry spot (like a garage or shed) for 1–2 weeks.
Can I save sesame seeds from store-bought pods?
Yes! Buy organic, untreated sesame pods from a trusted source. Let them dry completely, then store seeds in an airtight container in a cool, dark place. Test viability by planting a few—if they sprout, your seeds are good!
What should I do if my sesame pods turn moldy?
Mold usually means too much moisture during drying. If caught early, spread pods in a dry, sunny spot for faster drying. If mold is severe, discard the batch—never eat moldy sesame pods.
Wrapping up and next steps
Growing your own sesame seed pods is a rewarding journey that connects you to nature’s bounty—from fragrant blooms to harvestable seeds! Whether you’re aiming for culinary uses, gardening experiments, or simply the joy of nurturing a plant, your efforts will pay off with delicious and aromatic results. 🌱
Now that you’re armed with the know-how, why not take the next step? Try planting a few more pods next season, experiment with different varieties, or even share your harvest with fellow gardening enthusiasts. Happy growing—and may your garden bloom with sesame success! 🌟