
Propagation
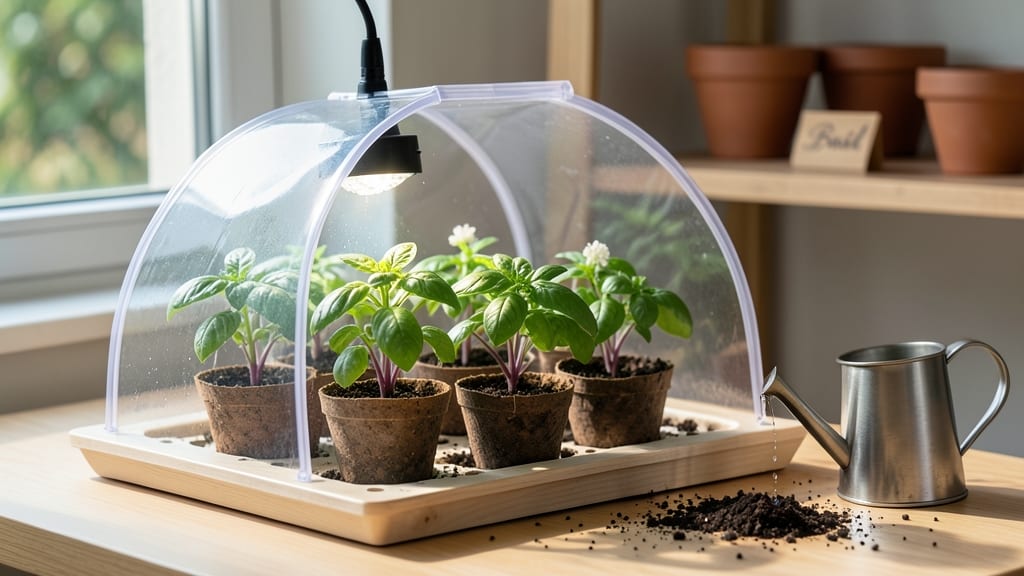
A small seed starting greenhouse turns your kitchen counter into a germination powerhouse—no more peeking seedlings or leggy weaklings. 🌱 I’ve used one every spring since my first batch of tomatoes outpaced the neighbors’ store-bought plants by three weeks.
The secret? Controlled warmth, humidity, and light that mimic a greenhouse without the space or cost.
You’ll need just three things: a compact greenhouse (plastic domes work great), a heat mat for bottom warmth, and a sunny windowsill or grow light. Most seed-starting kits include everything, but I upgraded my setup with a thermometer/hygrometer—it’s the difference between reliable germination and guessing.
Even in small spaces, you can start 50+ seedlings without overcrowding.
By week 3, you’ll see sturdy seedlings with true leaves, ready to outcompete anything at the nursery. The greenhouse keeps moisture where seeds need it most, speeds up germination by 2-3 days, and protects tiny sprouts from drafts.
No more sad, stretched-out seedlings—just bold, healthy starts that thrive from day one.
Works for veggies, herbs, and flowers alike, whether you’re a beginner or a seasoned grower. Here’s how to set it up—no greenhouses or fancy setups required.
📚 In This Guide
- What you need
- Instructions
- Tips and common mistakes
- Wrapping up and next steps
What you need
- ● Greenhouse Structure: Clear plastic sheeting (6 mil thickness, 4’x8’ sheet) or
- ● A pre-built small greenhouse (1’x2’ to 3’x5’ footprint, with ventilation)
- ● Base & Frame: Wooden frame (2x4s or PVC pipes) or a sturdy plastic base tray
- ● Waterproof sealant (for wooden frames)
- ● Ventilation: Small hinged lid or adjustable vents (2–4 inches wide)
- ○ Fan (optional but helpful for airflow)
- ● Growing Medium: Seed-starting mix (sterile, well-draining; 5–10 lbs)
- ● Small pots or seed trays (2–4 inch cells, 20–50 count)
- ● Lighting: Grow lights (LED or fluorescent, 12–16 hours/day)
- ○ Timer (optional but convenient)
- ● Humidity Control: Misting bottle or humidity dome (for seed trays)
- ● Thermometer/hygrometer (to monitor temp/humidity)
- ● Heating mat (for cold climates)
- ● Reflective material (aluminum foil or Mylar for extra light)
- ● Drip tray or saucer (to catch excess water)
- ● Label holders & markers (for seed organization)
Step-by-Step guide to building a small seed starting greenhouse
Transform any sunny spot into a seed-starting powerhouse with this simple, space-efficient greenhouse setup.
🪴 Step 1: Select and Prepare Your Base Structure
Choose a 4-foot by 4-foot base—this size accommodates 4 seed trays while maximizing airflow. I use a wooden frame with 1-inch thick cedar planks because cedar naturally resists rot and pests. Assemble the frame with corner brackets for stability, ensuring all angles are square before securing with outdoor-rated screws. The base should sit 2-3 inches off the ground to prevent moisture buildup and improve airflow from below.
Line the bottom with landscape fabric to block weeds and pests while allowing water drainage. This is non-negotiable—without it, soil-borne diseases will creep in and kill seedlings before they even sprout. Cut the fabric to size, staple it securely to the frame edges, and you’ve created a sterile foundation for your seedlings.
🌱 Step 2: Install Clear Covering for Controlled Microclimate
Cover the frame with 4mm thick clear polycarbonate panels—this material diffuses light evenly while trapping 90% of heat, creating ideal germination conditions. Cut panels to size with a jigsaw, leaving ¼-inch overhang on all sides to secure with aluminum trim. Seal edges with silicone caulk to prevent drafts and moisture loss. The panels should slope slightly (5-10 degrees) to allow condensation to run off during humid days.
For ventilation, install two hinged vents—one at the top and one at the bottom. Use magnetic latches for easy opening. You’ll want to crack these vents daily once germination begins to prevent fungal growth. The top vent should open first to release hot air, while the bottom vent introduces cooler, fresh air at seedling height.
☀️ Step 3: Set Up Internal Lighting and Temperature Control
Install a full-spectrum LED grow light on a dimmable timer set for 14-16 hours daily. Position it 6 inches above the seed trays—this distance ensures seedlings grow strong without stretching. Use a heat mat beneath the trays to maintain 75-85°F soil temperature, which is critical for fast germination. Plug the heat mat into a thermostat-controlled outlet to prevent overheating.
Place a digital hygrometer inside the greenhouse to monitor humidity—aim for 70-80% during germination, then reduce to 50-60% once seedlings emerge. If condensation fogs the panels, open vents immediately. This balance prevents both fungal diseases and leggy growth from overcrowding.
💧 Step 4: Arrange Trays and Manage Watering System
Place 4 seed trays inside the greenhouse, spaced 1 inch apart for airflow. Fill them with sterile seed-starting mix to ½-inch below the rim. Use a drip irrigation kit with ¼-inch tubing to deliver water directly to the soil surface. Run the tubing along the tray edges and space emitters 6 inches apart. This prevents overhead watering, which spreads disease.
Water only when the top inch of soil feels dry—overwatering is the #1 killer of seedlings. Set your irrigation timer for 5 minutes every other day during germination, then adjust as needed. The greenhouse’s humidity will reduce evaporation, so you’ll water 30-50% less than in open trays.
⏰ Step 5: Monitor and Adjust for Peak Germination
Check seedlings daily for the first 10 days—this is when most germination happens. Remove any condensation from the panels with a soft cloth to maximize light penetration. Once 50% of seeds sprout, reduce humidity by opening vents for 1 hour daily. You’ll see the first true leaves (not cotyledons) appear in 7-14 days—this is your cue to increase airflow further.
After 3 weeks, transition to bottom-watering by placing trays in a shallow water reservoir. This encourages deep root growth and reduces fungal risk. Keep the greenhouse in partial shade if outdoor temps exceed 85°F—seedlings will bolt (flower prematurely) if stressed by heat. With this setup, you’ll have sturdy, disease-free seedlings ready for transplanting in 4-6 weeks.
Tips & tricks for perfect seed starting greenhouses
Building the right environment makes all the difference between thriving seedlings and wasted effort. Here's what I've learned after years of perfecting this system.
Material Selection: For the 4mm polycarbonate panels in Step 2, I recommend choosing panels with a UV-inhibited coating—this prevents yellowing over time and maintains light diffusion. If you can't find this, regular polycarbonate will still work but may degrade faster under intense sunlight. The 5-10 degree slope is crucial too—this angle ensures condensation runs off rather than pooling, which can suffocate seedlings.
Ventilation Timing: The instructions mention cracking vents daily once germination begins, but I've found that opening them for just 10-15 minutes every 4 hours during peak sunlight hours (10 AM - 4 PM) creates the perfect balance. This prevents fungal growth while maintaining humidity. Use the top vent first to release hot air, then the bottom vent to introduce cooler air at seedling level—this mimics natural airflow patterns.
Lighting Optimization: When positioning your full-spectrum LED grow light 6 inches above seed trays in Step 3, consider using a reflective shield around the light. This directs more light downward toward seedlings, increasing efficiency by up to 30%. For the 14-16 hour daily timer, I recommend setting it to 14 hours during winter months when days are shorter, then increasing to 16 hours in summer to compensate for natural daylight.
Humidity Management: The 70-80% humidity range during germination is perfect, but achieving it requires attention. Place a small water tray with pebbles inside the greenhouse—this adds moisture without overwatering. When transitioning to 50-60% humidity after sprouting (around day 7-10), I recommend using a small fan on low speed near the vents to gently circulate air. This prevents fungal diseases while encouraging strong stem development.
Pro Tips for Small Seed Starting Greenhouse
- Building the right environment makes all the difference between thriving seedlings and wasted effort. Here's what I'v...
- Material Selection: For the 4mm polycarbonate panels in Step 2, I recommend choosing panels with a UV-inhibited coati...
- Ventilation Timing: The instructions mention cracking vents daily once germination begins, but I've found that openin...
Frequently asked questions
Got questions about setting up and using a small seed starting greenhouse? You’re not alone—here are some of the most common ones to help you get started with confidence!
What’s the best time of year to start seeds in a greenhouse?
For most veggies and flowers, start seeds indoors 6–8 weeks before the last frost date in your zone. Cool-season crops (like lettuce or peas) can go in earlier, while heat-lovers (tomatoes, peppers) need warmth—so adjust timing based on your climate. A greenhouse lets you extend the season by starting seeds earlier or later than outdoors!
How do I control humidity inside a small greenhouse?
Humidity is key for germination! Use a humidity dome or plastic wrap over trays, and mist seeds lightly with water. Ventilate daily to prevent mold—crack the lid or door for 10–15 minutes. A small fan on low can also improve airflow without drying things out too fast.
Can I reuse soil from last year’s seed starting greenhouse?
Not ideal! Old soil may harbor diseases or pests. Instead, mix fresh seed-starting mix (sterile and lightweight) with compost for nutrients. If reusing, sterilize it first by baking at 200°F for 30 minutes or using hydrogen peroxide (3% solution, 1 part to 100 parts water).
What if my greenhouse gets too cold at night?
Cold snaps can stall germination. Move the greenhouse to a warmer spot (like a garage or under a heat mat) or add a low-wattage grow light on a timer. For extreme cold, use insulated seedling trays or wrap the greenhouse in a thin thermal blanket at night.
Are there alternatives to a greenhouse for small spaces?
Try:
- Clear plastic domes over seed trays (cheap and effective).
- Mini grow tents with LED lights for year-round starts.
- DIY greenhouse boxes (use repurposed aquariums or plastic bins with lids).
Wrapping up and next steps
A small seed-starting greenhouse is your secret weapon for boosting germination rates and nurturing healthy seedlings—no matter your space constraints! 🌱 By creating a controlled microclimate with humidity, warmth, and light, you’re giving your plants the perfect head start.
Whether you’re a beginner or a seasoned gardener, this setup makes propagation easier and more rewarding.
Ready to green your thumb? Start by gathering your materials, then experiment with different seeds and conditions to find what works best for your space. Soon, you’ll be harvesting vibrant seedlings—and maybe even sharing your success with fellow plant lovers! 🌿