
Propagation
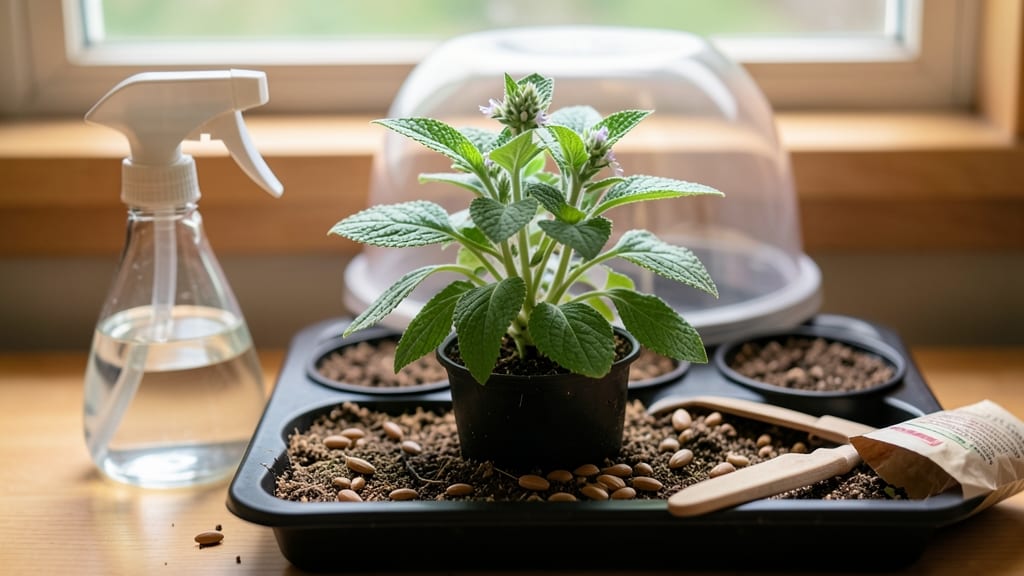
Stevia seed germination is all about keeping that soil moist—not soggy, not dry, but just right—because these tiny seeds need consistent dampness to wake up. 🌱 I’ve struggled with stevia germination before, and the difference between success and failure often comes down to moisture control.
The seeds are finicky; they won’t sprout if the soil dries out or if it’s too wet and suffocates them. You’ll need a warm spot (around 75°F), a seed-starting mix that drains well, and a clear container to keep humidity high without drowning the seeds.
Plant them just below the surface—no deeper than ¼ inch—and mist the soil lightly every other day. Patience is key here; germination can take 2-4 weeks, and some seeds might take even longer. Once those first green shoots appear, you’ll know you’re on the right track.
The seedlings are delicate at first, so avoid disturbing them, and keep the soil consistently moist but not waterlogged. Within a few weeks, you’ll have sturdy young plants ready to transplant. Most gardeners actually grow stevia from cuttings, but starting from seed lets you experiment with rare varieties.
Just remember: moisture control is your secret weapon for turning those tiny seeds into sweet, thriving plants.
📚 In This Guide
- What you need
- Instructions
- Tips and common mistakes
- Wrapping up and next steps
What you need
- ● Stevia seeds: High-quality, organic seeds (e.g., Stevia rebaudiana). Aim for 50–100 seeds to account for germination variability.
- ○ Seed-starting trays or small pots: 2–4" deep with drainage holes (6–12 trays/pots, depending on seed quantity). Optional: Use biodegradable peat pots for transplanting.
- ● Seed-starting mix: Lightweight, sterile potting soil with 50% perlite or vermiculite to improve aeration and moisture control.
- ● Spray bottle: For gentle watering (avoid over-saturating seeds).
- ● Clear plastic dome or plastic wrap: To create a humidity tent (cut to fit trays).
- ○ Heating mat (optional but recommended): Set to 70–75°F (21–24°C) to speed up germination.
- ● Grow lights or sunny windowsill: Stevia needs 12–14 hours of light daily. LED grow lights (full-spectrum) work best.
- ○ Humidity monitor (optional): Ideal range: 70–80% humidity during germination.
- ● Seed scarification tools: Sandpaper (120–200 grit) or a knife to lightly nick seeds (improves germination rates).
- ● Fungicide: A mild solution (e.g., hydrogen peroxide 3%) to prevent damping-off.
- ● pH test kit: Ensure soil pH is 6.0–6.5 (stevia prefers slightly acidic soil).
- ● Labeling tags: To track planting dates and varieties.
- ● Fine misting nozzle: For precise hydration without disturbing seeds.
Step-by-step guide to germinating stevia seeds successfully
Here's how I've mastered moisture control to get stevia seeds sprouting reliably every time.
🌱 Step 1: Prepare Your Germination Environment
Stevia seeds need consistent moisture and warmth to sprout, but they're sensitive to overwatering. Start by filling a shallow tray or seedling flat with a lightweight seed-starting mix that drains well. I like to mix in a little perlite or sand to improve aeration—stevia roots need air almost as much as water.
Moisten the mix until it feels like a wrung-out sponge: damp but not dripping. Press it down lightly so the surface is firm enough to hold seeds in place without compacting. The key here is creating a fine balance—too loose and seeds wash away, too firm and they can't push through the soil.
💧 Step 2: Plant Seeds at the Right Depth and Cover
Scatter seeds across the surface—don't bury them. Stevia seeds are tiny, so I use a toothpick to gently press them into the top 1/16 inch of soil. Covering them too deeply delays germination because they need light to trigger sprouting. Lightly mist the surface with water until the top layer looks uniformly damp.
Place a clear plastic dome or wrap a plastic bag loosely over the tray to create a humid microclimate. Stevia seeds germinate best at 75-80°F, so I keep mine on a seedling heat mat. Watch for condensation on the plastic—this tells you the moisture level is perfect. If you see water droplets, reduce watering slightly.
☀️ Step 3: Maintain Consistent Moisture Without Drowning
Here's where most people go wrong: overwatering. Stevia seeds rot quickly if kept too wet. I check moisture daily by lifting the tray—if it feels light, it's time for a light misting. You want the soil to stay evenly moist at the seed level, but never soggy. A good rule is to water when the top 1/4 inch feels dry to the touch.
Place the tray in bright, indirect light. Stevia seeds need warmth but not direct sun during germination—too much heat causes them to dry out. I keep mine under fluorescent lights on a timer for 14 hours daily. Within 10-21 days, you'll see tiny green sprouts pushing through the soil.
🌿 Step 4: Thin Seedlings and Prepare for Transplanting
Once seedlings reach 1 inch tall with their first true leaves, it's time to thin. Use small scissors to snip unwanted seedlings at soil level—pulling risks disturbing the roots of nearby plants. Stevia grows slowly at first, so I leave 1-2 inches between remaining plants to give them room to develop.
After thinning, reduce the humidity dome slightly each day to acclimate seedlings. Stevia thrives in full sun, so gradually introduce them to direct light over 5-7 days. Water from the bottom now—this encourages strong root development. You'll know they're ready for transplant when they've developed 3-4 true leaves.
Tips & tricks for perfect stevia seed germination
Between us, the difference between thriving stevia seedlings and sad, rotting seeds often comes down to these simple but critical adjustments.
Temperature Matters: The 75-80°F range is non-negotiable for germination. I've learned the hard way that even a 5°F drop can stall sprouting. If your home runs cooler, place the tray on a seedling heat mat or near a sunny window during the day. For extra insurance, I sometimes use a small space heater with a thermostat set to 78°F—just keep it at least 12 inches away from the tray to prevent uneven heat.
Lighting Secret: Those 14 hours of daily light aren't just about duration—they're about quality. Fluorescent grow lights are ideal because they emit the right spectrum for seedlings, but I've had success with a mix of natural sunlight and LED desk lamps too. The key is keeping them 6-8 inches above the tray. Too close and you'll scorch the seeds; too far and they'll stretch pitifully toward the light. I set a timer to remind me to turn them off at night—stevia seeds need darkness too!
Moisture Monitoring: The "wrung-out sponge" test in Step 1 is your best friend. When checking moisture, I press my finger into the top 1/4 inch—if it feels dry, it's time for a light misting. Here's what nobody tells you: condensation on the plastic dome is a good sign, but puddles mean you've gone too far. I've had to start over twice because I ignored that warning. If you see water droplets, remove the dome for 30 minutes to let excess moisture evaporate before resealing.
Thinning Technique: When your seedlings reach that 1-inch mark, resist the urge to pull them—those delicate roots break easily. Instead, use clean, sharp scissors to snip at soil level. I like to work in small batches, removing every other seedling first, then the ones in between. This gives your remaining plants maximum space (that 1-2 inch gap) without overcrowding. After thinning, I always give the soil a gentle watering from below to help the remaining roots establish.
Pro Tips for Stevia Seed Germination
- Between us, the difference between thriving stevia seedlings and sad, rotting seeds often comes down to these simple ...
- Temperature Matters: The 75-80°F range is non-negotiable for germination. I've learned the hard way that even a 5°F d...
- Lighting Secret: Those 14 hours of daily light aren't just about duration—they're about quality. Fluorescent grow lig...
Frequently asked questions
Got questions about growing stevia from seed? You’re not alone—this process can feel tricky at first! Here are some of the most common queries (and their answers) to help you navigate stevia seed germination like a pro.
How long does it take for stevia seeds to germinate?
Stevia seeds are slow starters! Under ideal conditions—consistent moisture, warmth (70–75°F), and indirect light—germination typically takes 2–4 weeks. Some seeds may take up to 6 weeks to sprout, so patience is key. Avoid overwatering, as soggy soil can delay or even prevent germination.
Can I germinate stevia seeds indoors without a greenhouse?
Use a clear plastic dome or humidity tray to create a mini greenhouse effect. Place seeds in a seed tray with moist, well-draining soil, cover lightly, and keep them in a warm spot (like on top of your fridge). A grow light or sunny windowsill will work—just avoid direct sunlight until sprouts appear.
What should I do if my stevia seeds aren’t sprouting?
First, check your soil moisture—it should stay consistently damp (not wet). If seeds still refuse to sprout after 4–6 weeks, try these fixes:
- Stratification: Place seeds in a damp paper towel in the fridge for 2–4 weeks to mimic winter conditions.
- Fresh seeds: Stevia seeds lose viability quickly; try sourcing new ones.
- Light exposure: Stevia needs light to germinate—move the tray to a brighter spot (but avoid direct sun).
Are there faster alternatives to growing stevia from seed?
If you’re eager for stevia, consider these shortcuts:
- Cuttings: Propagate from a mature stevia plant’s stems (place in water or moist soil). Roots form in 2–3 weeks!
- Transplants: Buy young stevia plants from nurseries (check for Stevia rebaudiana varieties).
- Seedlings: Some online sellers offer pre-sprouted stevia seeds (though germination rates vary).
For seed starters, cuttings are the fastest route to a sweet harvest!
What’s the best temperature for stevia seed germination?
Stevia thrives in warmth! Keep soil temperatures between 70–75°F (21–24°C) for optimal germination. Use a seedling heat mat if your home runs cooler. Avoid cold drafts or sudden temperature swings—consistency is critical. Once sprouted, maintain 60–75°F (15–24°C) for healthy growth.
Wrapping up and next steps
Mastering stevia seed germination is all about patience, precision, and the perfect balance of moisture—just like nurturing a tiny, sweet promise! 🌱 With the right setup, you’re well on your way to growing your own stevia plants for natural sweeteners, medicinal teas, or even a thriving garden.
Now that you’ve got the know-how, it’s time to roll up your sleeves and watch those seeds sprout.
Your next step? Start small—plant a few seeds in your moisture-controlled setup and observe their progress. Once your seedlings are strong and steady, consider expanding your stevia patch or sharing tips with fellow gardening enthusiasts. Happy growing!