
Trees
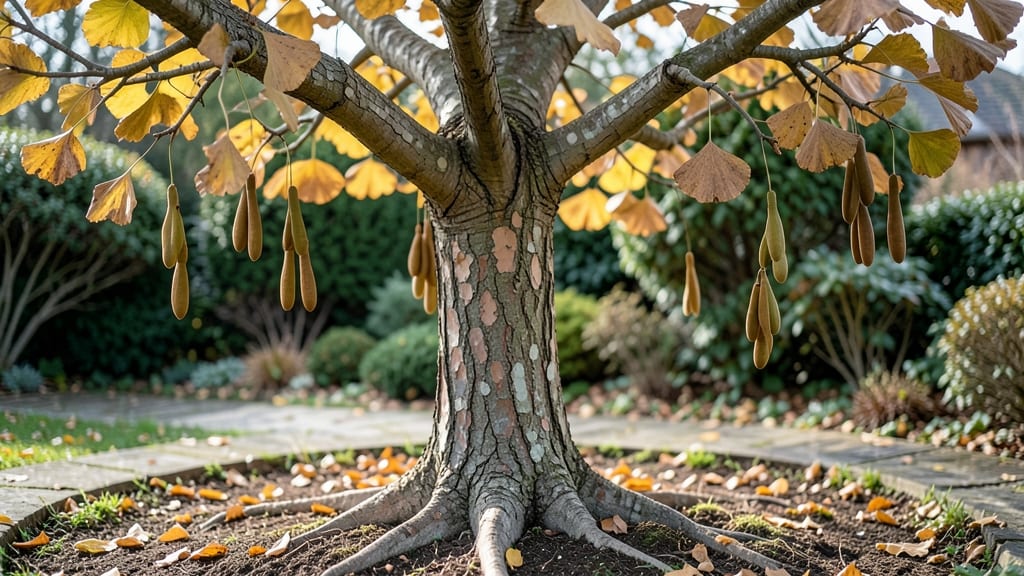
Collecting those papery tree seed pods in autumn sets you up for next spring's tiny forest. 🌱 The journey from pod to sprout takes patience—some species need cold stratification, others just moisture—but every successful seedling starts with the right timing and care.
I've watched acacia seeds sprout in just 10 days when given the right conditions, while oak acorns can take months to crack their dormancy.
The key is matching each seed type to its needs: maple seeds prefer moist paper towels, oaks need a winter chill, and acacias thrive with direct sunlight. You'll need basic supplies—a container, potting mix, and a spray bottle—but the real magic happens in the waiting.
That first green shoot breaking through the soil? That's the moment you've been preparing for.
By the time you're ready to transplant, those seedlings will have strong roots and 4-6 true leaves, ready to handle outdoor conditions. The payoff comes when they're tall enough to outgrow their nursery pots—proof that your autumn collection paid off.
Even if some seeds fail, you'll learn which varieties grow best in your climate.
Works for backyard gardeners, urban growers with sunny windowsills, or anyone dreaming of shade trees in 10 years. The process teaches you more about plant biology than any textbook ever could—because you're seeing it unfold right in front of you.
📚 In This Guide
- What you need
- Instructions
- Tips and common mistakes
- Wrapping up and next steps
What you need
- ● Tree seed pods: 5–10 pods (ensure they’re fresh, firm, and free of cracks or mold). Popular choices include maple, oak, or lotus pods.
- ● Seed-starting mix: 2–3 cups of lightweight, sterile potting soil (avoid garden soil—it’s too dense!). Look for a mix labeled for seedlings.
- ● Small pots or containers: 3–5 biodegradable pots (3–4 inches deep) or reusable plastic/ceramic pots with drainage holes.
- ● Watering can or spray bottle: A fine-mist spray bottle works best for gentle hydration.
- ● Plastic wrap or humidity dome: A clear plastic bag or a mini greenhouse lid to retain moisture.
- ○ Label markers & sticks: To track seed types and planting dates (optional but helpful!).
- ● Heating mat: A seedling heat mat (set to 70–75°F) to speed up germination for slower pods like oak.
- ● Grow lights: A LED grow light (12–16 hours/day) if natural light is limited.
- ● Fungicide: A natural fungicide spray (like neem oil) to prevent mold in humid setups.
- ● Notebook: To log germination timelines, pod types, and sprouting progress!
How to germinate tree seed pods successfully
Watch those tiny pods transform into sturdy young trees with these simple, science-backed steps.
🌱 Step 1: Collect and Prepare the Seed Pods
Harvest mature pods when they've fully dried and opened naturally on the tree. I like to collect them in a paper bag to prevent moisture buildup that could encourage mold. For best results, gather pods from healthy, disease-free trees in late fall or early winter when they're fully ripe.
Once home, spread the pods on a clean towel in a single layer. Let them dry for an additional 3-5 days in a warm, dry place. This extra drying helps break seed dormancy naturally. You'll know they're ready when the pods crumble easily between your fingers and the seeds inside look plump, not shriveled.
💧 Step 2: Stratify Seeds for Proper Germination
Most tree seeds need a cold period to break dormancy—a process called stratification. Place the seeds in a plastic bag with a damp paper towel, then seal it tightly. I like to add a few drops of water to create humidity without soaking the seeds. Store the bag in your refrigerator for 6-12 weeks, checking occasionally to ensure the towel stays moist but not dripping.
This cold treatment mimics winter conditions, tricking the seeds into thinking spring has arrived. You'll see tiny cracks appear in the seed coats after about 4-6 weeks—that's your signal the stratification is working. For faster results, some gardeners use a seed stratification mix in the fridge instead of paper towels.
☀️ Step 3: Plant Stratified Seeds in Germination Medium
Fill small pots with a sterile seed-starting mix (never garden soil—it's too dense). I use 2-3 inch deep pots for most tree seeds since their roots grow downward first. Moisten the mix until it's damp like a wrung-out sponge, then make small holes about ½ inch deep—roughly twice the seed's width.
Place 1-2 seeds per pot and cover lightly with additional mix. Press gently but don't compact the soil. Water lightly from the bottom by placing the pot in ½ inch of water for 10 minutes. This prevents washing seeds out while ensuring even moisture. Keep the pots in a warm spot (65-75°F) with bright, indirect light.
⏰ Step 4: Monitor for Sprouts and Provide Ideal Conditions
Germination can take 2-12 weeks, depending on the tree species. I check daily by gently lifting the soil surface—you'll see tiny white roots appear first, followed by the shoot pushing upward. Once sprouts emerge, move them to a south-facing window or under grow lights for 14-16 hours daily to prevent leggy growth.
Keep the soil consistently moist but never soggy. You'll know moisture is right when the top inch feels cool to touch but not wet. Thin seedlings to the strongest one per pot after 4-6 weeks, using clean scissors to avoid damaging roots. This gives your chosen sprout plenty of room to develop strong roots before transplanting outdoors.
🌿 Step 5: Harden Off and Transplant Young Seedlings
When seedlings have 3-4 true leaves (not the initial seed leaves), it's time to harden them off. Start by placing them outside in a sheltered spot for 1-2 hours the first day, gradually increasing time over 10-14 days. I like to use a shade cloth on sunny days to protect tender leaves from sunburn.
Transplant outdoors after the last frost when soil temperatures reach at least 60°F. Dig a hole twice as wide as the root ball but no deeper. Water the seedling thoroughly before planting to encourage root expansion. Mulch around the base with 2-3 inches of organic mulch to retain moisture and suppress weeds. Your young tree is now ready to grow into a mighty forest giant!
Tips & tricks for perfect tree seed pod germination
These science-backed tricks will help you turn tiny pods into thriving young trees with fewer surprises along the way.
Seed Pod Selection: Look for pods that open naturally on the tree—these contain fully mature seeds. Avoid pods that are still tightly closed or show signs of insect damage. I've found that pods from the top third of healthy trees often produce the most vigorous seedlings. The key is collecting them when they're completely dry but not brittle; they should crumble easily between your fingers after the 3-5 day drying period in Step 1.
Stratification Success: The 6-12 week cold treatment in Step 2 is where the magic happens, but consistency is key. I recommend placing your sealed bag with seeds on a shelf in the crisper drawer of your fridge where temperatures stay most stable. Check weekly by gently squeezing the paper towel—it should feel like a wrung-out sponge, not dripping. If you see mold developing, open the bag immediately to air it out for 30 minutes before resealing. Those tiny cracks appearing after 4-6 weeks are your green light that stratification is working!
Germination Medium: For Step 3, I can't stress enough how important that sterile seed-starting mix is. Regular garden soil contains pathogens and organisms that can harm delicate seedlings. If you're using a mix with perlite or vermiculite, it's even better for drainage. When making those ½-inch deep holes, use a pencil or chopstick to avoid compacting the soil around the seeds. The 10-minute bottom-watering technique prevents seeds from washing out while ensuring even moisture distribution throughout the pot.
Lighting Strategy: Once sprouts emerge in Step 4, proper lighting becomes critical. A south-facing window provides the best natural light, but if you're using grow lights, position them just 2-3 inches above the seedlings. I've seen seedlings stretch painfully toward weak light sources—this is called "leggy growth" and weakens the stems. The 14-16 hours of light daily mimics natural daylight cycles and prevents this common problem. Rotate your pots weekly to ensure even growth all around.
Pro Tips for Tree Seed Pods
- These science-backed tricks will help you turn tiny pods into thriving young trees with fewer surprises along the way.
- Seed Pod Selection: Look for pods that open naturally on the tree—these contain fully mature seeds.
- Stratification Success: The 6-12 week cold treatment in Step 2 is where the magic happens, but consistency is key.
Frequently asked questions
Got questions about tree seed pods?
You’re not alone! Here are some of the most common queries—and answers—to help you navigate germination like a pro.
How long do tree seed pods take to germinate?
The germination timeline varies by species. Fast growers like Lombardy poplar may sprout in 7–14 days, while slower types (e.g., oak) can take 30–90 days. Check the seed packet for specifics—patience is key! Pro tip: Keep soil moist but not soggy to speed up the process.
Why aren’t my seed pods sprouting?
Common culprits include dormancy (some seeds need cold stratification), poor soil (use well-draining mix), or overwatering. Try scarifying the pod (lightly sanding the hard shell) or chilling it in the fridge for 4–6 weeks if it’s a slow starter.
Can I plant seed pods directly from the tree?
Yes! Fresh pods often germinate best. Remove any remaining pulp, rinse seeds, and plant them ½ inch deep in moist soil. For tough pods (like acorns), soak them overnight to soften the shell before planting.
What’s the best time of year to plant tree seed pods?
Timing depends on your climate. In temperate zones, plant in early spring (after last frost) or fall (6–8 weeks before first frost). Tropical pods thrive year-round, but avoid extreme heat—aim for 60–75°F soil temps.
Are there any tree seed pods I should avoid planting?
Skip pods from invasive species (e.g., tree of heaven) or those with toxic seeds (like black walnut). Always research local regulations—some areas restrict planting non-native trees to protect ecosystems.
Bonus Tip:
Label your pods! Use toothpicks and masking tape to mark species and planting dates—it’ll save you headaches (and guesswork) when sprouts finally appear. Happy growing!
Wrapping up and next steps
From lotus seed pods to towering oaks, nature’s patience teaches us that growth takes time—but every tiny sprout starts with a single seed! 🌱 Whether you’re nurturing a delicate baobab pod or a hardy mesquite, understanding the germination timeline empowers you to create thriving greenery.
Now that you know the steps, roll up your sleeves and give it a try—your future forest begins with one small pod!
Next step: Pick a seed pod from your list, gather your supplies, and start your own green journey. Share your progress with fellow plant enthusiasts—you’ve got this! 🌿