
Lawn
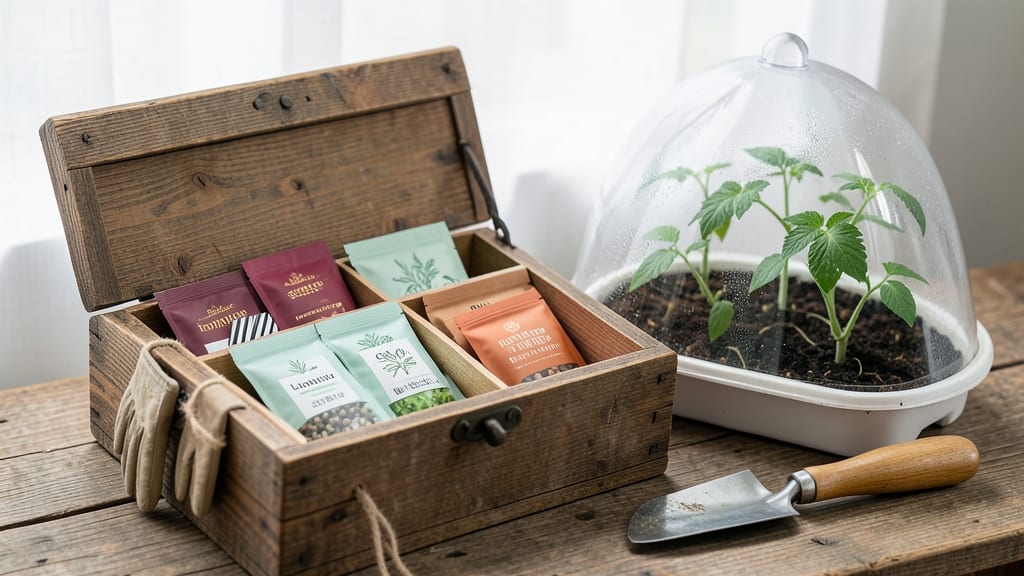
My vegetable seed vault kit saved me from the heartbreak of losing heirloom seeds to moisture and mold. 🌱 These compact, airtight organizers keep seeds fresh for years—no more digging through damp envelopes or worrying about cross-contamination between varieties.
The twist-lock design seals out humidity while letting me label everything clearly, so I never forget which seeds are which or when they need replanting.
What makes this system a game-changer is how it turns seed storage from a guesswork chore into a foolproof process. You’ll organize by type, maturity, and planting season, with each compartment holding exactly what you need for a single variety.
The clear labels mean no more confused gardeners reaching for the wrong packet mid-season—just grab, plant, and grow. For beginners, it’s the difference between a well-planned garden and one that starts from scratch every year.
By the end of your first season, you’ll have a system that preserves seeds longer than store-bought packets ever could. Imagine pulling out perfectly viable heirloom tomatoes or peppers from last year’s harvest—no more buying new seeds or risking poor germination.
The kit even helps you track planting schedules, so you’ll know exactly when to start each variety for your climate. No more forgotten seeds gathering dust in a drawer.
Whether you’re a first-time gardener or a seasoned seed saver, this kit adapts to your needs. It works for small urban gardens or large family plots, and the modular design lets you expand as your collection grows.
The real magic? You’ll never again lose a favorite variety to poor storage—just pure, reliable seeds ready to grow whenever you are.
📚 In This Guide
- What you need
- Instructions
- Tips and common mistakes
- Wrapping up and next steps
What you need
- ● Seed vault kit: A pre-packaged kit (like those from Seed Savers Exchange or Baker Creek Heirloom Seeds) or DIY supplies: airtight containers (e.g., mason jars with tight lids, food-grade buckets, or ziplock bags with oxygen absorbers). Quantity: 1 container per seed type (or 1 large container for mixed seeds).
- ● Specs: Containers should be lightproof (opaque or wrapped in aluminum foil) and moisture-resistant.
- ● Desiccant packets: Silica gel or uncooked rice (natural alternative) to absorb humidity. Quantity: 1–2 packets per container (or ½ cup rice).
- ● Seed varieties: Heirloom or open-pollinated seeds (avoid hybrids like F1 seeds). Quantity: 10–20 seeds per variety (enough for future planting + backup).
- ● Labels & markers: Acid-free tags or masking tape + permanent marker to label seeds by variety/year.
- ● Storage location: Cool, dark, and dry spot (ideal temp: 32–41°F; fridge or root cellar works!).
- ● Humidity tester: To monitor moisture levels (aim for 5–10% humidity).
- ● Vacuum sealer: For long-term seed storage (extends viability by decades!).
- ● Notebook: To track seed sources, germination rates, and storage dates.
- ● Freezer bags: Extra layer of protection for ultra-long-term storage.
Step-by-step instructions for creating your vegetable seed vault kit
Preserve your favorite heirloom seeds for years with this twist-free method—no fancy equipment needed.
🪴 Step 1: Gather and Prepare Your Seed Vault Materials
Start with a set of airtight, moisture-proof containers—think glass jars with tight-sealing lids or vacuum-sealed mylar bags. I like to use quart-sized mason jars because they’re easy to label and stack. For each variety, include a small paper envelope to hold seeds before sealing—this keeps them organized and prevents moisture buildup.
Label each container with the seed variety, harvest date, and storage location. I use a permanent marker on the jar lid and a matching label on the envelope. This ensures you’ll know exactly what’s inside years later. Place a small packet of silica gel (the kind that comes with electronics) in each container to absorb any lingering moisture—this is critical for long-term viability.
🌱 Step 2: Harvest and Dry Seeds Properly
Collect seeds when they’re fully mature but before they shatter or spoil. For tomatoes, wait until the fruit is overripe and the seeds form a gel-like pulp. For beans or peas, let the pods dry completely on the plant before harvesting. Once collected, spread seeds in a single layer on a paper towel or mesh screen in a warm, dry place with good airflow.
Keep seeds in this drying state for 7-14 days, stirring them occasionally to ensure even drying. You’ll know they’re ready when they’re hard to the touch and the paper towel beneath them shows no moisture. Avoid using heat sources like ovens—slow, natural drying prevents seed damage. Once fully dry, transfer seeds to their labeled envelopes and store them in a cool, dark place for 24 hours before sealing in the vault.
💧 Step 3: Seal and Store for Long-Term Viability
Place the labeled envelope with seeds into the airtight container, along with the silica gel packet. Seal the container tightly—this prevents moisture, pests, and oxygen from degrading the seeds over time. For extra protection, I like to place the sealed containers inside a larger, opaque storage box (like a plastic tote) to block out light completely.
Store your seed vault in a location with consistent temperatures between 32-41°F. A refrigerator crisper drawer works well, or you can use a dedicated seed storage cabinet. Avoid basements or attics where temperatures fluctuate wildly. Check your vault once a year to ensure the silica gel hasn’t absorbed too much moisture—replace it if it turns from blue to pink.
⏰ Step 4: Test Seed Viability Periodically
Every 2-3 years, test a small batch of seeds to check their viability. Place 10 seeds on a damp paper towel in a sealed container, then store them in a warm spot (around 70°F). Check daily for germination—if 80% or more sprout within 7-14 days, your seeds are still good. If fewer than half sprout, it’s time to refresh that variety by growing new seeds.
This testing step is non-negotiable. Seeds naturally lose viability over time, and some varieties (like onions or leeks) degrade faster than others. By testing regularly, you’ll always know which seeds to keep and which to replace. Keep a simple log of your test results to track the lifespan of each variety—it’s a game-changer for planning future gardens.
Tips & tricks for perfect seed vault preservation
These simple strategies will help you maximize your heirloom seeds' lifespan and ensure they stay viable for years to come.
Container Selection: While quart-sized mason jars work perfectly, you can also use vacuum-sealed mylar bags for even better moisture protection. I've found that mylar bags with oxygen absorbers (available online) create an almost airtight environment that extends seed life even further. Just make sure to seal them properly using a heat sealer or the included instructions.
Drying Technique: The 7-14 day drying period is crucial—don't rush it! I've learned the hard way that seeds dried too quickly won't store properly. Place your drying seeds in a spot with good airflow, like a mesh screen over a table fan on low setting. This gentle airflow helps prevent mold while ensuring even drying. Stir them daily to prevent any seeds from sticking together.
Temperature Matters: The 32-41°F storage range is ideal, but if you don't have refrigerator space, consider using a dedicated seed storage cabinet or even a cool basement with consistent temperatures. I've had good results storing seeds in a root cellar during winter months when temperatures naturally drop. Avoid attics or garages where temperatures can fluctuate wildly—even short periods of warmth can reduce seed viability.
Silica Gel Monitoring: That small silica gel packet is your best friend! Check it annually—when it turns from blue to pink, it's time to replace it. I like to keep a few extra packets on hand and store them in a separate container with a label. For extra protection, you can add a second packet to containers holding particularly moisture-sensitive seeds like lettuce or cilantro.
Pro Tips for Vegetable Seed Vault Kit
- These simple strategies will help you maximize your heirloom seeds' lifespan and ensure they stay viable for years to come.
- Container Selection: While quart-sized mason jars work perfectly, you can also use vacuum-sealed mylar bags for even better moisture protection.
- Drying Technique: The 7-14 day drying period is crucial—don't rush it!
Frequently asked questions
Got questions about storing your vegetable seeds long-term?
Here are answers to the most common ones—so you can keep your harvests thriving for years!
How long can seeds stored in a vault kit stay viable?
Most vegetable seeds in a properly sealed vault kit can last 5–10 years or longer, depending on the type. Tomatoes, peppers, and beans often stay good for 5+ years, while carrots and onions may last up to a decade. Store them in a cool, dark place (like a pantry) to maximize shelf life!
Do I need a special refrigerator or freezer for the seed vault?
Nope! A standard home refrigerator or freezer works perfectly—just keep seeds in an airtight container (like the one in your kit) to block moisture and light. Pro tip: Label each packet with the seed type and date for easy tracking!
Can I reuse the seed vault kit for different seeds?
Just clean and dry the container thoroughly between uses to prevent mold or cross-contamination. Avoid mixing seed types in the same bag unless they’re meant to be stored together (check your kit’s guidelines).
What if my seeds sprout mold or smell bad?
If you spot mold or a musty odor, your seeds may have absorbed moisture. Discard them immediately—mold can ruin viability. To prevent this, double-check seals and store seeds in a dehumidifier-safe spot (like a sealed container with silica gel packets).
When’s the best time to store seeds for next year’s garden?
Store seeds right after harvest (for homegrown seeds) or before planting season (for store-bought seeds). For best results, dry seeds completely (3–5 days in a cool, dark place) before sealing them in your vault kit. Pro tip: Harvest seeds when plants are fully mature but before they shatter!
Wrapping up and next steps
Building your own vegetable seed vault kit is a rewarding way to preserve heirloom varieties and ensure a sustainable harvest for years to come. With the right materials—like moisture absorbers, airtight containers, and proper labeling—you’re not just storing seeds; you’re safeguarding biodiversity and future gardens. 🌱
Ready to take the next step? Start by gathering your supplies, then follow the steps to create a twist-free, long-term seed storage solution. Whether you’re a seasoned gardener or just beginning, this project empowers you to grow with confidence—and maybe even share your knowledge with others!