
Lawn
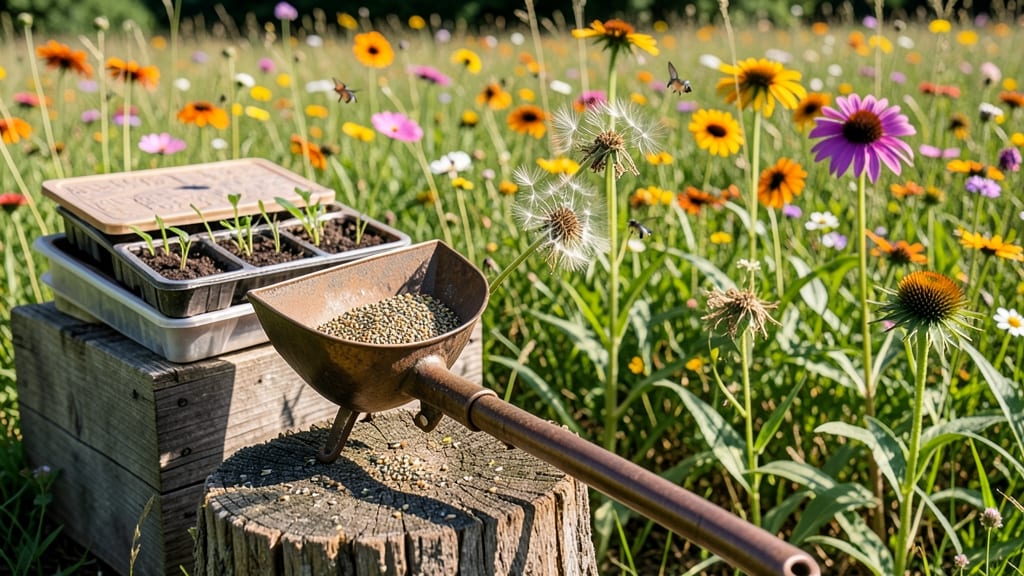
Your wild seed project starts with a twist-resistant harvest for next year’s blooms. ✨ The key is letting nature do the work—planting native wildflowers that reseed themselves reliably, so you get a self-sustaining meadow without annual replanting.
I learned this the hard way after my first attempt flopped because I ignored the seed heads' natural dispersal patterns.
First, choose seeds from local native species—black-eyed Susans, coneflowers, and milkweed are pollinator magnets that thrive with minimal fuss. Prepare the soil with a no-till approach (just scratch the surface), and plant in late summer or early fall for the best germination rates.
The secret? Leave the seed heads standing until they dry completely—this ensures they’ll scatter naturally next spring.
By next summer, you’ll have a vibrant, low-maintenance garden teeming with bees, butterflies, and birds. The best part? Once established, these plants spread on their own, creating a living tapestry of color and life that keeps giving year after year. No more buying seeds or fighting weeds—just pure, effortless beauty.
Works in meadows, borders, or even large containers—just adjust spacing for your space. Here’s how to make it happen without the guesswork.
📚 In This Guide
- What you need
- Instructions
- Tips and common mistakes
- Wrapping up and next steps
What you need
- ● Seed Collection Tools: 1 pair of clean, sharp pruning shears (or small scissors for delicate stems)
- ● 1-2 paper bags (brown lunch bags work great!) or envelopes for seed storage
- ● 1 fine-mesh sieve or colander (for drying and separating seeds)
- ● Harvesting Supplies: 1 notebook or label maker (to track seed types and harvest dates)
- ● 1 spray bottle with water (for cleaning seeds)
- ● 1 damp cloth or paper towels (for gentle seed separation)
- ● Drying & Storage Essentials: 1 well-ventilated area (like a sunny windowsill or drying rack)
- ● 1 airtight container (glass jars or resealable bags with silica gel packets for humidity control)
- ● 1 seed catalog or app (for identifying and organizing wild seeds)
- ● 1 humidity pack (to prevent mold in storage)
- ● 1 magnifying glass (for spotting tiny seeds)
- ● 1 labeling system (e.g., colored tags or sticky notes for easy sorting)
Step-by-step guide to twist-resistant wild seed harvesting
Here's how to collect seeds that'll thrive next season without tangling or breaking.
🌱 Step 1: Identify Mature Wild Seed Heads
Wait until seed heads turn brown or tan and begin splitting open—this signals full maturity. I always test by gently pressing a seed head; if seeds dust out easily, it's ready. Avoid harvesting when heads are still green or damp, as seeds won't store properly. Focus on 4-6 healthy plants per variety to ensure genetic diversity in next year's blooms.
Harvest on a dry, sunny morning when dew has evaporated. This prevents mold growth during drying. Use clean, sharp scissors to cut 2-3 inch stems below the seed head—longer stems make handling easier without adding bulk. Place cuttings in a paper bag (not plastic) immediately to catch falling seeds.
💧 Step 2: Dry Seeds Thoroughly Before Storage
Spread seed heads in a single layer on brown paper bags or screened trays in a well-ventilated, dry location (like a garage or shed). Keep them out of direct sunlight—indirect light prevents overheating while allowing airflow. Stir or shake the seeds every 2-3 days to ensure even drying.
Seeds are ready when they're completely dry and brittle—they should crumble easily between your fingers. If any seeds remain moist, they'll develop mold during storage. For tough seed heads (like milkweed), I place them in paper bags and hang them upside down to dry while seeds naturally fall out.
☀️ Step 3: Clean and Separate Seeds
Once dry, gently rub or brush seed heads over a clean white sheet or tray to separate seeds from chaff. I use a fine-mesh sieve for delicate seeds like poppies, shaking it gently to let seeds fall through while chaff stays behind. For larger seeds (like coneflowers), I simply pick them by hand under good light.
Store seeds in labeled paper envelopes or glass jars with silica gel packets to absorb moisture. I always include the harvest date and plant name on the label—this helps track viability over time. Keep containers in a cool, dark place (like a pantry) where temperatures stay below 70°F to maintain germination rates.
⏰ Step 4: Test Viability Before Next Season
Before planting, conduct a simple viability test: Place 10 seeds between damp paper towels in a sealed container. Keep them in a warm spot (70-75°F) and check daily. Seeds that sprout within 7-14 days are viable; discard any that remain dormant.
For seeds that pass the test, plant them in well-draining soil at the same depth they were collected. If you're unsure about timing, sow them in autumn—many wild seeds require cold stratification to germinate properly. Mark planting locations clearly to monitor next year's growth patterns.
Tips & tricks for perfect wild seed harvesting
Took me a while to figure these out, so here goes—these little details make all the difference when preserving wild seeds for planting.
Timing is Everything: Harvesting at the right moment is critical. I've learned the hard way that seeds harvested too early won't store properly, while waiting too long means they'll scatter naturally. The key is that perfect moment when seed heads turn brown or tan and begin splitting open—this usually happens in late summer to early fall, depending on your climate. For tough seed heads like milkweed, I wait until they're completely dry and brittle before handling them.
Drying Strategy: While the instructions mention drying for 2-3 days, I've found that some seeds—especially those from woody plants—may need up to a week in dry conditions. The trick is to monitor them daily: if any seeds remain moist, they'll develop mold. For seeds that are particularly stubborn, I place them in paper bags and hang them upside down to dry while seeds naturally fall out. This works especially well for milkweed pods.
Storage Wisdom: Labeling is non-negotiable. I use small, labeled paper envelopes or glass jars with silica gel packets to keep moisture at bay. The labels should include not just the plant name but also the harvest date—this helps track viability over time. Store containers in a cool, dark place (below 70°F) to maintain germination rates. I also add a small note about the location where the seeds were collected, which helps recreate ideal growing conditions later.
Viability Test: The 10-seed test is your best friend. Place seeds between damp paper towels in a sealed container and keep them in a warm spot (70-75°F). Check daily—seeds that sprout within 7-14 days are viable. If fewer than half sprout, consider storing the remaining seeds for another year or discarding them. This test saves you from planting non-viable seeds and wasting time and effort.
Pro Tips for Wild Seed Project
- Took me a while to figure these out, so here goes—these little details make all the difference when preserving wild s...
- Timing is Everything: Harvesting at the right moment is critical. I've learned the hard way that seeds harvested too ...
- Drying Strategy: While the instructions mention drying for 2-3 days, I've found that some seeds—especially those from...
Frequently asked questions
Got questions about the Wild Seed Project? You’re not alone! Here are answers to the most common queries to help you get started with confidence.
What’s the best time to harvest wild seeds for next year’s blooms?
The ideal time is late summer to early fall (August–October), when seed heads are fully mature but haven’t yet scattered. Look for dry, brown, or papery pods—this signals readiness. Harvest on a dry, sunny day to avoid moisture, which can spoil seeds.
Do I need special tools, or can I use household items?
While dedicated tools like pruners, seed scissors, or a vacuum seed collector make the job easier, you can DIY with:
- A clean pair of scissors or gardening shears for cutting seed heads
- A paper bag or envelope for storage (label with the plant name!)
- A soft brush to gently coax stubborn seeds from pods
How do I store harvested seeds to ensure viability?
Seeds need cool, dry, and dark conditions to stay fresh. Store them in:
- A paper envelope or breathable bag (plastic traps moisture)
- A cool, dry place (like a fridge or basement, not the freezer)
- Label each bag with the plant name and harvest date
What if my seeds won’t come out of the pod easily?
Some seeds are naturally stubborn! Try these tricks:
- Dry them out: Leave pods in a warm, dry spot for a few days to loosen seeds.
- Freeze them: Place pods in a sealed bag and freeze for 24 hours—thawing helps release seeds.
- Rub gently: Use a soft brush or your fingers to massage pods over a tray.
Can I use store-bought wildflower seeds instead of harvesting my own?
Store-bought seeds are a great backup if harvesting isn’t feasible. Look for:
- Native seed mixes (best for local ecosystems)
- Organic, untreated seeds (avoid chemical coatings)
- Clear labels on germination rates and planting instructions
Wrapping up and next steps
The Wild Seed Project isn’t just about harvesting seeds—it’s about preserving nature’s resilience for future blooms. By mastering twist-resistant techniques, you’re not only securing seeds for next year but also contributing to biodiversity. 🌱 Every seed you save is a promise of life, color, and growth waiting to unfold.
Ready to take the next step? Start small—dedicate a corner of your garden to wild seed collection this season. Share your progress with fellow gardeners or local conservation groups to multiply the impact. Your efforts today will bloom into something beautiful tomorrow!