
Lawn
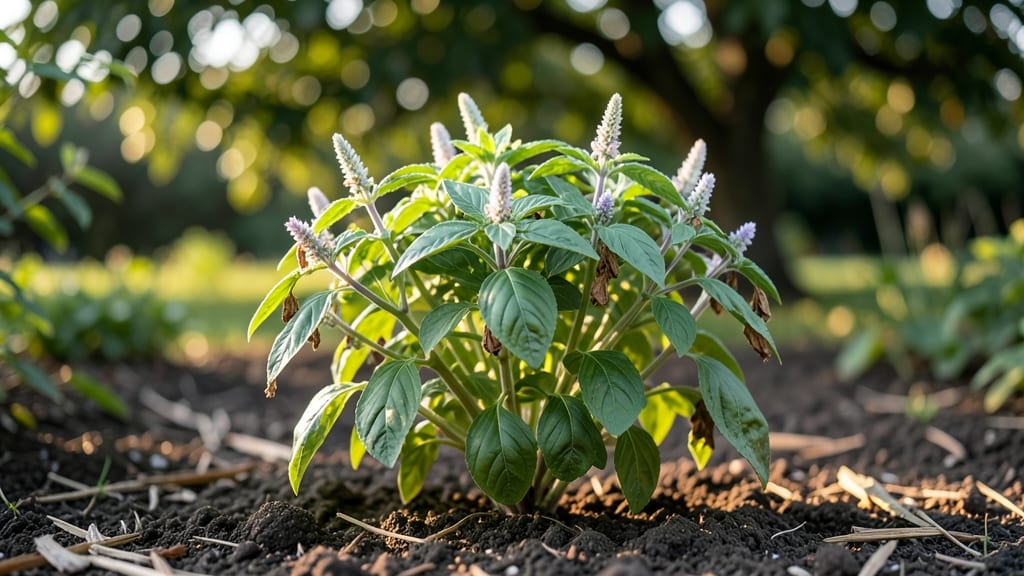
Saving basil seed pods means next year’s garden starts with free, homegrown plants that taste better than anything you’ll find at the store. 🌱 The trick is knowing exactly when to harvest those tiny pods—before they burst open and scatter seeds everywhere.
I’ve saved seeds from my own plants for years, and once you try it, you’ll never buy basil seeds again.
Mature seed pods form after flowers bloom and wither, turning from green to brown. Simply twist them gently until they release the tiny black seeds inside—no fancy equipment needed. These seeds stay viable for 2-3 years if stored properly in a cool, dry place.
The whole process takes less than 10 minutes from harvest to storage, and you’ll end up with enough seeds to grow a whole new crop.
What you’ll get is a head start on the season, with plants that adapt perfectly to your climate and soil. The first leaves from saved seeds are always more flavorful, and you’ll avoid the disappointment of store-bought varieties that never quite measure up.
Plus, there’s something deeply satisfying about holding a pod in your hand and knowing you’re growing next year’s harvest right there.
Works for any basil variety—Genovese, Thai, or purple—and even lets you experiment with heirloom types. Just be patient with germination, as basil seeds can take 7-14 days to sprout. Here’s how to do it right the first time.
📚 In This Guide
- What you need
- Instructions
- Tips and common mistakes
- Wrapping up and next steps
What you need
- ● Fresh basil plants: Mature basil plants (preferably Ocimum basilicum varieties) with fully developed seed pods (turning from green to brown). Aim for at least 3-5 healthy plants for a good yield.
- ● Sharp pruning shears or scissors: A pair of clean, sterilized shears to snip seed pods without damaging the plant.
- ● Brown paper bags or breathable seed-saving envelopes: 4-6 medium-sized bags (8x10 inches) to collect and dry the pods.
- ○ Newspaper or cardboard: A flat surface for drying pods indoors (optional but helpful for organization).
- ● Small mesh bags or paper towels: For separating seeds from dried pods (e.g., a fine strainer or cheesecloth).
- ● Permanent marker or labels: To mark varieties, harvest dates, and storage locations.
- ● Air-tight containers: Small glass jars or resealable plastic bags (1-2 oz capacity) for long-term seed storage.
- ○ Desiccant packets (optional but recommended): 1-2 packets to absorb moisture and extend seed viability.
- ● Hand lens or magnifying glass: For inspecting seed pods and seeds for quality.
- ● Humidity monitor: If storing seeds long-term in a climate-controlled space.
- ● Seed catalog or notebook: To track germination rates and notes on next year’s planting.
- ● Glove (lightweight): To protect hands from prickly pods or sap.
How to harvest and save basil seeds from dried pods
Here’s my foolproof method for collecting basil seeds—no fancy tools, just patience and a twist.
🌿 Step 1: Let Basil Plants Flower and Mature
Allow your basil to grow until it produces flowers. The tiny white blooms will form seed pods that look like miniature green beans. Don’t harvest the leaves once flowers appear—let them develop fully. This takes about 4-6 weeks after flowering begins.
Watch for the pods to turn from green to light brown—that’s your signal they’re ready. If you pick them too early, the seeds won’t be viable. I always leave the largest, healthiest plants to flower, as they produce the most seeds.
🌱 Step 2: Twist Off the Dried Seed Pods
Once the pods are dry and brittle, gently twist them off the stems. You’ll hear a faint pop as they release. Place them in a paper bag or envelope—plastic traps moisture and can cause mold. I like to label the bag with the basil variety and harvest date.
Don’t rush this step. If the pods still feel green or soft, they need more time. The seeds inside must fully mature to germinate properly. A few stubborn pods might resist—just give them a little more time on the plant.
💧 Step 3: Dry and Separate the Seeds
Spread the pods on a clean, dry surface in a warm, dry spot for 3-5 days. They’ll crumble easily once fully dry. Once they’re brittle, gently crush them between your fingers or roll a pin over them in the bag to release the tiny black seeds.
Sift the mixture through a fine mesh strainer or cheesecloth to separate seeds from debris. The seeds are so small they’ll float through like dust—just catch them in another container below. Discard any chaff or empty pods.
⏰ Step 4: Store Seeds Properly for Next Year
Transfer the seeds to a small airtight container, like a glass jar or envelope. Add a silica gel packet or a few drops of food-grade mineral oil to absorb moisture. Label with the date—basil seeds stay viable for 2-3 years if stored correctly.
Keep the container in a cool, dark place, like a pantry or seed vault. Check it occasionally for moisture or pests. Properly stored seeds will germinate just as well as fresh ones, giving you a head start next growing season.
Tips & tricks for perfect basil seed pod harvesting
A few simple tricks will help you maximize your seed yield and ensure viability for next year's garden.
Timing is Everything: The 4-6 week flowering period is crucial—don't rush it! I've learned the hard way that impatient harvesting leads to empty pods. Watch for the pods to turn from green to light brown, and only then proceed. This color change signals the seeds are fully mature and ready to collect.
Pod Selection Strategy: Focus on the largest, healthiest plants for seed production. These will yield the most seeds. I typically select 2-3 of my strongest plants to flower, while continuing to harvest leaves from others. This gives me both fresh basil and seeds without sacrificing too much growth.
Drying Technique: When drying your pods in Step 3, choose a warm, dry spot away from direct sunlight. A windowsill with indirect light works perfectly. The 3-5 day drying period is non-negotiable—rushing this step can lead to moldy seeds. If you're in a humid climate, you might need to extend this to 7 days for complete dryness.
Storage Wisdom: For long-term storage, I recommend using glass jars over plastic containers. The glass provides better moisture protection, and you can easily see the seeds inside. If you don't have silica gel packets, a few drops of food-grade mineral oil on the seeds before sealing works just as well to prevent moisture absorption.
Pro Tips for Basil Seed Pods
- A few simple tricks will help you maximize your seed yield and ensure viability for next year's garden.
- Timing is Everything: The 4-6 week flowering period is crucial—don't rush it!
- Pod Selection Strategy: Focus on the largest, healthiest plants for seed production.
Frequently asked questions
Got questions about saving basil seed pods? You’re not alone! Here are some of the most common queries—plus straightforward answers to help you twist, release, and store those seeds like a pro.
How do I know when basil seed pods are ready for harvesting?
Basil seed pods are ready when they turn light brown and start splitting open on their own. If you wait too long, the tiny seeds will scatter—so harvest them just as the pods begin to crack. Aim for late summer or early fall, depending on your climate.
Can I save seeds from basil plants grown indoors?
Yes! Indoor basil can still produce seed pods, but you’ll need to hand-pollinate the flowers with a small brush or cotton swab to encourage seed development. Place the plant near a sunny window or under grow lights to maximize success. Just be patient—indoor pods may take longer to mature than outdoor ones.
What’s the best way to store basil seeds after harvesting?
Once dried, remove seeds from the pods and store them in a cool, dry place (like a sealed envelope or airtight container). Label with the date—they’ll stay viable for 2–3 years if kept away from moisture and light. Pro tip: Add a silica gel packet to absorb extra humidity!
What if my basil flowers but doesn’t produce seed pods?
Lack of seed pods often means the plant was stressed (too much water, poor light, or over-fertilizing). Next time, let the soil dry slightly between waterings and avoid heavy nitrogen fertilizers. If your basil is genetically sterile (like some hybrid varieties), seeds won’t form—opt for heirloom types instead.
Are there alternatives to saving basil seed pods?
If seed-saving feels tricky, buy fresh seeds from a reputable supplier or propagate basil from cuttings. Simply snip a healthy stem, strip the leaves, and root it in water—new plants in 2–3 weeks! For large-scale needs, check local nurseries or seed swaps.
Wrapping up and next steps
Saving basil seed pods is a simple yet rewarding way to ensure your garden thrives next season! With just a few tools and a little patience, you can collect, dry, and store these tiny treasures for future planting—no fancy equipment needed.
Whether you're a seasoned gardener or just starting out, this method makes seed saving effortless and cost-effective.
Ready to take the next step? Start by harvesting your basil plants before the first frost—then follow the twist-and-release trick to unlock fresh seeds for your 2025 garden. Happy growing! 🌱✨