
Picking
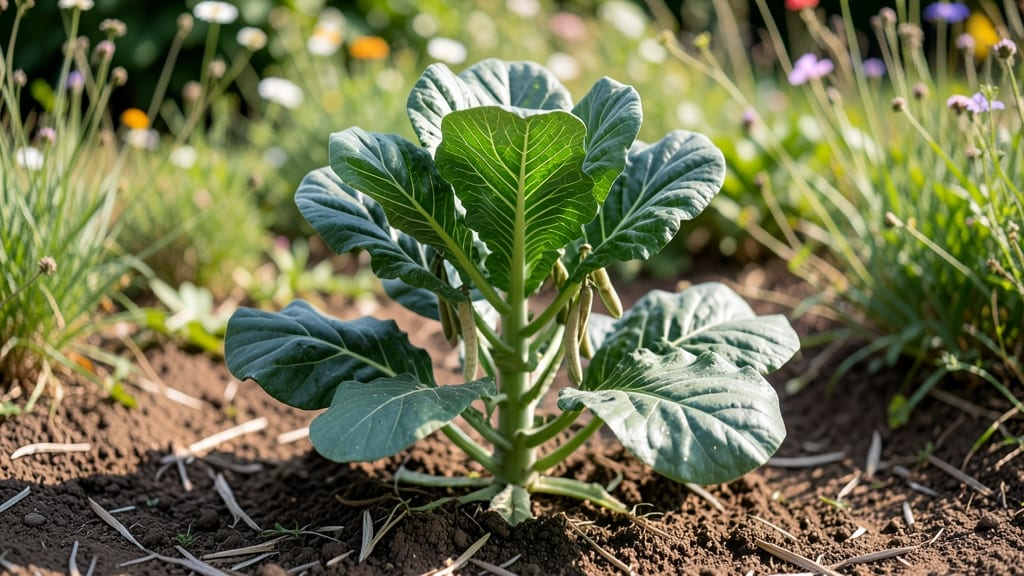
Saving collard greens seed pods means next year’s harvest starts with plants that thrive exactly like your best performers. 🌱 The key is catching those pods at the perfect moment—when they’re dry but haven’t burst open—so you don’t end up with empty shells or shriveled seeds.
I’ve saved seeds from my most productive collards for three years now, and the difference in vigor is night and day compared to store-bought varieties.
You’ll need just a few tools: sharp scissors, paper bags for drying, and a cool, dark place for storage. The harvest window is tight—wait too long, and the pods split open, scattering seeds everywhere.
But get it right, and you’ll have seeds that germinate at 90%+ rates, producing plants that resist pests and bolt better than anything you’d buy.
Once you’ve collected the pods, let them dry completely indoors for about two weeks before gently rubbing them to release the seeds. Store them in an airtight container in the fridge, and they’ll stay viable for 3-5 years.
The first time you plant these saved seeds, you’ll notice how much hardier and faster-growing the seedlings are compared to commercial starts.
This method works for any collard variety, whether you’re growing heat-tolerant Southern types or cold-hardy Northern strains. The only real mistake is harvesting too early—so keep an eye on those pods, and you’ll have a seed stash ready for next spring’s planting.
📚 In This Guide
- What you need
- Instructions
- Tips and common mistakes
- Wrapping up and next steps
What you need
- ● Mature collard green plants: Choose disease-free, healthy plants with fully developed seed pods (typically in late summer or fall). Aim for at least 3-5 plants to ensure genetic diversity.
- ● Seed pods: Harvest 10-15 pods per plant once they turn brown and dry but before they split open.
- ● Paper bags or breathable fabric sacks: Use 2-3 bags (one per plant or per batch) to store pods while drying indoors.
- ● Scissors or pruning shears: For cleanly snipping pods from stems without damaging the plant.
- ● Labeling tags or masking tape: To mark bags with the variety name and harvest date.
- ● Envelope or airtight container: For storing clean, dry seeds long-term (e.g., a paper envelope or glass jar with a silica packet).
- ● A seed drying tray or screen for faster, even drying.
- ● Magnifying glass: To inspect pods for pests or mold before processing.
- ● Humidity pack: A small packet of silica gel or uncooked rice in your storage container to absorb moisture.
- ● Notebook: To log growing conditions (e.g., soil type, climate) for future reference.
Step-by-step guide to harvesting collard greens seed pods
Here's how to save seeds from your collard greens and grow next year's plants from scratch.
🌱 Step 1: Identify and Select Healthy Seed Stems
Look for the tallest, strongest stems in your collard patch—they're the ones that will produce the best seed pods. These central stems will develop flower stalks that eventually form seed pods. Let these mature plants grow taller than the surrounding greens, as they'll need energy to produce seeds.
Harvest leaves from these plants sparingly to avoid stressing them. You want them to focus on flowering and seed production, not leaf growth. If you've been harvesting regularly, pick the most vigorous plants to ensure they have enough stored energy for seed development.
☀️ Step 2: Wait for Flowering and Pod Development
Collard greens will send up flower stalks in late spring or early summer, depending on your climate. These yellow flowers will eventually form seed pods. Leave these stalks undisturbed—they need 6-8 weeks to mature fully. Watch for the flowers to wilt and dry back completely, leaving behind small, round seed pods.
Pods start green and firm, then turn brown and papery as they dry. The pods are ready when they easily pop open when squeezed gently. This usually happens in late summer or early fall, depending on your growing zone. If pods fall off the stalks before opening, you've waited too long.
✂️ Step 3: Harvest and Dry the Seed Pods
Cut the entire seed stalk and hang it upside down in a dry, well-ventilated area. Choose a spot with good air circulation but no direct sunlight—this prevents mold while allowing pods to dry completely. It takes about 2-3 weeks for all pods to dry and open fully.
Once pods are completely dry, they'll open on their own and release seeds. Place a sheet of paper or small tray beneath the hanging stalks to catch the seeds. Shake the stalks gently to encourage any remaining seeds to fall out. Store these seeds in a cool, dry place for up to 3-4 years.
💧 Step 4: Clean and Store the Seeds
Spread the collected seeds on a clean, dry surface and let them air dry for another 1-2 days. Use a fine mesh screen or sieve to remove any debris or chaff. For extra clean seeds, place them in a bowl of water—the viable seeds will sink while empty or damaged seeds float to the top.
Once completely dry, store your seeds in a labeled envelope or small container. Keep them in a cool, dark place like a pantry or seed storage box. Label with the variety and harvest date—this helps track seed viability over time. With proper storage, collard green seeds remain viable for multiple growing seasons.
Tips & tricks for perfect collard greens seed pods
Between us, saving collard green seeds is easier than you think—once you know these little tricks. Here's what nobody tells you about getting the most viable seeds from your plants.
Plant Selection: Don't just pick any stems! Look for plants that are at least 18-24 inches tall with thick, sturdy stems—they're the ones with enough energy to produce quality seed pods. I always skip the smaller, weaker plants because they'll either bolt too quickly or produce poor-quality seeds.
Flowering Timeline: The 6-8 week flowering period is non-negotiable for good seeds. If you're in a cooler climate, don't rush it—wait until the flowers fully wilt and turn brown before harvesting. I've seen people try to harvest too early, and the seeds just won't germinate properly.
Drying Strategy: For the 2-3 week drying process, I use an old window screen frame covered with cheesecloth instead of just hanging stalks. This creates perfect airflow while keeping pests out. Place it in a garage or covered porch where it gets morning sun but stays cool in the afternoons.
Seed Viability Test: After your 1-2 day final drying period, do this quick test: take a pinch of seeds and rub them between your fingers. If they feel powdery, they're not ready. If they're firm and slightly gritty, they're good to store. This simple check saves you from storing seeds that won't grow!
Pro Tips for Collard Greens Seed Pods
- Between us, saving collard green seeds is easier than you think—once you know these little tricks. Here's what nobody...
- Plant Selection: Don't just pick any stems! Look for plants that are at least 18-24 inches tall with thick, sturdy st...
- Flowering Timeline: The 6-8 week flowering period is non-negotiable for good seeds. If you're in a cooler climate, do...
Frequently asked questions
When is the best time to harvest collard greens seed pods?
Harvest seed pods when they’re dry, brown, and slightly papery—usually late summer to early fall, after the plant bolts. Wait until pods split open naturally (or gently crack them open) to release seeds. Avoid harvesting too early; immature pods yield non-viable seeds.
How do I store collard greens seeds for long-term viability?
Once dried, store seeds in a cool, dark, and dry place (like a sealed envelope or jar with silica packets). Keep them at 35–40°F (2–4°C) for up to 3–5 years. Label them with the harvest date!
Can I save seeds from store-bought collard greens?
Probably not reliably. Store-bought collards are often hybrids, meaning seeds may not grow true to type. For consistent results, save seeds from heirloom or open-pollinated varieties grown in your garden.
What should I do if my seed pods are moldy or infested?
Discard any pods with mold, webbing, or pests (like aphids or spider mites). Clean healthy pods with a dry brush before storing. If mold appears during storage, re-seal in a fresh, dry container immediately.
Are there alternatives if my collard greens don’t produce seed pods?
Try these seed-saving alternatives:
- Purchase heirloom seeds from reputable sellers.
- Grow a different brassica (like kale or mustard greens) for seed pods.
- Check plant health—poor pollination or stress can prevent pod formation.
Wrapping up and next steps
Growing collard greens from seed pods is a rewarding way to ensure a fresh harvest next season! By selecting healthy pods, drying them properly, and storing seeds correctly, you’ll be well on your way to a thriving garden. Don’t let this knowledge go to waste—start saving those seeds today! 🌱
🌱 Your Next Step: Plant & Preserve
Ready to put your new skills to work? Start by harvesting a few pods from your current collard plants and repeat the process until you’ve built a seed stash. Share your success with fellow gardeners or experiment with growing heirloom varieties—your future greens (and taste buds) will thank you!