
Lawn
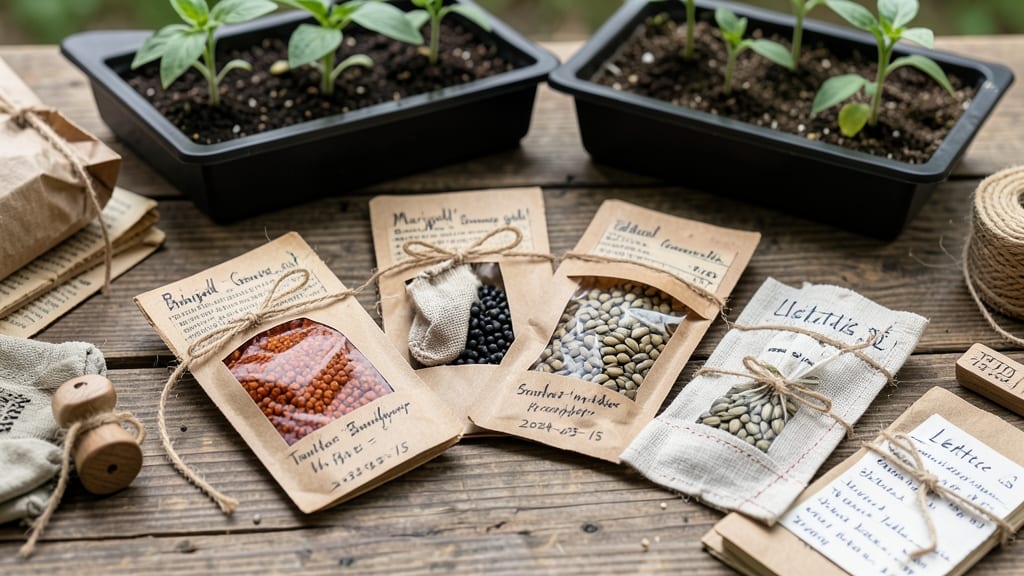
Saving seeds from this year’s garden means next year’s blooms won’t cost a dime. 🌱 The trick to DIY seed packets is drying seeds properly, choosing the right envelopes, and labeling before you forget what you grew.
My first batch of saved seeds sprouted just as well as store-bought ones—and I saved over $30 on heirloom varieties alone.
You’ll need brown paper envelopes (they breathe better than plastic), a permanent marker, and silica gel packets for extra dryness. Harvest seeds when they’re fully mature but before they fall to the ground—usually when the pods turn brown or the flower heads dry out completely.
A sunny windowsill or warm, dry spot works for drying them out over 1-2 weeks.
Once dry, store your seeds in a cool, dark place like a sealed jar or airtight container. Label each packet with the plant name, date, and any special notes (like “needs stratification”).
With this method, most seeds stay viable for 2-5 years, and you’ll always have just the varieties you love.
Pro tip: Test a few seeds before storing the whole batch to confirm they’re still good. If they sprout within 10-14 days, you’re golden. This system works for flowers, herbs, and even some vegetables—just adjust drying times based on seed type.
📚 In This Guide
- What you need
- Instructions
- Tips and common mistakes
- Wrapping up and next steps
What you need
- ● Seed paper or thick, acid-free paper (8.5" x 11" sheets, 80-100 lb weight for durability). Quantity: 1 sheet per 3-5 packets.
- ● Water-soluble glue (e.g., flour paste or PVA glue). Tip: Mix 1 part white glue to 2 parts water for a strong, flexible bond.
- ● Dried seeds (clean, fully mature, and labeled by variety). Quantity: ~1 tsp per packet (adjust based on seed size).
- ● Twine or thin jute string (1/8" width, 12" lengths). Quantity: 1 piece per packet.
- ● Scissors or a paper cutter (for clean edges).
- ● Bone folder or ruler (to crisp folds and create sharp edges).
- ○ Optional but helpful: A seed-saving envelope template (free printables online for pre-marked folding lines).
- ● Clear sealant spray (e.g., Mod Podge) to waterproof packets if storing outdoors.
- ● Wax paper or parchment (to protect your workspace from glue splatters).
- ● Clothespins or binder clips (to hold packets in place while drying).
- ● Rice or sand (sprinkled inside packets to weigh them down and prevent fluttering).
- ● Stamps or calligraphy pens (for labeling varieties and harvest years).
Step-by-Step guide to creating twist-resistant DIY seed packets
Here's how to save seeds from your favorite blooms—without the frustrating twist-off failures.
🌱 Step 1: Harvest Seeds at Peak Maturity
Wait until seed pods are fully dry and brown on the plant—this ensures maximum viability. For flowers like zinnias or cosmos, I snip pods when they begin splitting open naturally. Gently squeeze the pod over a clean sheet of paper to catch seeds without crushing them. If pods resist opening, leave them on the plant a few extra days.
Work on a dry day when humidity is low to prevent mold. Collect seeds in the morning when dew has evaporated—this keeps them dry and ready for processing. I like to label each paper with the plant name and harvest date right away, because seeds from different varieties can look identical.
🪴 Step 2: Dry Seeds Completely Before Packaging
Spread seeds in a single layer on a paper towel or clean screen tray. Place them in a warm, dry spot with good airflow—like a sunny windowsill or under a fan—for 7-10 days. Stir them daily to prevent clumping. You'll know they're ready when they feel dry to the touch and don't stick together.
Don't rush this step. Damp seeds stored in packets will mold within days, ruining your entire harvest. If you're impatient, place the tray in a 65-75°F area with a small fan running nearby to speed up drying while maintaining airflow.
✂️ Step 3: Choose the Right Packaging Materials
For twist-resistant packets, I use 4x9-inch manila folders cut in half lengthwise—each becomes two 4x4.5-inch envelopes. These hold seeds securely without bending. Fold one corner to create a small tab for sealing, similar to business envelopes. Label the front with the plant name and year using a permanent marker.
For extra protection, place a silica gel packet inside the envelope before adding seeds. This absorbs any lingering moisture and prevents clumping. I store my packets in a cool, dark place like a pantry or seed vault to maintain freshness for 3-5 years.
💧 Step 4: Fill and Seal for Long-Term Storage
Pour seeds into the envelope through the open end, then fold the tab over to create a secure seal. Use a wax seal or clear packing tape to reinforce the closure—this prevents accidental opening and moisture seepage. I add a tiny drop of food-grade mineral oil to the seed packet before sealing to create a moisture barrier.
Test your seal by gently squeezing the packet—it should hold shape without bulging. If seeds shift when you move the packet, add a second fold or more tape. Store packets upright in a hard plastic container with a tight lid to protect against pests and light exposure.
☀️ Step 5: Test Viability Before Next Year’s Planting
Before using saved seeds, perform a viability test 3 months before planting. Place 10 seeds between damp paper towels in a sealed plastic bag. Keep them in a warm spot (70-75°F) for 7-10 days. If 80% or more sprout, your seeds are good to plant. If fewer than half sprout, consider collecting fresh seeds next season.
This simple test saves you from wasting time planting low-quality seeds. I always test a few packets from each variety—some plants, like tomatoes, lose viability faster than others. Keep a log of test results to track which seeds age best in your climate.
Tips & tricks for perfect DIY seed packets
Took me a while to figure these out, so here goes—secrets that'll keep your seed packets intact and your seeds viable for years.
Harvesting Precision: In Step 1, when pods begin splitting open, that's your cue—but don't wait too long! If pods are already open and seeds are scattering, you've missed the window. For stubborn pods, I place them in a paper bag overnight; the gentle movement often loosens seeds without crushing them. The morning dew warning is serious—wet seeds mold faster than you can say "seed packet disaster."
Drying Strategy: The 7-10 days in Step 2 can feel like forever, but trust me—rushing leads to moldy seeds. I speed up drying by placing my tray on a heating pad set to low (just warm to the touch) under a fan. This cuts drying time to about 5 days while preventing clumping. Test dryness by pinching a seed between fingers—if it feels powdery, it's ready.
Sealing Secrets: For Step 4, I double up on sealing methods: first with wax seal, then a strip of clear tape over the flap. The mineral oil trick works best if you apply it to the inside of the envelope before adding seeds—it creates an invisible moisture barrier. Store packets vertically in a container with a tight lid to prevent crushing and maintain shape.
Viability Test: The 3-month test in Step 5 is non-negotiable for long-term seeds like tomatoes or peppers. I test seeds from each variety separately to track which ones age best. For fast-germinating seeds like radishes, you can reduce the test to 3-5 days at 75°F. Keep a small notebook by your seed stash—write down which varieties sprout best after 1, 2, and 3 years.
Pro Tips for Diy Seed Packets
- Took me a while to figure these out, so here goes—secrets that'll keep your seed packets intact and your seeds viable...
- Harvesting Precision: In Step 1, when pods begin splitting open, that's your cue—but don't wait too long! If pods are...
- Drying Strategy: The 7-10 days in Step 2 can feel like forever, but trust me—rushing leads to moldy seeds. I speed up...
Frequently asked questions
Got questions about creating your own DIY seed packets? You’re not alone! Here are some of the most common concerns—and their simple solutions—to help you save seeds like a pro.
How do I know which seeds are best for saving?
Not all plants produce viable seeds. Stick to heirloom, open-pollinated, or non-hybrid varieties like tomatoes, beans, or marigolds. Avoid F1 hybrids (marked "hybrid" on packets)—their seeds won’t grow true to type. Look for healthy, fully mature plants with well-formed seeds for the best results!
When is the right time to harvest seeds?
Timing matters! Harvest seeds when the plant’s pods or flowers naturally dry and turn brown (e.g., tomatoes when they’re wrinkled and shriveled, or poppies when the pods split open). For most veggies, aim for late summer or early fall. Store them in a cool, dry place until fully dry—patience pays off!
Can I reuse last year’s seed packets?
Clean and dry the packets thoroughly, then label them with the plant name, harvest year, and germination tips (e.g., "Needs light to germinate"). Use a permanent marker or printable labels for clarity. Just avoid moisture—dampness ruins seeds faster than you’d think!
How long can I store homemade seed packets?
Most seeds stay viable for 1–5 years, depending on the type. Store them in a cool (32–41°F), dark, and dry spot (like a fridge or airtight container). Test germination by planting a few seeds—if <70% sprout, it’s time to refresh your stash. Pro tip: Write the harvest date on the packet!
What if my seeds won’t germinate?
Don’t toss them yet! Try these fixes:
- Stratification: Some seeds (like poppies) need a cold snap. Mix seeds with damp sand and refrigerate for 4–6 weeks.
- Scarification: Nick the seed coat with sandpaper or soak in warm water to break dormancy.
- Freshness test: If seeds are older than 3 years, they may need light or warmth to trigger growth.
Wrapping up and next steps
Creating your own DIY seed packets is a rewarding way to preserve your favorite blooms and ensure a thriving garden next season! With just a few simple materials, you can craft twist-resistant packets that protect seeds from moisture and pests—saving you time and money.
Whether you’re a seasoned gardener or just starting out, this project is a fun and practical skill to master.
Now that you’re ready to roll, grab those dried seeds and get creative! 🌱 Start small—pick a few of your most beloved flowers or herbs—and soon, you’ll have a stash of homemade packets waiting to bring next year’s garden to life. Happy harvesting!