
Lawn
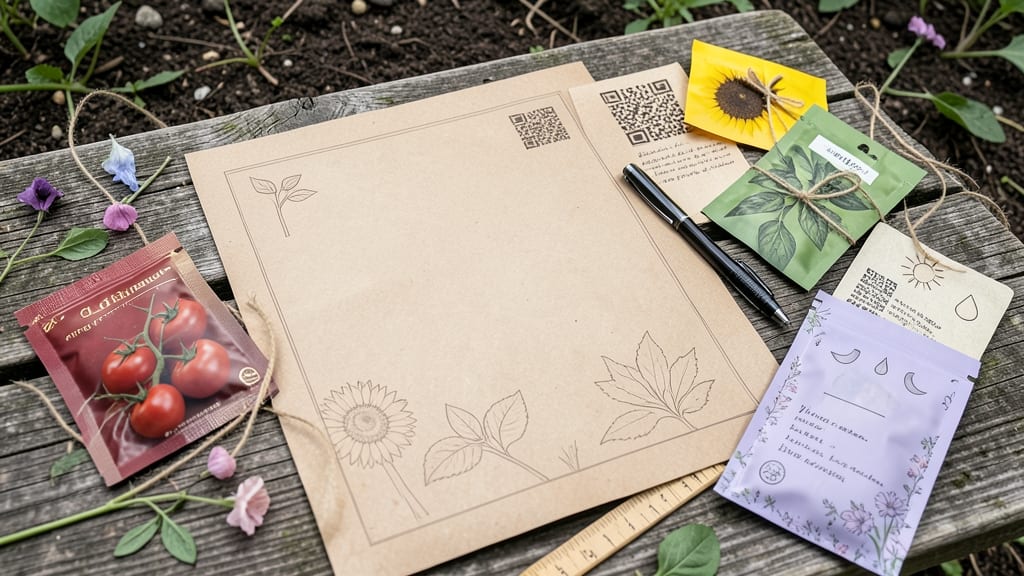
My seed envelope template game-changer transformed my chaotic seed collection into a foolproof system that saves me time and headaches every growing season. 🌱 Before this, I'd mislabel packets, forget germination rates, and lose seeds in the back of my storage bin—until I created custom labels that track everything from variety names to planting dates.
The best part? You don’t need fancy tools—just a printer, basic templates, and a little creativity. I’ll show you how to add color-coding by plant family, include QR codes linking to seed details, and even track harvest notes right on the envelope.
This system cuts my spring planning time in half while keeping my garden organized for years.
Imagine never stressing about which packet is which again, or losing seeds because they were tucked too far back. With these templates, you’ll have a visual inventory at a glance, making seed saving and garden planning effortless.
Plus, it’s a great way to pass on your favorite varieties with all the care instructions included.
Whether you’re a seed-saving pro or just starting to organize your collection, this method scales perfectly. Ready to turn your seed storage into a well-oiled system? Let’s get started with the easy steps and customization tips that’ll have your seeds ready for planting in no time.
📚 In This Guide
- What you need
- Instructions
- Tips and common mistakes
- Wrapping up and next steps
What you need
- ● Seed envelopes or kraft paper: 3" x 5" or 4" x 6" (standard sizes work best). Quantity: Enough for your seed collection (e.g., 10–50+ depending on needs).
- ○ Printer: Laser or inkjet (for crisp text). Optional: Use a local print shop for bulk printing.
- ● Printable seed envelope template: Download a free or premium template (e.g., from Etsy, Canva, or DIY designs). Tip: Choose one with fields for seed name, variety, planting date, and storage notes!
- ● Pens or markers: Fine-tip black or dark-colored ink for handwritten labels (if not printing).
- ● Adhesive labels or tape: For attaching printed templates to envelopes (e.g., 3M Scotch tape or Avery labels).
- ● Ruler or measuring guide: Ensures consistent label placement.
- ● Hole punch & twine: For hanging seed packets in a garden organizer.
- ● Clear laminator or laminate sheets: Protects labels from moisture (great for outdoor storage!).
- ● Color-coded folders or bins: Organize envelopes by plant type, season, or maturity.
- ● Digital design tools: Canva, Microsoft Word, or Adobe Illustrator (for customizing templates).
How to create a custom seed envelope template for efficient storage
Here's how I design my seed envelopes—simple, clear, and packed with all the info I need to track varieties year after year.
📝 Step 1: Gather Essential Seed Information
Start by collecting these key details for each seed packet: the variety name, purchase year, source (seed company or where you saved seeds), and days to maturity if applicable. I keep a small notebook nearby while organizing seeds to jot down any additional notes like germination rates or special growing conditions. For heirloom varieties, I also include the origin—this helps me track genetic diversity over generations.
If you're organizing seeds you've collected yourself, check the packet for any existing labels or codes. Some companies use internal numbering systems that might not mean much to you, so translate those into your own terms. For example, "BAS-003" might become "Basil 'Genovese' from Baker Creek." This step ensures you'll recognize your seeds years later without confusion.
✏️ Step 2: Design the Envelope Layout
Use a standard 3x5-inch index card or A6 envelope for your template—these sizes fit neatly in seed storage boxes. Divide the space into labeled sections: "Variety", "Year", "Source", "Days to Maturity", and "Notes". I like to use a bold header for each category to make scanning quick during planting season. Leave extra space at the bottom for handwritten germination observations or planting reminders.
For visual clarity, I use a light pencil or fine-tip marker to sketch a simple table layout before printing or writing. This ensures all information fits neatly without crowding. If you're using digital templates, align the text boxes so they're easy to fill out consistently. The goal is to make future you grateful for the organization—trust me, you'll thank yourself when you're pulling seeds in February and need to know which ones need stratification.
🖨️ Step 3: Print or Handwrite Your Template
For durability, I print my templates on acid-free cardstock or laminated paper—this prevents ink from smudging or fading over time. If you're handwriting, use a permanent marker like Sharpie to ensure the text doesn't bleed through the envelope. For digital templates, save them as PDFs to maintain formatting across devices. I keep a stack of these in my seed storage box so I can label new packets immediately after opening them.
Here's the thing—don't overcomplicate it. A simple, clear layout beats a fancy design that's hard to read in low light. I've seen gardeners use color-coding for different plant families (e.g., red for tomatoes, blue for herbs), but only if it genuinely helps you. Test your template with a few packets first to see what works best for your workflow.
📦 Step 4: Label and Store Your Seeds
Once you've designed your template, fill out an envelope for each seed packet before storing them. Place the labeled envelope inside the seed packet or tape it directly to the outside if the packet is small. I like to include a small magnet or clip on the envelope so I can attach it to my seed storage box lid for quick access during planning. For bulk seeds, consider using small ziplock bags with the template printed on them—this keeps everything contained and organized.
Store your seeds in a cool, dark place with low humidity, like a sealed container in your refrigerator or a dedicated seed vault. Check the envelopes annually to update germination notes or adjust planting reminders. If you're using digital templates, take a photo of each labeled packet and save it in a cloud folder—this creates a backup in case of misplacement or damage.
⏰ Step 5: Maintain and Update Your System
Every spring and fall, review your seed collection and update your envelopes. Note which seeds germinated well, which didn't, and any changes in growing conditions. I also add a "Last Tested" date to track how long seeds remain viable. For example, if a packet of beans from 2020 still sprouted in 2024, I know they have a long shelf life. This helps you avoid wasting seeds that may no longer be viable.
If you find yourself struggling to keep up, set a reminder on your phone or calendar to spend 15 minutes every month updating your seed database. Over time, you'll build a system that feels effortless—one that makes seed saving and organizing a joy, not a chore. And when you pull out a perfectly labeled packet years later, you'll realize how much this small effort has paid off.
Tips & tricks for perfect seed envelope organization
These practical strategies will help you create a system that lasts for years—no more digging through mystery packets or losing track of heirlooms.
Template Durability: For long-term storage, I recommend using laminated cardstock or waterproof paper instead of regular printer paper. The moisture in seed storage containers can cause regular paper to degrade within months, while laminated templates stay crisp and readable for years. If you're handwriting, opt for archival-quality markers that resist fading—Sharpie's permanent markers work well, but avoid alcohol-based ones that can dissolve over time.
Digital Backup Strategy: I've learned the hard way that even the best physical system can fail. After testing multiple methods, I now photograph each labeled envelope and store the images in a cloud folder organized by plant family. This creates an instant backup if your physical labels get lost or damaged. You can even create a simple spreadsheet with all your seed information for quick searching—just match the variety names to your photos.
Color-Coding Secrets: While the instructions mention color-coding as optional, I've found it invaluable for visual gardeners. Assign consistent colors to plant families (e.g., green for leafy greens, red for tomatoes) and use matching highlighters on your envelopes. This makes scanning your collection during planting season faster than ever. Just be consistent—if you choose red for tomatoes, stick with it for all tomato varieties. Pro tip: Use a color legend on your storage box lid for reference.
Annual Review Hack: Don't let your seed organization become a chore. Set a reminder for 15 minutes every spring to update your envelopes with germination notes from the previous year. I've found that dedicating just this small window prevents the system from feeling overwhelming. During your review, also check seed viability by testing a few from each packet—this helps you avoid wasting old seeds that may no longer sprout. Mark non-viable packets with a small "X" to quickly identify them next season.
Pro Tips for Seed Envelope Template
- These practical strategies will help you create a system that lasts for years—no more digging through mystery packets...
- Template Durability: For long-term storage, I recommend using laminated cardstock or waterproof paper instead of regu...
- Digital Backup Strategy: I've learned the hard way that even the best physical system can fail. After testing multipl...
Frequently asked questions
Got questions about using a seed envelope template for your garden? You’re not alone! Here are some of the most common queries—plus quick, actionable answers to keep your seed storage game strong.
What information should I include on my seed envelope?
At a minimum, jot down the seed variety, harvest date, and planting instructions (depth, spacing, sunlight needs). Add extras like purchase date, germination rate, or special notes (e.g., "needs stratification"). Pro tip: Use a QR code linking to a digital garden journal for extra details!
How long can I store seeds in envelopes before they lose viability?
Most seeds last 1–5 years in cool, dry conditions (50°F or below, <40% humidity). Check the seed packet for specifics—some, like beans, may only last a year, while others (like peas) can survive a decade. Store envelopes in airtight containers with silica gel packets to extend shelf life.
Can I reuse seed envelopes from store-bought seeds?
Just wipe them clean with rubbing alcohol to kill bacteria, then reprint or handwrite your new labels. For a sustainable touch, repurpose envelopes from old seed packets or use recycled kraft paper. Just avoid envelopes with moisture damage—they won’t protect seeds long-term.
What’s the best way to print or handwrite seed envelope templates?
For printing: Use a laser printer on archival-quality paper (acid-free) to prevent ink smudging. For handwriting, opt for a fine-tip marker or pencil (so you can erase mistakes). Laminate labels if you’re storing them long-term—it adds durability and protects against spills.
My seeds aren’t germinating—could my envelope labels be the issue?
Unlikely! But check for moisture damage (moldy labels = bad news) or ink smudges blocking seed identification. If seeds are old, they may just need scarification or stratification. Test a few seeds in damp paper towels to diagnose—if they sprout, the envelope itself isn’t the culprit.
Wrapping up and next steps
Organizing your seed collection doesn’t have to be a chore—with a custom seed envelope template, you can turn chaos into clarity in minutes! Whether you’re a seasoned gardener or just starting, these labels ensure your seeds stay fresh, labeled, and ready for planting. 🌱
Now that you’re equipped with the perfect template, take the next step—print, personalize, and start organizing your seed stash today! Your future garden (and sanity) will thank you.