
Lawn
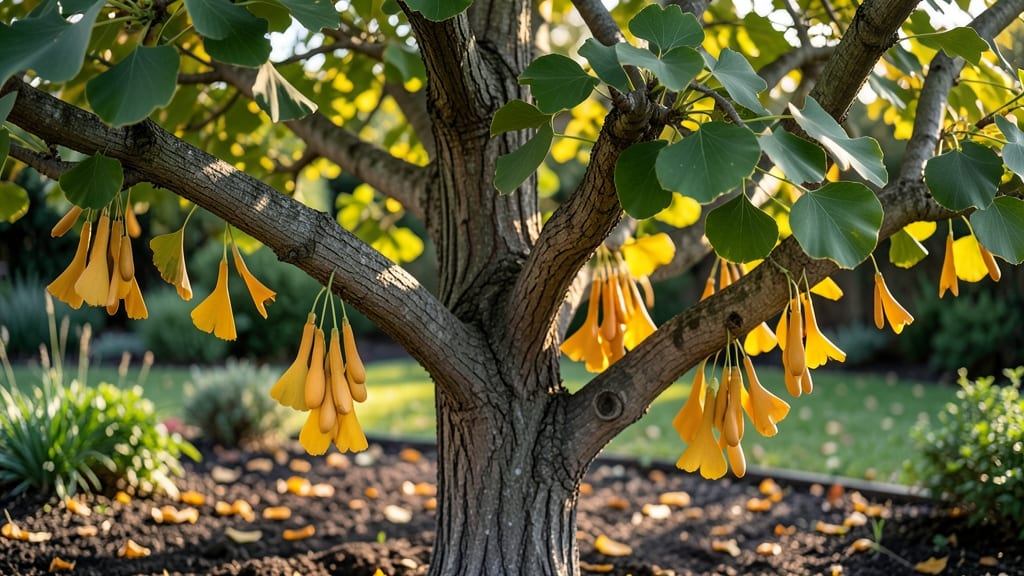
Harvesting ginkgo tree seed pods means skipping the messy, sticky struggle of dealing with their infamous "twist" when fresh. 🌿 The key is timing—wait until those pods turn from green to a golden brown, usually in late September or October, when they’re dry enough to handle without leaving a residue on your hands.
Once ripe, the pods split open naturally, revealing the seeds inside. You’ll want to collect them before they hit the ground, as squirrels and birds have a habit of snatching them up.
A simple method is to shake the branches gently over a tarp or bucket, then sift through the debris to find the plump, nut-like seeds. These seeds aren’t just for planting—they’re also edible (though they have a strong, acquired taste) and historically used in traditional medicine.
But for gardeners, the real payoff is growing a ginkgo tree from scratch, a living fossil that thrives for centuries with minimal care. The challenge?
Viability drops sharply after a few weeks, so store seeds in a cool, dry place until you’re ready to stratify them—cold treatment for 3-4 months mimics winter and tricks them into sprouting. Here’s how to do it right without losing your patience (or your seeds).
📚 In This Guide
- What you need
- Instructions
- Tips and common mistakes
- Wrapping up and next steps
What you need
- ● Ginkgo tree seed pods: 10–20 fresh, mature pods (harvested in fall, ideally October–November when they turn yellowish-brown).
- ● Sharp pruning shears or small saw: For safely cutting pods from branches (avoid damaging the tree!).
- ● Glove: 1 pair (thick gardening gloves to protect against the stinky ginkgolides—yes, they do smell!).
- ● Bucket or breathable mesh bag: 1 large container to collect pods (avoid plastic if storing long-term).
- ● Paper towels or newspaper: 2–3 sheets for drying seeds.
- ● Small container (e.g., seed tray or egg carton): For seed stratification (if cold-stratifying).
- ● Plastic wrap or damp paper towels: To maintain moisture during germination.
- ● Potting mix: 1 bag of well-draining, sterile seed-starting mix (or coco coir).
- ● Small pots (2–3 inches deep): 10–20 pots for each seed pod (or a single large tray).
- ● Spray bottle: For gentle watering.
- ○ Label markers & tags: To track planting dates (optional but helpful!).
- ● Refrigerator or cold stratification setup: For mimicking winter conditions (if not planting immediately).
- ● Heat mat: To speed up germination (set to 70–75°F).
- ● Grow lights: If starting indoors before transplanting outdoors.
- ● Compost or worm castings: To boost soil fertility for young seedlings.
- ● Notebook: To log pod collection dates and germination progress.
Step-by-Step guide to harvesting and preparing ginkgo tree seed pods
Here’s how to collect and prepare these unique pods for germination—no messy surprises included.
🌱 Step 1: Identify and Harvest Ripe Ginkgo Seed Pods
Ginkgo pods turn from green to a golden-yellow when fully ripe, usually in late September to October. Look for pods that open slightly at the top—they’ll release seeds naturally. Avoid pods still attached to the tree if they’re still green or tightly closed, as they won’t be ready for germination.
Use clean, sharp pruners or gloves to harvest the pods. Place them in a paper bag (not plastic) to allow airflow and prevent mold. I like to collect pods from multiple trees to ensure genetic diversity for stronger seedlings. Once home, store them in a cool, dry place—like a garage or basement—until you’re ready to process them.
🪴 Step 2: Extract Seeds and Clean the Flesh
Spread the pods on a clean, flat surface and gently twist them open. The inner flesh is sticky and foul-smelling (it’s nature’s way of deterring animals), so work outdoors or in a well-ventilated area. Scoop out the seeds—each pod contains 1-4 seeds—and place them in a bowl of water to separate the seeds from the pulp.
Rinse the seeds under cool water to remove all residue. The seeds should sink to the bottom, while the pulp will float and wash away. I use a fine mesh strainer to catch the seeds while letting the debris drain. Pat them dry with a paper towel—moisture now will cause rot before germination. Store the clean seeds in a sealed container in the fridge until you’re ready to plant.
☀️ Step 3: Stratify Seeds for Successful Germination
Ginkgo seeds need cold stratification to break dormancy. Place the dried seeds in a plastic bag with a moistened paper towel (not dripping wet). Seal the bag and refrigerate for 60-90 days at 35-40°F. Check them monthly—if mold appears, discard the batch and try again with fresh seeds.
After stratification, remove the seeds and plant them ½ inch deep in a well-draining potting mix. Use small pots (3-4 inches wide) with drainage holes. Water lightly and place in a warm spot (70-75°F) with indirect light. Germination can take 3-6 months, so patience is key—don’t overwater, or the seeds will rot.
⏰ Step 4: Transplant Seedlings When Ready
Once seedlings sprout 2-3 inches tall (usually in spring), they’re ready to move to individual pots. Use 4-6 inch pots with fresh potting mix. Keep them in bright, indirect light and water when the top ½ inch of soil feels dry. Ginkgo seedlings grow slowly—don’t rush them.
After 1-2 years, when seedlings reach 12-18 inches tall, they can be transplanted outdoors in USDA Zones 4-8. Choose a location with full sun and well-draining soil. Mulch around the base to retain moisture and protect roots. With proper care, your ginkgo seedlings will mature into majestic trees in decades.
Tips & tricks for perfect ginkgo tree seed pod harvesting
Working with ginkgo seed pods can feel like a science experiment—but these tricks will help you avoid the messiest parts and get the best results.
Timing is Everything: Don't wait until the pods are completely dried out on the tree. The golden-yellow stage is your window—usually late September to October. If you miss it, pods may split open and scatter seeds everywhere. I've learned this the hard way after finding seeds already scattered on the ground!
Ventilation is Key: When cleaning the seeds in Step 2, work in a well-ventilated area—trust me, that foul-smelling pulp is strong! I've had to open windows and even step outside mid-process. The sticky residue can also attract pests, so clean up immediately after handling. A drop cloth makes cleanup a breeze.
Stratification Check: During the 60-90 day cold stratification period in Step 3, don't be tempted to peek inside the bag too often. Every time you open it, you risk introducing warm air and moisture that can cause mold. Mark your calendar and check only monthly as instructed—this is where most germination failures happen.
Patience Pays Off: Germination can take 3-6 months, so resist the urge to overwater or move pots around. I've seen beginners give up after just a few weeks, only to have seeds sprout months later. Keep pots in consistent conditions and trust the process—ginkgo trees are worth the wait!
Pro Tips for Ginkgo Tree Seed Pods
- Working with ginkgo seed pods can feel like a science experiment—but these tricks will help you avoid the messiest pa...
- Timing is Everything: Don't wait until the pods are completely dried out on the tree. The golden-yellow stage is your...
- Ventilation is Key: When cleaning the seeds in Step 2, work in a well-ventilated area—trust me, that foul-smelling pu...
Frequently asked questions
Got questions about harvesting and germinating ginkgo tree seed pods? You’re not alone—these unique seeds can be tricky! Below, we’ve rounded up the most common queries to help you navigate the process like a pro.
When is the best time to harvest ginkgo seed pods?
The ideal time to harvest ginkgo seed pods is late fall (October–November) when they turn golden-brown and begin to split open naturally. If you wait too long, the seeds may sprout prematurely or attract pests. Harvest them before they fully release their seeds onto the ground for the best results!
How do I tell if a ginkgo seed pod is ready for harvesting?
Look for pods that are dry, papery, and slightly cracked—they’ll feel lightweight and may even open on their own. Press gently: if the pod releases seeds with minimal pressure, it’s ready! Avoid harvesting green or moist pods, as they won’t store or germinate well.
Can I germinate ginkgo seeds directly from the pod, or do I need to extract them?
While you can plant whole pods, extracting the seeds first improves germination rates. The fleshy outer layer can inhibit sprouting. Once harvested, soak the pods in water for 24 hours, then gently remove the seeds. This step mimics natural stratification and boosts success!
Do ginkgo seeds need cold stratification before planting?
Yes! Ginkgo seeds benefit from cold stratification to break dormancy. After extracting the seeds, mix them with moist sand or peat moss, then refrigerate for 60–90 days at 33–41°F (1–5°C). This mimics winter conditions and signals the seed it’s time to sprout. Pro tip: Label your containers to avoid mix-ups!
What should I do if my ginkgo seeds aren’t germinating after stratification?
If seeds remain dormant after stratification, try these fixes:
- Check moisture: Keep the soil consistently damp (not soggy) during germination.
- Test viability: Cut a seed in half—if the center is firm and white, it’s still viable.
- Adjust timing: Some seeds need longer stratification (up to 120 days). Be patient!
- Use a heat mat: Bottom heat (70–75°F) can encourage stubborn seeds to sprout.
Wrapping up and next steps
Harvesting ginkgo tree seed pods doesn’t have to be a messy or frustrating experience—with the right tools and techniques, you can collect them cleanly and efficiently! 🌿 Whether you’re aiming for propagation or simply enjoying the unique charm of these pods, mastering the process ensures success.
Now that you’re equipped with the know-how, why not share your newfound skills with fellow gardening enthusiasts or even plant a few seeds to grow your own ginkgo tree?
Pro tip: 🌱 Keep an eye on your seedlings—they’re a rewarding long-term project! Happy harvesting! 🌟