
Propagation
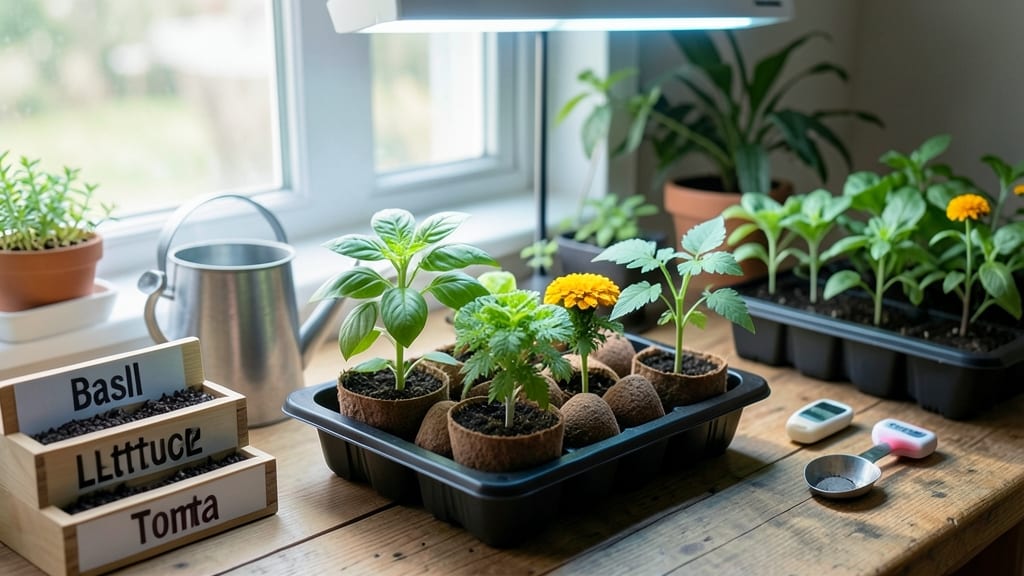
Cold-stratified blooms in just six weeks—Jiffy seed starting makes it possible. 🌱 I’ve used these peat pellets for years, and they’ve transformed my seed-starting game, especially for finicky flowers that need a winter chill to germinate.
The secret lies in their perfect moisture control and cozy environment, which cuts down transplant shock and speeds up growth.
You’ll need Jiffy peat pellets, a seedling tray, your chosen seeds, and a spray bottle for gentle watering. No fancy equipment—just a sunny windowsill or grow light setup. The pellets expand when soaked, creating the ideal snug home for tiny roots to establish before they even peek above soil level.
By week three, you’ll see sprouts pushing through, and by week six, they’ll be ready for their first taste of real sunlight. The best part? No more losing seeds to mold or overwatering—these pellets hold moisture just right.
Perfect for urban gardeners with limited space or anyone tired of hit-or-miss germination.
Once seedlings hit 2-3 inches tall, they’re ready for outdoor hardening. Start with short daily trips outside, then gradually increase time. My cold-stratified poppies and delphiniums always outperform store-bought starts—it’s like cheating, but with science. Ready to try it?
📚 In This Guide
- What you need
- Instructions
- Tips and common mistakes
- Wrapping up and next steps
What you need
- ● Jiffy-7 Pellets (or Jiffy-7 Seed Starter Trays) – 20-50 pellets, depending on your project scale (e.g., 20 for small flats, 50 for larger batches).
- ○ Cold-stratification mix (optional but recommended) – 1 part peat moss or coco coir + 1 part perlite (for moisture retention and aeration).
- ● Seed packets – Choose cold-hardy, slow-to-germinate seeds like foxglove, columbine, or delphinium (check packets for stratification needs!).
- ● Spray bottle with water – Fine mist setting to avoid crushing pellets.
- ● Plastic zip-top bags or clear containers – Sealable, at least 12"x16" for moisture retention.
- ● Refrigerator or cold frame – 34–40°F (1–4°C) for stratification (or a cool basement if no fridge).
- ● Grow lights or sunny windowsill – 12–16 hours of light daily after stratification.
- ● Humidity dome or plastic wrap – Speeds up germination in warm-up phase.
- ● pH test kit – Ensures your mix is 6.0–7.0 (ideal for most seeds).
- ● Label markers & tags – Avoid mix-ups with variety names and dates!
- ● Heating mat (for post-stratification) – 70–75°F (21–24°C) for faster sprouting.
- ● Fertilizer (diluted) – Half-strength balanced formula (10-10-10) after first true leaves appear.
Step-by-Step instructions for Jiffy seed starting
Here's how to transform stubborn cold-stratified seeds into blooming beauties in just six weeks.
🌱 Step 1: Prepare Jiffy Pellets and Seed Trays
Fill your seed tray with the 48 Jiffy pellets, spacing them evenly in rows. I always soak the pellets in warm water for 10-15 minutes until they expand to twice their original size. This pre-hydration ensures consistent moisture for germination. Once swollen, gently press each pellet into its tray cell to secure it—no wobbling allowed.
Here's the thing—don't let them dry out after soaking. Place a tray of water nearby and cover the whole setup with a clear plastic dome to maintain humidity. You'll see condensation form on the inside, which is perfect for keeping those pellets moist while you prepare your seeds.
💧 Step 2: Sow Seeds at Proper Depth
For most cold-stratified wildflower seeds, plant 2-3 seeds per pellet at a depth of about ¼ inch. I use a toothpick to make a small hole in the pellet surface—this prevents over-deep planting, which can delay germination. Tap the pellet gently to settle the seeds into place, then lightly cover with a sprinkle of sterile seed-starting mix.
Mist the surface with a spray bottle until the mix looks uniformly damp. You want it moist but not soggy—think of a wrung-out sponge. Label each tray with the seed variety and date. I swear by masking tape and a sharpie—it's durable and won't disintegrate when you move the trays.
☀️ Step 3: Stratify for 4-6 Weeks
Place the trays in a refrigerator set to 35-40°F for the cold stratification period. I use a clear plastic container with ventilation holes to create a mini greenhouse effect. Check weekly to ensure pellets stay moist—if they feel dry to touch, give them a light misting. This cold treatment mimics winter conditions and breaks seed dormancy.
You won't see any action for 3-4 weeks, but that's normal. The seeds are busy preparing to germinate. After 4-6 weeks, move the trays to a bright, cool location (60-65°F) with 12-14 hours of indirect light daily. This gradual temperature shift signals the seeds it's time to grow.
🌿 Step 4: Transition to Warmth and Light
Once you see the first green shoots (7-10 days after moving to warmth), remove the plastic dome immediately. This prevents damping-off disease that thrives in high humidity. Place the trays under grow lights if natural light is insufficient—you'll know they need more light when seedlings stretch toward it with pale, leggy stems.
Water from the bottom by placing the trays in ½ inch of water for 10-15 minutes. This method prevents disturbing delicate seedlings while ensuring even moisture. Keep the soil surface slightly damp but never waterlogged—you'll see the pellets darken slightly when properly hydrated.
⏰ Step 5: Harden Off and Transplant
When seedlings develop 2-3 true leaves (about 6 weeks total), begin hardening off by placing them outside in partial shade for 1 hour daily. Gradually increase exposure over 7-10 days
Transplant to the garden when nighttime temperatures stay above 45°F and all danger of frost has passed. Dig holes slightly larger than the pellet size and plant with the top of the pellet level with the soil surface. Water deeply after planting to settle the roots into place. You'll see new growth within 7-10 days as a sign everything is working.
Tips & tricks for perfect Jiffy seed starting
These game-changing tips will help you transform cold-stratified seeds into thriving blooms every single time—no guesswork required!
Moisture Mastery: During the 10-15 minute soak in Step 1, use water that's 70-75°F—lukewarm, not scalding. Too hot can shock the pellets, while too cold slows hydration. After soaking, place your tray on a damp paper towel in the dome to maintain that perfect humidity until planting. This prevents the critical drying-out that kills germination before it starts.
Precision Planting: For that ¼-inch depth in Step 2, use a toothpick to make holes—it's the only way to avoid crushing seeds or planting too deep. Here's the thing: if you plant deeper than ¼ inch, seeds may never emerge. Press gently around the edges of the pellet after planting to create a tiny well that holds moisture right where the seeds need it most.
Stratification Secrets: The 35-40°F refrigerator temperature in Step 3 is non-negotiable for breaking dormancy, but placement matters. I store my trays on the middle shelf—top shelves can get too warm, while bottom shelves may be too cold. Check weekly by pressing your finger into a pellet: if it springs back slowly, it's perfectly moist; if it stays indented, add a light mist.
Light Transition: When moving trays to 60-65°F after stratification, place them under grow lights immediately if natural light is weak. Watch for "leggy" seedlings—those stretched, pale stems mean they're starving for light. This happens 7-10 days after warmth, so act fast by moving them closer to the light source or increasing duration to 14-16 hours if needed.
Pro Tips for Jiffy Seed Starting
- These game-changing tips will help you transform cold-stratified seeds into thriving blooms every single time—no gues...
- Moisture Mastery: During the 10-15 minute soak in Step 1, use water that's 70-75°F—lukewarm, not scalding. Too hot ca...
- Precision Planting: For that ¼-inch depth in Step 2, use a toothpick to make holes—it's the only way to avoid crushin...
Frequently asked questions
Got questions about Jiffy seed starting? You’re not alone! Here are answers to the most common concerns—from timing to troubleshooting—to help you grow confidently with your cold-stratified seeds.
How do I know if my seeds need cold stratification?
Cold stratification mimics winter’s natural dormancy period. If your seed packet (or plant tag) says “needs cold treatment” or lists “slow germinators”—like poppies, delphiniums, or peonies—it’s a good bet! Otherwise, skip it unless you’re experimenting with finicky varieties.
Can I speed up germination without skipping stratification?
Nope! Cold stratification is non-negotiable for many seeds—they won’t germinate properly otherwise. However, you can shorten the process by using a refrigerator (instead of outdoor winter) or a stratification mat (like the Greatmats brand) for precise control. Patience pays off with stronger seedlings!
What if my Jiffy pellets mold or smell bad?
Mold or funky odors mean excess moisture or poor airflow. Fix it: Discard the affected pellets, sterilize your tray with a 10% bleach solution, and let it dry completely. Use fresh, sterile potting mix (like Pro-Mix) in future batches, and avoid overwatering—pellets should stay damp, not soggy!
Do I need a heat mat for Jiffy seed starting?
Not always! Most cold-stratified seeds germinate best at 60–65°F after stratification. If your home stays in this range, a heat mat isn’t necessary. But for slow germinators (like lupines), a seedling heat mat can cut waiting time by weeks. Monitor soil temp with a thermometer for best results.
Can I reuse Jiffy pellets for multiple seed batches?
Technically yes, but it’s risky. Pellets break down over time, losing structure and nutrients. For repeated use, rinse them thoroughly, sterilize with hydrogen peroxide (3%), and replenish with fresh potting mix. However, for consistent success, stick to new pellets—especially for finicky seeds!
Wrapping up and next steps
Mastering Jiffy seed starting with cold stratification is your fast track to vibrant blooms—no green thumb required! 🌱 With just a few simple steps, you’ll unlock a world of hardy perennials and wildflowers in just six weeks.
The key? Patience, the right materials, and a little chilly encouragement for your seeds.
Ready to turn your garden dreams into reality? Start by gathering your supplies, then dive in—your future garden will thank you! Next up: Pick your first cold-stratified seeds and get planting! 🌸