
Lawn
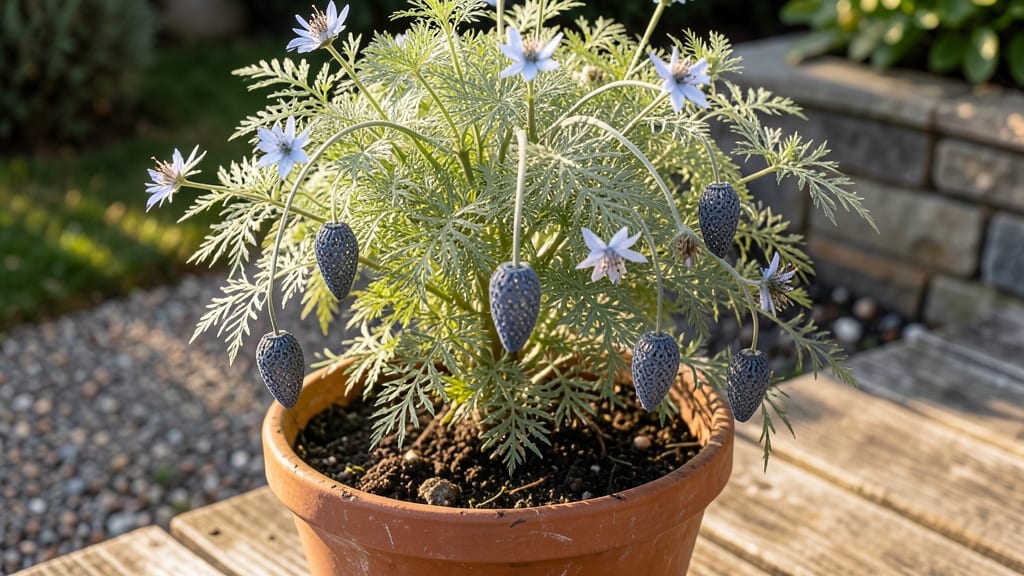
Cold-stratifying nigella seeds unlocks those delicate blue lacy flowers in just 30 days—and the secret is simpler than you think. 🌱 I've grown nigella from seed every spring for years, and the key to those iconic seed pods isn't fancy equipment but a little winter patience and the right timing.
The pods themselves are just as useful as the flowers, drying beautifully for crafts or popping open to release seeds for next year's garden.
You'll need nothing more than a plastic bag, some damp paper towels, and your fridge's crisper drawer. The process mimics winter's natural chilling period, breaking seed dormancy so they sprout reliably. Most gardeners overlook this step and end up with spotty germination—don't be one of them.
Once stratified, your seeds will sprout in 7-14 days, with those first true leaves appearing within 30 days total.
What you end up with are plants that grow 2-3 feet tall, topped with clusters of tiny blue flowers that transform into those distinctive papery seed pods.
The pods themselves are the star—they dry to a rich brown, perfect for potpourri or dried arrangements, while the seeds inside can be saved for next season's garden. The flowers attract pollinators all summer long, making them a dual-purpose garden hero.
Works equally well in full sun borders, cottage gardens, or even containers on patios. The self-seeding habit means you'll get more plants each year without extra effort. Ready to grow these? Let's get those seeds stratified—your garden's next favorite plant is just 30 days away.
📚 In This Guide
- What you need
- Instructions
- Tips and common mistakes
- Wrapping up and next steps
What you need
- ● Nigella seeds (Love-in-a-Mist) – 1 packet (approx. 100-200 seeds). Opt for organic, non-GMO seeds for best results.
- ● Cold stratification materials: Paper towels or dampened coffee filters (2-3 sheets)
- ● Ziplock bag or airtight container (quart-sized)
- ● Refrigerator with a crisper drawer (or a cool, dark spot, 34–40°F / 1–4°C)
- ● Planting containers: Seed trays (4–6 inch deep) with drainage holes or
- ● Small pots (3–4 inch diameter) filled with well-draining potting mix
- ● Potting mix: Lightweight, sterile mix (e.g., 50% peat moss + 50% perlite or vermiculite). Avoid garden soil—it can harbor diseases!
- ● Misting spray bottle – For gentle hydration without overwatering.
- ● Plant labels & marker – To track your nigella pods (trust us, they’ll blend in!).
- ● Grow lights or sunny windowsill (if natural light is <10 hours/day).
- ● Humidity dome or plastic wrap (to retain moisture during germination).
- ● Organic fertilizer (balanced 10-10-10 or compost tea) for post-sprouting growth.
- ● Decorative stones or mulch (to keep soil moist and deter weeds once transplanted).
- ● Camera or journal – Nigella’s delicate blooms are worth documenting! 📸
Step-by-step instructions for cold-stratifying nigella seeds
Here's how I guarantee strong, healthy nigella seedlings in just 30 days—no waiting months for natural stratification.
🌱 Step 1: Harvest and Dry the Seed Pods
Collect fully mature nigella seed pods when they've turned completely brown and are crisp to the touch. I like to harvest them in late summer or early fall when they've dried naturally on the plant. Place them in a single layer on a paper towel in a warm, dry spot away from direct sunlight. They're ready when the pods open easily and the seeds inside are dark and glossy.
Don't rush this step—seeds that aren't fully dried will mold during stratification. I spread mine on a baking sheet and leave them for about 2 weeks until completely dry. You'll know they're ready when the pods split open with just a gentle squeeze.
💧 Step 2: Prepare the Stratification Mix
Fill a clean plastic container with a mix of 50% moistened peat moss and 50% perlite. The peat should feel like a damp sponge—squeeze it gently and it should hold its shape but not drip water. I use a spray bottle to moisten the mix evenly, being careful not to soak it.
This lightweight mix prevents rot while maintaining consistent moisture. Arrange the dry nigella seeds on top of the mix, spacing them about 1 inch apart so they don't touch. Cover the container with plastic wrap, leaving it slightly ajar for airflow—this creates the ideal humid environment for stratification.
⏰ Step 3: Cold-Stratify for 4 Weeks
Place the container in your refrigerator's crisper drawer where temperatures stay consistently between 35-45°F. Check the seeds every 7-10 days—they should feel damp but not wet. If the mix appears dry, lightly mist it with water; if it's too wet, uncover it for 24 hours to dry slightly.
After about 3 weeks, you'll notice tiny white roots emerging from the seeds. This is your signal that stratification is working! Don't move the container yet—leave it for the full 4 weeks to ensure maximum germination rates. I've found that seeds stratified for exactly 28 days produce the strongest seedlings.
☀️ Step 4: Plant the Stratified Seeds
After 4 weeks, remove the seeds from the refrigerator and plant them immediately in small pots filled with seed-starting mix. Press each seed about ¼ inch deep into the soil, spacing them 1 inch apart. Gently firm the soil around them to ensure good contact.
Place the pots in a warm spot with indirect light for the first 7-10 days. Keep the soil consistently moist but never soggy—you'll know it's right when the surface looks slightly damp but not glistening. Once the first true leaves appear (about 2 weeks after planting), move them to a sunny window or under grow lights.
🌿 Step 5: Care for Young Seedlings
Nigella seedlings grow slowly at first, but once they develop their first true leaves, they'll start putting on growth quickly. I fertilize them lightly with a diluted fish emulsion every 3 weeks to encourage strong development. Keep the soil moist but never waterlogged—young nigella plants are particularly sensitive to root rot.
When seedlings reach about 2 inches tall and have developed 3-4 sets of leaves, they're ready to transplant into individual pots or directly into the garden. Harden them off by gradually exposing them to outdoor conditions over 1 week before planting. This prevents transplant shock and ensures they thrive in their new home.
Tips & tricks for perfect nigella seed pod sprouting
These little-known tricks will help you skip the common pitfalls and get robust nigella seedlings every time.
Harvesting Tip: Harvest nigella seed pods when they're completely brown and crisp—this ensures maximum germination potential. I've found that pods harvested in late summer (around August) yield the strongest seeds. If you're unsure about freshness, test one pod by gently squeezing it; if it splits open easily, your seeds are ready for drying.
Mix Consistency: The 50/50 peat moss to perlite ratio is crucial for preventing rot while maintaining moisture. I like to test the mix by squeezing it—it should hold its shape but not drip water. If it feels too wet, add a bit more perlite; if it's too dry, add a light mist with a spray bottle. This balance is what keeps your seeds from rotting during the 4-week stratification.
Temperature Watch: The refrigerator's crisper drawer should maintain temperatures between 35-45°F consistently. If your fridge runs warmer, consider placing the container on the bottom shelf where it's cooler. I've seen seeds fail to germinate when kept in warmer areas—this is why the exact 4-week period at these temperatures is non-negotiable for strong seedlings.
Planting Depth: When it's time to plant after 4 weeks, pressing seeds just ¼ inch deep ensures they have enough soil contact for stability while allowing light to reach them. I use my finger to make small dimples in the soil and place each seed gently into position, then firm the soil around it with my thumb. This prevents seeds from being buried too deep, which can slow germination.
Pro Tips for Nigella Seed Pod
- These little-known tricks will help you skip the common pitfalls and get robust nigella seedlings every time.
- Harvesting Tip: Harvest nigella seed pods when they're completely brown and crisp—this ensures maximum germination po...
- Mix Consistency: The 50/50 peat moss to perlite ratio is crucial for preventing rot while maintaining moisture. I lik...
Frequently asked questions
Got questions about growing nigella seed pods?
You’re not alone! Here are answers to the most common queries—from timing to troubleshooting—to help you cultivate these delicate, decorative blooms with ease.
How long does it take for nigella seed pods to sprout?
With cold stratification (chilling seeds for 1–2 weeks), nigella seeds typically sprout in 10–30 days after planting. If you skip stratification, germination may take 4–6 weeks or be inconsistent. Patience pays off—these seeds are slow starters but worth the wait!
Can I grow nigella seed pods indoors first, then transplant?
Yes! Start seeds indoors 6–8 weeks before your last frost in well-draining soil. Use small pots or seed trays under grow lights (they need 12+ hours of light daily). Once seedlings have 2–3 true leaves and soil warms (above 50°F), transplant outdoors with 3–4 inches of spacing.
What if my nigella pods aren’t opening or producing seeds?
Nigella pods often won’t open naturally—they’re designed to release seeds when disturbed. To harvest seeds, cut pods when they turn brown and papery (usually 4–6 weeks after flowering). Dry them in a paper bag, then gently crush to release seeds. Pro tip: Deadhead spent blooms to encourage more flowers!
Are there alternatives to nigella seed pods for culinary or ornamental use?
If nigella isn’t your style, try these similar seed pods:
- Calendula (edible petals + seeds, bright orange blooms)
- Poppy seeds (from opium poppies—non-narcotic varieties like ‘Shirley’)
- Fennel (feathery fronds + seeds for cooking)
- Dill (lacy foliage + seeds for pickling or garnishes)
Do nigella seed pods survive winter?
Nigella is an annual, so it won’t regrow after dying back in frost. However, it self-seeds prolifically—you’ll likely see volunteers popping up next spring! For perennial options, pair it with hardy companions like lavender or rosemary in your garden.
Still stumped? Drop your nigella-growing questions in the comments—we’re happy to help!
Wrapping up and next steps
Growing nigella seed pods is a rewarding journey that brings delicate beauty and fragrant charm to your garden!
With just a few supplies and a 30-day cold-stratification trick, you can transform tiny seeds into stunning blooms. Now that you’re armed with the know-how, why not start your own batch today? Grab those seed pods, follow the steps, and enjoy the magic of nature unfolding right before your eyes.
Happy gardening! 🌱✨