
Lawn
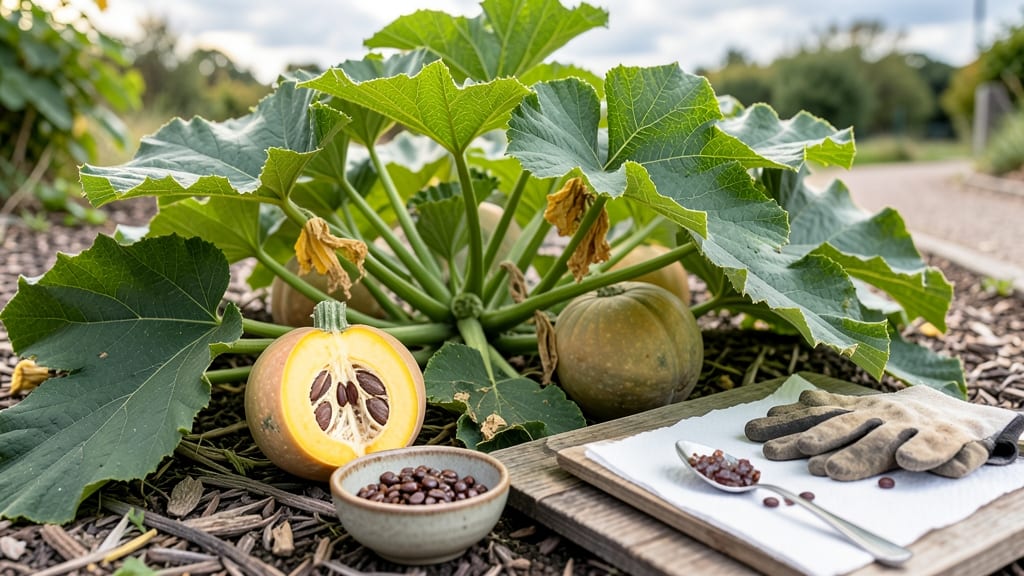
Saving squash seeds is how you preserve the exact varieties you love year after year—perfect for heirlooms and open-pollinated types. I’ve saved seeds from my butternut and zucchini for three seasons now, and the difference between store-bought and homegrown is night and day.
The process starts with selecting the healthiest plants and ends with seeds that’ll germinate like new.
You’ll need just a few simple tools: a sharp knife, a bowl of water, paper towels, and breathable seed envelopes. The key is patience—harvesting seeds at the right moment (when the squash is fully mature but not rotting) makes all the difference.
Once you’ve dried them properly, they’ll stay viable for 3-5 years if stored correctly.
What you’ll end up with is a stash of seeds that grow into plants identical to the ones you loved this year—no genetic drift, no surprises. The first time you taste a squash grown from your own saved seeds, you’ll understand why gardeners do this every season.
It’s like capturing sunshine in a little paper packet.
This method works for all summer and winter squash, though cross-pollination can complicate things if you’re growing multiple varieties. We’ll cover how to avoid mix-ups and ensure your seeds stay true to type. Ready to turn this year’s harvest into next year’s foundation?
📚 In This Guide
- What you need
- Instructions
- Tips and common mistakes
- Wrapping up and next steps
What you need
- ● Mature squash varieties: Choose 3–5 healthy, disease-free squash from different plants (e.g., acorn, butternut, or zucchini) to ensure genetic diversity. 🌱
- ● Sharp knife or pruning shears: For carefully slicing open squash to extract seeds.
- ● Large bowl or bucket: A non-reactive container (like glass or stainless steel) to hold squash pulp and seeds while fermenting.
- ● Water: Enough to submerge the seeds and pulp mixture during fermentation.
- ● Fine-mesh strainer or cheesecloth: To separate seeds from the pulp after fermentation.
- ● Paper towels or clean cloth: For gently drying seeds before storage.
- ● Small paper envelopes or seed-saving bags: Label each with the squash variety and date (e.g., 3x5-inch envelopes or breathable kraft paper bags).
- ● Permanent marker or labels: To clearly mark seed packets with details like variety, harvest year, and any notes (e.g., "resistant to powdery mildew").
- ○ Desiccant packets (optional but helpful): To absorb moisture in sealed containers and extend shelf life.
- ● Seed catalog or notebook: For tracking varieties, germination rates, and future planting plans.
- ● Fine-tip tweezers: For handling small or delicate seeds without damage.
- ● Food dehydrator or oven: If you prefer an extra-dry method for seeds (set to 100–120°F).
- ● Humidity monitor: To ensure seeds are stored in a low-humidity environment (ideal: <30% humidity).
- ● Seed viability test kit: For checking germination rates before planting next season.
Instructions for squash seed saving: dry-to-perfection method
Here’s how I ensure my squash seeds stay viable and ready for next season’s planting.
Select and Harvest Mature Squash
Choose the healthiest, most productive squash plants to save seeds from. Look for fruit with fully developed seeds—typically when the squash is overripe and the skin has turned soft or begun to rot. This signals the seeds are fully mature and ready for harvest.
Use a clean knife to cut open the squash and scoop out the seeds along with the surrounding pulp. Place the seeds and pulp in a bowl, making sure not to mix varieties. Label each bowl with the squash variety and harvest date to keep track of what you’re saving.
Ferment the Seeds for Purification
Fermentation helps separate viable seeds from non-viable ones and removes the gelatinous coating that can cause seeds to clump together. Place the seeds and pulp in a clean jar, covering them with water by about an inch. Stir well to ensure all seeds are submerged.
Cover the jar loosely with a cloth or lid and let it sit in a warm spot, like a sunny windowsill, for 3-5 days. You’ll notice bubbles forming and a foul odor developing—this is normal and part of the fermentation process. Stir the mixture once a day to keep the seeds moving and prevent mold.
Rinse and Dry the Seeds
After fermentation, pour the seeds and pulp through a fine-mesh strainer to rinse away the pulp and any remaining gelatinous coating. Rinse the seeds under cool water until the water runs clear. Spread the cleaned seeds on a clean, dry paper towel or a seed-saving screen.
Place the seeds in a warm, dry, and well-ventilated area, away from direct sunlight. Stir or gently shake the seeds every few days to ensure even drying. The seeds are ready when they’re completely dry and brittle to the touch, which usually takes 1-2 weeks. Store them in a labeled envelope or small jar.
Store Seeds Properly for Long-Term Viability
Once fully dry, transfer the seeds to a labeled envelope or airtight container. Place the container in a cool, dark, and dry location, such as a pantry or seed storage box. Properly stored squash seeds can remain viable for 4-5 years, though germination rates may decrease over time.
Include the variety name, harvest date, and any notes about plant performance on the label. This will help you keep track of which seeds to plant next season and which varieties performed best in your garden.
Tips & tricks for perfect squash seed preservation
These practical strategies will help you maximize seed viability and avoid common pitfalls when saving squash seeds.
Selection Tip: The key to successful seed saving starts in Step 1 with proper squash selection. Look for squash that's completely mature—when the skin becomes soft or slightly rotten, that's your cue. I've learned the hard way that harvesting too early means seeds won't be fully developed, leading to poor germination rates. For cucurbits like butternut or acorn squash, wait until the stem dries completely before harvesting.
Fermentation Watch: During the 3-5 day fermentation in Step 2, you'll notice mold can become an issue if the mixture isn't stirred daily. I recommend using a clean spoon to gently break up any scum forming on top and stir the seeds every 24 hours. The foul odor is normal, but if you see black mold developing, discard that batch immediately—it means the seeds are compromised. This step is crucial for removing the gelatinous coating that would otherwise cause seeds to clump together.
Drying Strategy: For Step 3's drying process, I've found that using a seed-saving screen rather than paper towels allows for better airflow and more even drying. Place the screen on a baking rack in a well-ventilated area, away from direct sunlight. Stir the seeds every few days to prevent any from sticking together. The drying time of 1-2 weeks can vary based on humidity levels in your area—if your climate is particularly damp, you might need to extend this process slightly.
Storage Wisdom: When storing your seeds in Step 4, consider using small glass jars with tight-sealing lids rather than envelopes. Glass containers provide better protection against moisture and pests. I've had success storing seeds in the refrigerator for even longer viability—up to 7 years in some cases—though standard pantry storage works perfectly for most gardeners. Always include the harvest date on your labels, as this helps track seed freshness and germination potential.
Pro Tips for Squash Seed Saving
- These practical strategies will help you maximize seed viability and avoid common pitfalls when saving squash seeds.
- Selection Tip: The key to successful seed saving starts in Step 1 with proper squash selection. Look for squash that'...
- Fermentation Watch: During the 3-5 day fermentation in Step 2, you'll notice mold can become an issue if the mixture ...
Frequently asked questions
Got questions about saving squash seeds? You’re not alone!
Here are answers to the most common queries—because a successful seed-saving adventure starts with the right know-how.
How do I know when my squash seeds are fully dry?
Seeds are ready when they’re completely dry, hard, and rattling inside the pod. Test by cracking open a seed: if it’s not damp or sticky, it’s safe to store. Aim for 3–4 weeks of drying time in a warm, well-ventilated spot (like a mesh bag or paper towel). Patience pays off—moldy seeds mean failed sprouts!
Can I save seeds from hybrid squash varieties?
Most hybrid squash (marked with an "F1" label) won’t grow true to type—meaning next year’s plants may look wildly different. Stick to heirloom or open-pollinated varieties (like ‘Butternut’ or ‘Delicata’) for reliable seeds. Pro tip: Check seed packets for a non-GMO, open-pollinated label!
What’s the best time to harvest seeds for saving?
Wait until the squash is fully mature (color deepens, skin toughens) and overripe—think mushy flesh and wrinkled skin. Scoop out seeds, rinse them, and let them ferment in water for 3–5 days to kill bacteria. Then dry! Harvesting too early = lower germination rates.
What if my seeds sprout but the plants look weak?
Weak seedlings often mean poor storage (moisture or pests) or old seeds (viability drops after 2–3 years). Test germination by planting a few seeds in damp paper towels—if less than 80% sprout, try fresher seeds. Store in a cool, dark, airtight container (like a glass jar with silica packets) to preserve vigor.
Do I need to isolate squash varieties to avoid cross-pollination?
Yes! Squash (like pumpkins and zucchini) cross-pollinate easily. Separate varieties by at least 1 mile (or grow them in different years) to maintain purity. If space is tight, use row covers or hand-pollinate with a paintbrush. Label seeds clearly—mystery squash = mystery flavors!
Wrapping up and next steps
Saving squash seeds is a rewarding way to ensure next year’s garden thrives with heirloom varieties and zero cost! By mastering the dry-to-perfection method, you’ll preserve genetic diversity, reduce waste, and enjoy fresh harvests for seasons to come. 🌱
Now that you’re equipped with the know-how, take the next step—grab those ripe squash, follow the steps, and start your seed-saving journey today. Your future garden (and wallet!) will thank you! 🎉