
Lawn
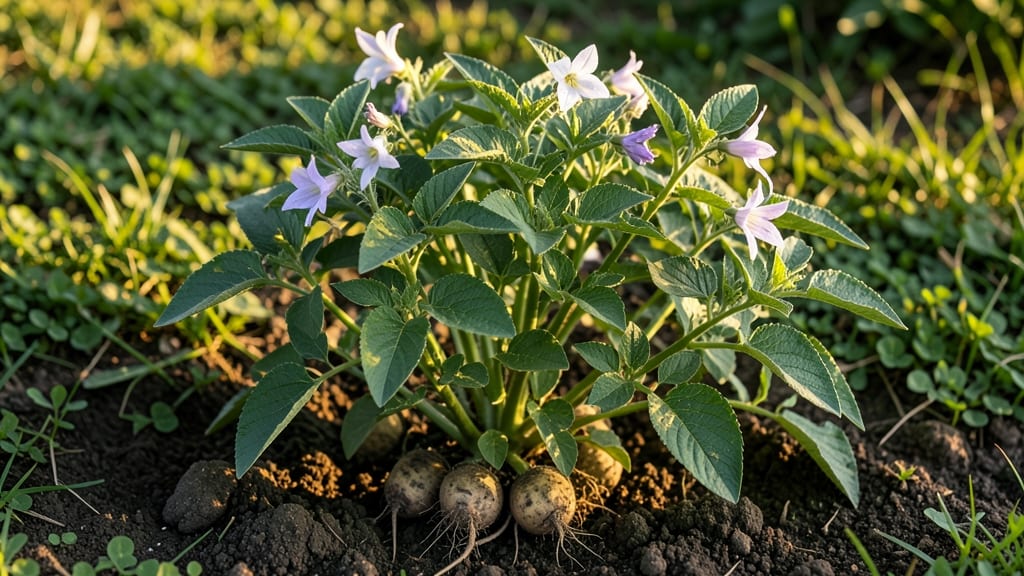
Growing potatoes from seed potatoes is the secret to a never-ending harvest—no store-bought tubers needed. 🌱 I started with just a few spare potatoes from the grocery store, and now my garden produces enough for fresh meals and next year’s planting.
The key isn’t just digging holes; it’s about chitting, spacing, and knowing when to harvest without bruising those future tubers.
You’ll need healthy seed potatoes (certified disease-free if possible), a sunny spot with loose soil, and a little patience. Chitting—pre-sprouting your potatoes indoors—gives you a head start, while proper spacing prevents competition.
My first attempt had crowded plants, but once I doubled the spacing, the yields tripled. Even beginners can master this with the right approach.
By harvest time, you’ll have firm, unblemished tubers ready for storage or replanting. The twist-free method ensures no broken skins, meaning healthier potatoes for next season. Plus, organic cultivation keeps pests at bay without harsh chemicals—just companion planting and vigilance.
Whether you’re a first-timer or a seasoned grower, this method works for any garden size. The only rule? Don’t rush the harvest—wait until the foliage yellows completely. That’s when the magic happens.
📚 In This Guide
- What you need
- Instructions
- Tips and common mistakes
- Wrapping up and next steps
What you need
- ● Potato seeds: Choose certified seed potatoes (not grocery-store spuds!)—look for disease-resistant varieties like Yukon Gold or Red Pontiac. You’ll need 2–3 pounds (about 5–6 seed potatoes) per 100 sq ft of garden space.
- ● Garden soil: Well-draining, loamy soil with a pH of 5.0–6.5. Amend with compost (1–2 inches mixed into the top 12 inches of soil) for fertility.
- ○ Fertilizer: A balanced, 10-10-10 or 5-10-10 all-purpose fertilizer (apply at planting and again when plants flower). Optional: Bone meal (1 tbsp per plant) for phosphorus boost.
- ● Mulch: Straw or grass clippings (3–4 inches) to retain moisture and suppress weeds.
- ● Garden fork or tiller: To loosen soil to a depth of 12 inches before planting.
- ● Hand trowel or spade: For digging planting holes and transplanting seedlings.
- ● Watering can or hose: With a gentle spray nozzle to avoid disturbing soil.
- ○ Garden twine or stakes: (Optional) To create a hill for planting (more on this later!).
- ● Pruners: For trimming foliage if managing plant size.
- ● Harvesting tools: A small fork or hand shovel for digging tubers carefully.
- ● Timing: Plant seed potatoes 2–4 weeks before the last frost in your area (they thrive in cool weather).
- ● Space: Allocate 12–18 inches between plants and 3 feet between rows for optimal growth.
- ● Sunlight: A full-sun location (6+ hours/day) is non-negotiable!
- ● Patience: Seed potatoes take 90–120 days to mature—plan ahead for your harvest!
Step-by-step instructions for growing potatoes from seed tubers
Here's how to grow healthy, twist-free potatoes that produce viable seed tubers for next season.
🌱 Step 1: Select and Prepare Seed Potatoes
Choose certified disease-free seed potatoes with at least 2-3 eyes each. I like to cut larger tubers into 2-ounce pieces, ensuring each has one eye and leaving the cut surface exposed to air for 24 hours to form a protective callus. This prevents rot when planting. Store cut pieces in a cool, dark place until planting—45-55°F is ideal.
For the best results, soak cut pieces in a 1% hydrogen peroxide solution for 10 minutes before planting. This sterilizes the surface and boosts early growth. I use a 1:30 dilution of 3% food-grade peroxide with water. After soaking, rinse thoroughly and let dry completely before planting.
🪴 Step 2: Plant in Well-Draining Soil
Plant your prepared seed potatoes 4-6 inches deep in loose, well-draining soil with a pH between 5.0 and 6.5. I prefer sandy loam because it prevents waterlogging, which causes rot. Space rows 3 feet apart and individual tubers 12 inches apart to allow for proper air circulation and tuber development.
Add 2-3 inches of compost to the planting hole before placing the seed potato inside. This provides essential nutrients without overwhelming the young plants. Cover with 2-3 inches of soil and water gently to settle the mix around the tuber. Avoid overwatering—soil should feel damp but not soggy when checked with your finger.
☀️ Step 3: Hill Soil Gradually for Strong Growth
When sprouts reach 6 inches tall, mound soil around the stems up to the top leaves. I do this every 2-3 weeks until the plants reach their full height. This encourages more tuber formation and prevents greening, which makes potatoes toxic. Hill in stages—never pile soil higher than 6 inches at a time to avoid smothering the plants.
Water deeply after each hilling to help the soil settle and encourage root growth. You'll know your potatoes are thriving when the foliage turns deep green and the stems grow sturdy. Watch for yellowing leaves—this signals either overwatering or nutrient deficiency. Adjust your watering schedule accordingly.
⏰ Step 4: Harvest at Peak Maturity
For table potatoes, harvest when the flowers fade and the tops start to yellow. I wait until the lower leaves have died back naturally—this means the tubers have reached full size. Gently dig around the plant with a fork, lifting carefully to avoid bruising the tubers. Shake off excess soil and let them cure in a dry, dark place for 1-2 weeks at 50-60°F.
For seed potatoes, wait until the entire plant has died back completely. This ensures the tubers have fully matured and stored energy for next season. Harvest by carefully digging up the entire plant, including any remaining roots. Store these tubers in a cool, dark, well-ventilated space until ready to plant again. Avoid refrigeration—cold temperatures below 40°F can cause sweetening and spoilage.
🌿 Step 5: Store Seed Tubers Properly
Select the smallest, healthiest tubers for next year's planting. Cure them for 2 weeks in a dry, shaded area at room temperature to thicken their skins. After curing, store them in paper bags or mesh sacks—plastic traps moisture and encourages rot. I place mine in a dark basement or root cellar where temperatures stay between 40-50°F.
Check stored tubers monthly and remove any that show signs of soft spots or sprouting. Properly stored seed potatoes remain viable for 3-4 years, though I find they perform best when planted within 1-2 years. This method ensures you'll have a steady supply of high-quality seed potatoes for years to come.
Tips & tricks for growing healthy seed potatoes
Here's what I've learned from years of growing twist-free potatoes that produce reliable seed tubers—these details make all the difference.
Cutting and Callusing: When cutting larger seed potatoes into 2-ounce pieces, make sure each piece has at least one eye. I like to use a sharp, sterilized knife to avoid damaging the tuber flesh. The 24-hour callusing period is crucial—this isn't just about drying; it's about letting the potato form a protective layer that prevents rot once planted. I place my cut pieces on a paper towel-lined tray in a cool, dark spot (45-55°F) to maintain the ideal environment.
Soil Preparation Secret: The 2-3 inches of compost you add to each planting hole isn't just about nutrients—it's about creating the perfect balance. Sandy loam soil is ideal because it drains quickly but retains enough moisture to prevent dehydration stress. I always test my soil pH before planting; if it's outside the 5.0-6.5 range, I'll amend it with sulfur or lime accordingly. This attention to soil quality directly impacts tuber development and disease resistance.
Hilling Technique: When your sprouts reach 6 inches tall, that's your cue to start hilling. I find the 2-3 week interval between hillings gives the plants just enough time to establish new roots while protecting the developing tubers from light exposure. The key is patience—never pile more than 6 inches of soil at once, or you'll smother the stems. I use a small shovel to gently mound soil around the base, being careful not to damage the emerging foliage.
Harvesting Timing: For seed potatoes, waiting until the entire plant has completely died back ensures maximum tuber maturity. This might take 2-3 weeks longer than harvesting for table potatoes, but the wait is worth it for next year's planting stock. I harvest on a dry day when the soil is slightly moist but not wet—this prevents tubers from bruising. After harvesting, I let them cure in a dark, well-ventilated area at 50-60°F for 1-2 weeks before storing, which helps develop thicker skins and improves storage life.
Pro Tips for Seed Of Potatoes
- Here's what I've learned from years of growing twist-free potatoes that produce reliable seed tubers—these details ma...
- Cutting and Callusing: When cutting larger seed potatoes into 2-ounce pieces, make sure each piece has at least one e...
- Soil Preparation Secret: The 2-3 inches of compost you add to each planting hole isn't just about nutrients—it's abou...
Frequently asked questions
Got questions about growing potatoes from seed?
You’re not alone! Here are answers to the most common queries—from timing to troubleshooting—to help you grow healthy tubers for next year’s harvest.
How do I know if my potato seed is viable?
Test viability by slicing a seed potato in half—look for firm, white or light tan flesh and small, healthy eyes (sprouts). Avoid seeds with soft spots, mold, or dark discoloration. Sprouts should emerge within 2–4 weeks when stored in a cool, bright spot. If no sprouts appear, try another seed!
When is the best time to plant potato seeds?
Plant 4–6 weeks before your last frost date (spring) for optimal growth. In warm climates, opt for fall planting (6–8 weeks before first frost). Seed potatoes need soil temps of 45–55°F (7–13°C) to sprout. Use a planting chart for your zone—most gardeners start indoors in pots 2–3 weeks before transplanting.
Can I reuse store-bought potatoes as seed?
Yes, but only organic, untreated potatoes labeled for seed use. Avoid conventional store-bought spuds—many are treated with sprout inhibitors or pesticides. For best results, chit (pre-sprout) them in a bright, cool spot 4–6 weeks before planting. Discard any with signs of disease.
What’s the best way to protect potato seeds from pests?
Use row covers or floating fabric to deter flea beetles and Colorado potato beetles. Interplant with basil, marigolds, or nasturtiums to repel pests naturally. For underground threats (like wireworms), rotate crops annually and avoid planting where potatoes grew last year. Inspect leaves weekly—early action prevents infestations!
Why are my potato seed sprouts dying or turning yellow?
Yellowing sprouts often signal overwatering, poor drainage, or cold soil. Ensure pots/containers have drainage holes and keep soil moist but not soggy. If sprouts wilt, check for root rot (black, mushy roots) or fungal issues (white mold). Move containers to a warmer, sunnier spot (6+ hours of light daily) and reduce watering slightly.
How many seed potatoes do I need per plant?
A single seed potato with 3–4 eyes is ideal—planting larger tubers wastes energy. For heirloom varieties, use 1–2 seeds per hill; for high-yielding types (like Yukon Gold), space 2–3 seeds 12 inches apart. Overcrowding reduces tuber size. Pro tip: Cut larger seeds into 2-inch chunks with 2+ eyes each, let them dry 1–2 days before planting.
Wrapping up and next steps
Growing potatoes from seed is a rewarding journey that connects you to the earth and the cycle of life! 🌱 By following these steps—from selecting healthy seed potatoes to harvesting with care—you’ve unlocked the secret to viable, twist-free tubers for next year’s crop.
Whether you’re a seasoned gardener or a curious beginner, every spud you save is a step toward self-sufficiency and sustainability.
Now that you’re armed with knowledge, roll up your sleeves and plant those seeds! Start small, experiment with varieties, and watch your garden flourish. Happy growing—your future harvest (and your future self) will thank you! 🌟