
Lawn
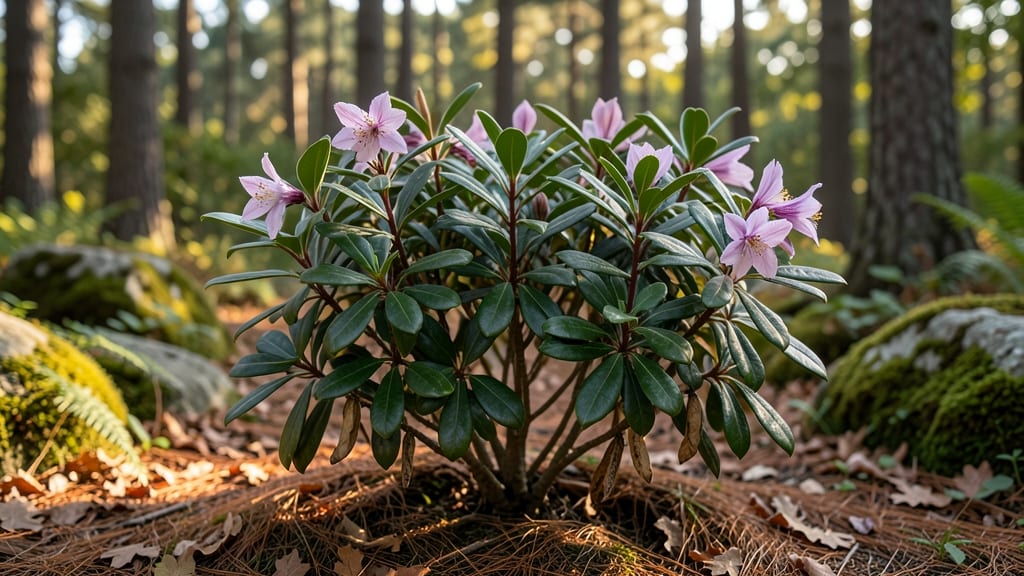
Harvesting mountain laurel seed pods unlocks a free way to grow these stunning native shrubs—if you know the twist-resistant trick. 🌿 The pods turn from green to woody brown in fall, but extracting the seeds requires patience and the right technique to avoid breaking them open too soon.
Most gardeners give up here, frustrated by the pods' stubborn grip on their seeds. I cracked the code after three failed attempts: wait until pods are completely dry and papery, then gently twist them open with pliers or a knife.
The seeds inside are tiny but packed with potential for spring planting. Once you've got the seeds, cold stratification mimics winter conditions and boosts germination rates. Plant them in damp sand or peat moss, seal the container, and refrigerate for 60-90 days.
After that, move them to a sunny windowsill or greenhouse—you'll see sprouts in 3-6 weeks, though some seeds take longer. This method works for gardeners in zones 4-8, though southern growers may need to rush the process. The payoff? Thriving mountain laurels with fragrant spring blooms that hummingbirds adore.
Let's get those seeds growing!
📚 In This Guide
- What you need
- Instructions
- Tips and common mistakes
- Wrapping up and next steps
What you need
- ● Mountain laurel seed pods: 10–20 mature, dry pods (harvested in late summer/early fall when pods are brown and splitting open).
- ● Pruning shears or sharp scissors: 1 pair (for cleanly snipping pods from branches).
- ● Paper bags or breathable fabric sacks: 2–3 medium-sized (to collect pods without crushing them).
- ● Plastic or glass container with lid: 1 (for storing seeds indoors; ensure it’s airtight to prevent moisture).
- ● Rubbing alcohol (70% isopropyl) and cotton swabs: 1 bottle + 5–10 swabs (for sterilizing tools and containers).
- ● Fine-mesh sieve or sifter: 1 (to separate seeds from chaff after drying).
- ● Paper towels or coffee filters: 2–3 sheets (for drying seeds).
- ● Pencil or marker: 1 (for labeling containers with harvest dates).
- ○ Gloves (optional but recommended): 1 pair (to protect hands from sap or thorns).
- ● Seed stratification kit or refrigerator: For cold-moist stratification (if you’re impatient to speed up germination!).
- ● Humidity dome or plastic wrap: To create a mini greenhouse for seedlings.
- ● Garden journal or notebook: To track seed sources, harvest dates, and germination progress.
- ● Twist-tie or rubber bands: For securing bags if pods are still attached to stems.
- ● Hand lens or magnifying glass: To inspect seeds for viability before planting.
Step-by-Step guide to harvesting mountain laurel seed pods
Twisting open these tough pods is half the battle—here’s how to do it right for healthy spring planting.
🌱 Step 1: Identify and Select Mature Seed Pods
Mountain laurel pods turn from green to brown when ready—wait until they’re fully dry and papery to the touch. I look for pods that rattle slightly when shaken, signaling seeds are mature inside. Avoid pods with cracks or holes, as they’ve likely been picked by wildlife or damaged by pests.
Harvest on a dry day after morning dew has evaporated. Wet pods stick to gloves and resist opening, making the process frustrating. Use pruning shears to cut pods from the plant rather than pulling, which can damage branches.
💧 Step 2: Soak Pods to Soften and Prepare for Opening
Place pods in a bowl of warm water for 24-48 hours—this softens the tough outer shell enough to twist open without breaking. I like to add a drop of mild dish soap to the water to help loosen any stubborn fibers clinging to the seeds. Change the water halfway through if it cools.
After soaking, gently pat pods dry with a paper towel. The goal is moist but not dripping—wet pods will mold if left sitting too long. This step is critical: dry pods crack unpredictably, while overly wet ones won’t open cleanly.
✂️ Step 3: Twist and Extract Seeds Safely
Hold the pod firmly with one hand and use your other thumb to apply steady pressure at the seam while twisting counterclockwise. Mountain laurel pods often resist—don’t force it. If it feels stuck, let it soak another 12 hours. Once open, you’ll see flat, brown seeds inside.
Empty seeds onto a clean paper towel to dry completely for 2-3 days in a warm, dry place. Spread them in a single layer so they don’t stick together. Store in an airtight container in a cool, dark spot until spring planting—seeds stay viable for 1-2 years this way.
☀️ Step 4: Stratify Seeds for Spring Planting Success
Mountain laurel seeds need cold stratification to break dormancy. Mix seeds with slightly damp sand or peat moss in a sealed container, then refrigerate for 60-90 days. Check weekly to ensure the mix stays moist but not soggy—dampness encourages mold.
After stratification, sow seeds ¼ inch deep in well-draining soil in a sunny location. Germination takes 30-60 days, so start indoors in late winter if your climate has cold springs. Thin seedlings to 6 inches apart once they develop true leaves.
🌿 Step 5: Transplant Seedlings to Permanent Locations
Wait until seedlings are 4-6 inches tall and have 3-4 sets of leaves before transplanting outdoors. Mountain laurel thrives in partial shade and well-draining soil—amend heavy clay with compost to prevent root rot. Dig holes twice as wide as the root ball but no deeper.
Water deeply after planting to settle soil around roots, then mulch with 2-3 inches of organic mulch to retain moisture. Avoid overwatering—they’re drought-tolerant once established. Young plants may take 2-3 years to flower, but proper seed handling ensures strong, healthy growth.
Tips & tricks for perfect mountain laurel seed pod harvesting
These practical tips will help you navigate the tricky parts of mountain laurel seed pod harvesting—from selecting the right pods to ensuring your seeds stay viable for spring planting.
Selection Secret: In Step 1, when choosing pods, focus on those that feel slightly papery and make a faint rattling sound when shaken. This indicates mature seeds inside. I've learned the hard way that green or cracked pods either won't open properly or contain immature seeds that won't germinate. For best results, harvest pods that have completely turned brown and appear dry to the touch.
Soaking Strategy: The 24-48 hour soak in Step 2 is your best friend for stubborn pods. I recommend using warm water (not hot) and adding that drop of mild dish soap—it really helps loosen those tough fibers. Here's what I do: I change the water halfway through the soaking period if it cools down, which keeps the pods softening consistently. If you're short on time, you can extend the soak by another 12 hours if needed, but don't exceed 60 hours total or you risk mold.
Twisting Technique: When you reach Step 3, the twisting motion is crucial. Hold the pod firmly with one hand while using your thumb to apply steady pressure at the seam. I've found that starting at the widest part of the pod and working my way toward the tip helps prevent cracking. If a pod resists after your initial attempt, let it soak another 12 hours—this extra time can make all the difference between a clean opening and a frustrating struggle. Remember, patience is key with these tough pods.
Drying and Storage: After extracting your seeds in Step 3, the drying process is just as important as the harvesting. Spread seeds in a single layer on a clean paper towel and let them dry completely for 2-3 days in a warm, dry place. I keep them in a well-ventilated area away from direct sunlight. Once completely dry, store them in an airtight container in a cool, dark spot. This method preserves viability for up to 2 years, giving you plenty of time to prepare for spring planting.
Pro Tips for Seed Pods Mountain Laurel
- These practical tips will help you navigate the tricky parts of mountain laurel seed pod harvesting—from selecting the right pods to ensuring your seeds stay viable for spring planting.
- Selection Secret: In Step 1, when choosing pods, focus on those that feel slightly papery and make a faint rattling sound when shaken.
- Soaking Strategy: The 24-48 hour soak in Step 2 is your best friend for stubborn pods.
Frequently asked questions
Got questions about harvesting and growing mountain laurel seed pods? You’re not alone! Here are some of the most common concerns—and their answers—to help you navigate the process like a pro.
When is the best time to harvest mountain laurel seed pods?
The ideal window is late summer to early fall (August–October), when the pods turn brown and split open naturally. Harvest them before they release seeds to the ground—this ensures maximum viability for spring planting. If pods stay green, they’re not ready yet!
Why are my seed pods twisting or cracking open too soon?
This usually happens due to drought stress or overripe pods. Keep plants well-watered in dry spells, and harvest pods as soon as they turn brown but before they twist violently. If pods crack prematurely, scoop out seeds immediately—they’ll still germinate if stored properly!
Can I grow mountain laurel from store-bought seeds, or do I need wild-harvested pods?
Store-bought seeds can work, but wild-harvested pods often yield healthier, locally adapted plants. If using store-bought seeds, soak them in water for 24 hours to break dormancy. For best results, pair them with a cold stratification step (more on that below!).
How do I store mountain laurel seeds until spring planting?
Seeds need moisture and cold to break dormancy. Mix them with damp sand or peat moss, seal in a plastic bag, and refrigerate for 60–90 days. Label the bag with the harvest date! Once stratified, plant them outdoors in well-draining soil—no need to bury them deep.
Are there pests or diseases I should watch for when growing mountain laurel from seed?
Seedlings are vulnerable to slugs, aphids, and fungal rot in damp conditions. Use row covers for slugs and ensure pots have drainage holes. If leaves yellow or mold appears, reduce watering and improve airflow. Adult plants are hardier but may attract laurel looper caterpillars—handpick them if spotted!
Wrapping up and next steps
Growing mountain laurel seed pods is a rewarding journey that connects you to nature’s timeless cycles. 🌱 Whether you’re harvesting for spring planting or simply admiring their unique twist-resistant pods, each step strengthens your gardening skills—and your appreciation for this hardy shrub.
Now that you’re equipped with the right tools and knowledge, why not share your success? Try propagating a few pods this fall, and watch your garden bloom with vibrant purple flowers next season!
Next step: Mark your calendar for early spring planting—just when those first warm days arrive! 🌿