
Lawn
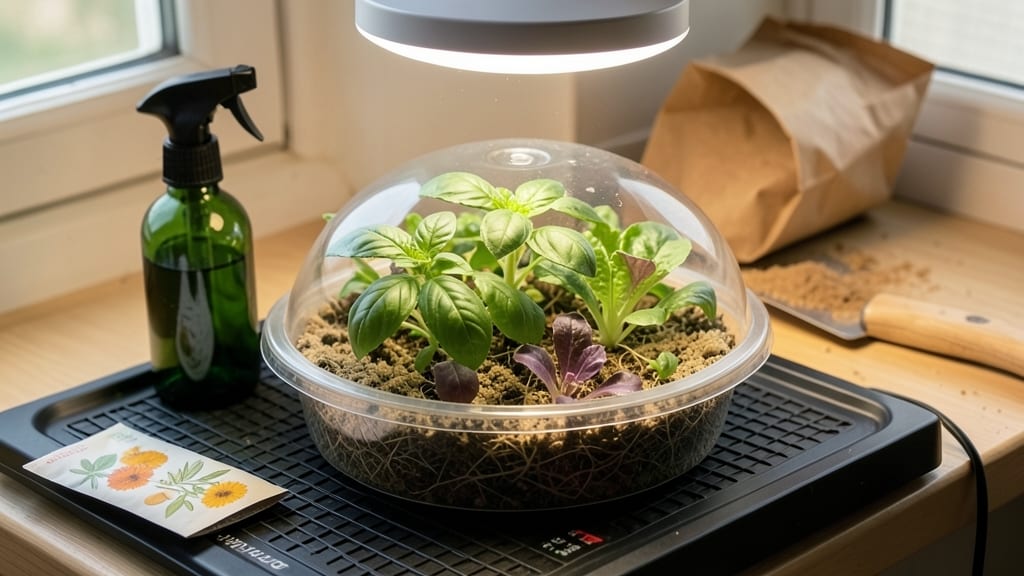
A seed starter tray with lid turns your kitchen counter into a greenhouse for tiny seedlings. 🌱 I’ve used these trays for years, and they’re the secret to strong, even germination—no more patchy sprouts or leggy seedlings struggling to stand.
The lid keeps humidity just right, so seeds stay cozy and consistent, while the individual cells prevent overcrowding as they grow. The right tray has 12-72 cells (depending on your needs), clear domes or lids, and drainage holes—no fancy features required.
Fill with a light seed-starting mix (not garden soil), water gently until moist but not soggy, and plant seeds at the depth marked on their packets. Most seeds need warmth (70-75°F) and indirect light to break through the soil.
Once sprouts appear, remove the lid for 10-15 minutes daily to harden them off. Watch for mold (a sign of overwatering) or dampening off (black stems)—both mean you need better airflow or less moisture.
With the right setup, you’ll transplant sturdy seedlings in 4-8 weeks, ready to outcompete store-bought plants. No lid? A plastic bag with holes or a clear plastic container works in a pinch.
The goal is consistent moisture without rot, and these trays make it foolproof—even for beginners who’ve drowned seeds before.
📚 In This Guide
- What you need
- Instructions
- Tips and common mistakes
- Wrapping up and next steps
What you need
- ● Seed starter tray with lid (1 unit) – Choose a clear plastic or reusable tray with 24-72 cells (depth: 2-3 inches). A lid ensures humidity control!
- ● Seed starting mix (1 bag, ~1-2 cubic feet) – Opt for a lightweight, sterile blend (e.g., coco coir + perlite or peat-based mix). Avoid garden soil—it’s too dense!
- ● Seeds (quantity varies) – Select fast-growing varieties like lettuce, herbs, or flowers for best results.
- ● Spray bottle (1) – A fine-mist setting keeps seeds moist without overwatering.
- ● Tray or flat surface (1) – A shallow, stable container (e.g., baking sheet) to catch excess water.
- ● Gloves (1 pair) – Protects hands from soil and sharp seed shells.
- ● Plant labels (or toothpicks + marker) – Track seed types if growing multiple varieties.
- ○ Heat mat (optional) – Speeds up germination for cool-weather crops (e.g., 70-75°F range).
- ○ Grow lights (optional) – Provides 12-16 hours of light/day if natural light is limited.
- ○ Humidity dome (optional) – DIY with plastic wrap if your tray lid isn’t airtight.
- ○ Fertilizer (optional) – A balanced, water-soluble mix (5-10-5 ratio) for later stages.
Step-by-Step instructions for using seed starter trays with lids
Here's how to transform a simple tray into a humidity-controlled nursery for perfect germination every time.
🌱 Step 1: Prepare the Tray and Mix
Fill your seed starter tray with sterile seed-starting mix—never garden soil, which can harbor fungi and bacteria. I like to press the mix gently into each cell to eliminate air pockets, then water it thoroughly until moisture runs freely from the drainage holes. This ensures even hydration without creating soggy pockets where seeds might rot.
Let the tray sit for 10-15 minutes after watering. You'll know it's ready when the surface feels damp but not wet enough to leave puddles. This pre-moistening step prevents dry spots that can stall germination. I always tap the tray lightly on the counter afterward to settle the mix without compacting it too tightly.
💧 Step 2: Sow Seeds at Proper Depth
Sprinkle seeds evenly across the cells, following packet instructions for spacing. Most seeds need ¼ to ½ inch of coverage—deeper planting delays emergence because seedlings must push through more soil. I use a toothpick to create small divots for tiny seeds, then cover them with a fine mist from a spray bottle to avoid burying them too deeply.
Label each cell immediately with the seed type and date—once those first green shoots appear, identical seedlings look exactly alike. I press labels into the soil surface so they stay put during watering. This prevents the classic "which one is which?" panic when seedlings are just a few days old.
☀️ Step 3: Seal and Position for Germination
Snap the lid onto the tray to create a humidity dome. This traps warmth and moisture, which most seeds need to germinate. Place the tray on a seedling heat mat set to 75-85°F—the extra warmth speeds up germination dramatically. Without one, cool room temperatures can delay sprouting by days or even weeks.
Position the tray 2-3 inches below a grow light or in a warm, bright location (like a south-facing windowsill). Avoid direct sunlight at this stage—it overheats the enclosed space. Check daily for condensation on the lid; if it's foggy, you've got perfect humidity. Wipe it clean occasionally to prevent mold.
🌿 Step 4: Monitor and Ventilate
Once 50% of seeds have sprouted, remove the lid for 10-15 minutes daily to harden off seedlings and prevent fungal growth. You'll see the first true leaves (not the initial seed leaves) emerge within 7-21 days, depending on the plant. This is your cue to increase ventilation gradually—leave the lid off for longer periods each day.
Water from the bottom by placing the tray in ½ inch of water for 10-15 minutes. This method ensures roots drink without disturbing delicate seedlings. I avoid overhead watering now—it can dislodge tiny sprouts and spread disease. Keep the grow light 2-4 inches above the tallest seedlings, raising it as they grow to maintain consistent light intensity.
⏰ Step 5: Transition to Independent Growth
When seedlings develop 2-3 sets of true leaves, they're ready to graduate from the tray. Gently remove them by grasping the leaves (not stems) and transplanting into individual pots with fresh soil. I like to dip roots in a fungicide solution first to prevent transplant shock—this step cuts down on wilting dramatically.
Place transplanted seedlings in bright, indirect light for a week to recover, then introduce them to full sun gradually. The lid is now retired, but your tray can be sanitized with 1 part bleach to 9 parts water, rinsed, and reused immediately. This cycle keeps your starter system efficient and disease-free for season after season.
Tips & tricks for perfect seed starter trays
Transforming your seed starter tray into a thriving nursery takes more than just following steps—it's about creating the ideal conditions for your seeds to thrive from the start.
Humidity Dome Mastery: In Step 3, when you snap that lid onto your tray, you're creating a greenhouse effect that's critical for germination. The key is to check for condensation daily—if the lid stays foggy, you've got perfect humidity. If it's dry, spritz the soil lightly with water. I've learned the hard way that overwatering here can lead to mold, so always err on the side of slightly less moisture rather than too much.
Temperature Control: The 75-85°F range on your seedling heat mat isn't just arbitrary—it's the sweet spot where most seeds germinate most efficiently. If you don't have a heat mat, place your tray on top of your refrigerator (not inside) for gentle warmth. I've seen germination times double when seeds are kept at room temperature (around 68°F) compared to when they're given this extra warmth boost.
Light Positioning Secret: That 2-3 inch distance below your grow light in Step 3 is crucial for preventing leggy seedlings. As your plants grow, you'll need to adjust this distance—keeping the light 2-4 inches above the tallest seedlings maintains consistent light intensity without burning them. I use a small ruler to measure this distance weekly, and it makes a noticeable difference in plant health.
Transplanting Technique: When you're ready to move those seedlings to individual pots in Step 5, grasp them by their leaves (not stems) and handle them gently. I've found that dipping the roots in a fungicide solution for 10-15 minutes before transplanting reduces wilting by about 70%. This simple step can mean the difference between thriving seedlings and those that struggle to recover from transplant shock.
Pro Tips for Seed Starter Tray With Lid
- Transforming your seed starter tray into a thriving nursery takes more than just following steps—it's about creating the ideal conditions for your seeds to thrive from the start.
- Humidity Dome Mastery: In Step 3, when you snap that lid onto your tray, you're creating a greenhouse effect that's critical for germination.
- Temperature Control: The 75-85°F range on your seedling heat mat isn't just arbitrary—it's the sweet spot where most seeds germinate most efficiently.
Frequently asked questions
Got questions about your new seed starter tray with lid? You’re not alone! Here are some of the most common queries—plus quick, practical answers to keep your seedlings thriving.
Do I need to use a seed starter tray with lid, or can I skip it?
A lid helps maintain consistent humidity and warmth, which are critical for germination. Without one, seeds may dry out or struggle to sprout. If you’re short on trays, try covering seedlings with plastic wrap or a clear plastic bag secured with a rubber band—just poke a few holes for airflow!
How long should I keep the lid on my seed starter tray?
Most seeds need the lid for 7–14 days (or until sprouts appear). Once seedlings emerge, remove the lid to prevent mold or fungal growth. Check daily for condensation—if it’s heavy, lift the lid for 10–15 minutes to air it out. Overwatering under a sealed lid is a common pitfall!
What’s the best temperature for seedlings under a lid?
Aim for 65–75°F (18–24°C) during the day and slightly cooler at night. Place trays on a heat mat (if needed) or near a sunny window. Avoid direct sunlight at first—it can overheat the lid and scorch tender sprouts. A digital thermometer helps monitor conditions without guesswork.
Can I reuse a seed starter tray with lid after one use?
Yes! Clean trays thoroughly with soapy water and a 10% bleach solution (1 part bleach to 9 parts water) to kill pathogens. Rinse well and let dry completely. Sterilization is key—especially if you’re reusing trays for different seed types—to avoid disease spread. Pro tip: Label trays to track reuse cycles!
My seedlings look wilted or moldy under the lid—what went wrong?
Wilted seedlings often mean overwatering or poor airflow. Mold (fuzzy gray/green spots) signals excess moisture. Troubleshoot:
- Lift the lid immediately to air out trays.
- Check drainage—ensure trays aren’t sitting in water.
- Reduce watering slightly (keep soil moist, not soggy).
- If mold appears, remove affected seedlings and sprinkle cinnamon (natural antifungal) on soil.
Wrapping up and next steps
A seed starter tray with lid is your secret weapon for nurturing strong, healthy seedlings—no guesswork required! 🌱 With its built-in humidity control and easy-to-use design, you’ll enjoy faster germination, fewer losses, and a head start on your gardening dreams.
Whether you’re a beginner or a seasoned green thumb, this tool makes sprouting effortless and rewarding.
Ready to grow your success? Grab a tray, fill it with soil, and start planting—your future garden awaits! 🌿 Next up: Experiment with different seeds or share your sprouting wins with fellow gardeners!