
Lawn
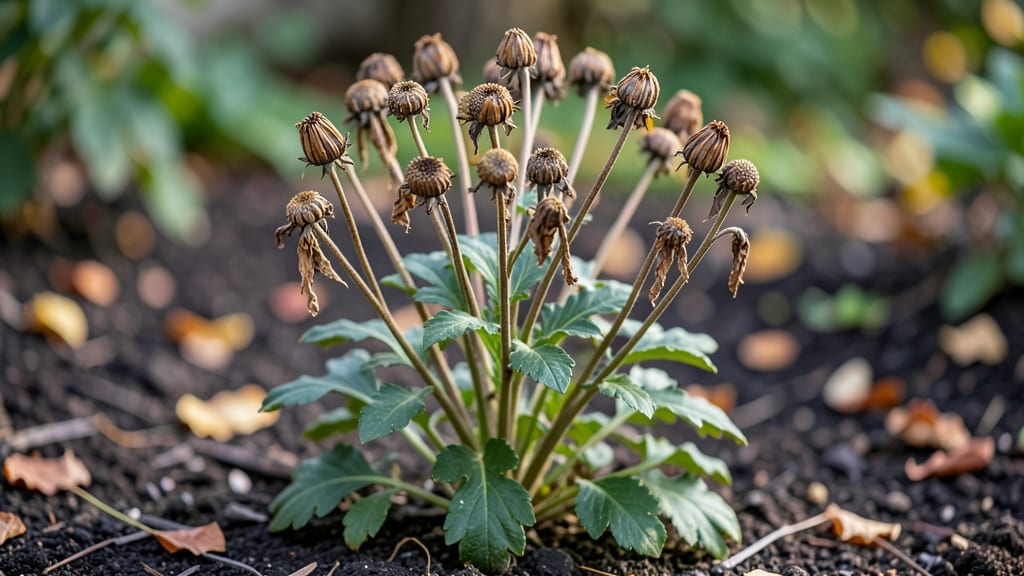
Harvesting mum seed pods turns last year’s blooms into next season’s garden stars. 🌼 The moment those brown, papery pods appear, you’ve got a chance to grow your own chrysanthemums—no nursery tags required.
My first attempt at saving seeds taught me that timing and patience are everything, and the results can be shockingly lush if you do it right.
You’ll need just a few simple tools: sharp scissors, a paper bag for collection, and a dry spot to let the pods mature. The key is waiting until the pods are fully brown and dry to the touch—never harvest green ones.
Once you’ve collected them, spread the pods on a screen or paper towel in a warm, dry place for about two weeks. This gentle drying process ensures the seeds stay viable for planting.
When stored properly in a sealed container, these seeds can last for years, giving you a head start on spring planting. The payoff? A garden filled with the same vibrant blooms you love, year after year, without the cost of buying new plants.
Plus, there’s something deeply satisfying about growing something from seeds you saved yourself.
This method works for all chrysanthemum varieties, whether you’re growing them in garden beds, containers, or even as cut flowers. The only real challenge is remembering to check those pods before they burst open naturally—so set a reminder for late fall or early winter, depending on your climate.
Here’s how to make it work without the guesswork.
📚 In This Guide
- What you need
- Instructions
- Tips and common mistakes
- Wrapping up and next steps
What you need
- ● Mature mum seed pods: Collect only fully browned and dried pods from healthy plants (aim for at least 20-30 pods for a good seed yield).
- ● Sharp pruning shears or scissors: For cleanly snipping pods without damaging the stems.
- ● Paper bags or brown lunch bags: 2-3 medium-sized bags (one pod per bag or a small handful) to prevent moisture buildup.
- ● Newspaper or cardboard: Spread out a large sheet (about 2’ x 3’) for drying pods in a single layer.
- ○ Fan or dehumidifier (optional but helpful): Ensures even airflow if drying indoors.
- ● Seed envelope or small jars: For storing seeds long-term (label with the variety and date!).
- ● Fine mesh sieve: Helps sift out chaff and debris from dried pods.
- ● Notebook or app: Track seed varieties, harvest dates, and germination notes for future reference.
- ● Rubbing alcohol (70%+) and cotton swabs: Quickly disinfect tools to prevent mold or bacteria.
How to harvest and dry mum seed pods for future gardens
Here’s the simple method I use every fall to save seeds from my mums—no fancy tools, just patience and the right timing.
🌱 Step 1: Identify and Harvest Mature Seed Pods
Wait until the seed pods on your mums turn a tan or brown color and begin to split open naturally. This usually happens 4-6 weeks after blooms fade, depending on your climate. Gently twist the pods between your fingers—they’ll release seeds easily when fully ripe. Avoid harvesting green pods, as they won’t store well.
I like to harvest on a dry morning after the dew has evaporated. Use a small bowl or paper bag to catch the seeds as they fall. If pods are still closed but brown, place them in a paper bag with a few holes punched in the sides for a day or two—they’ll finish drying and open on their own.
💧 Step 2: Clean and Separate the Seeds
Once you’ve collected the seeds, spread them out on a clean, dry towels or newspaper in a single layer. Let them air-dry for 24-48 hours in a warm, dry spot away from direct sunlight. This prevents mold from forming during storage. You’ll notice the seeds darken slightly as they dry completely.
After drying, gently rub the seeds between your fingers or use a fine mesh strainer to separate them from any remaining chaff or debris. Store the clean seeds in a small envelope or airtight container labeled with the mum variety and harvest date. I keep mine in a cool, dark place until spring.
☀️ Step 3: Store Seeds Properly for Next Year
Place your dried seeds in a paper envelope or small glass jar with a tight-sealing lid. Store them in a cool, dry location—I use the back of my fridge or a seed storage box. The key is keeping them below 50°F to prevent premature germination. If stored correctly, mum seeds remain viable for 1-2 years, though germination rates drop after the first year.
Check your seeds occasionally for signs of moisture or mold. If you notice any dampness, transfer them to a new container immediately. Properly stored seeds should feel dry and light when shaken in their container.
⏰ Step 4: Test Germination Before Planting
In early spring, test a few seeds by planting them in a small pot with moist potting mix and covering lightly with soil. Keep the pot in a warm, bright spot (around 65-70°F) and mist the soil lightly every few days. Germination usually takes 10-21 days—if seeds sprout within this time, your batch is good to use.
If germination is slow or patchy, try soaking the seeds in lukewarm water for 12 hours before replanting. This can help break dormancy. Once you see strong sprouts, you’re ready to transplant them into the garden after the last frost date.
Tips & tricks for perfect mum seed pod harvesting
Saving mum seeds is easier than you think—these little tricks will help you avoid common pitfalls and maximize your success.
Timing is Everything: The 4-6 week window after blooms fade is crucial. I've found that harvesting too early (when pods are still green) leads to poor viability, while waiting too long means seeds scatter naturally. If you miss the natural opening, place closed pods in a paper bag with holes for 1-2 days—they'll finish drying and open on their own.
Storage Wisdom: That 24-48 hour drying period is non-negotiable for preventing mold. I spread seeds on clean towels in my laundry room (warm but not sunny) where humidity is controlled. Pro tip: If your seeds feel even slightly damp after drying, extend the process—mold can ruin your entire harvest overnight.
Germination Test Strategy: The 10-21 day germination window gives you flexibility, but don't wait until the last minute. I always test a small batch in early spring to gauge viability. If germination is slow, the 12-hour lukewarm soak works wonders—it mimics natural rain triggers that break seed dormancy.
Pro Tips for Mum Seed Pods
- Saving mum seeds is easier than you think—these little tricks will help you avoid common pitfalls and maximize your s...
- Timing is Everything: The 4-6 week window after blooms fade is crucial. I've found that harvesting too early (when po...
- Storage Wisdom: That 24-48 hour drying period is non-negotiable for preventing mold. I spread seeds on clean towels i...
Frequently asked questions
Got questions about harvesting and drying mum seed pods? You’re not alone! Here are answers to the most common queries to help you save seeds like a pro.
When is the best time to harvest mum seed pods?
Harvest mum seed pods in late fall or early winter when they’ve turned brown and dried on the plant. Avoid harvesting too early—the seeds won’t be mature enough to germinate. If pods drop to the ground, collect them promptly to prevent moisture damage.
How do I know if the seeds inside are ready?
Ready seeds are dark brown or black and rattle when shaken inside the pod. If you squeeze a pod and it crumbles easily, the seeds are likely dry and harvest-ready. Avoid pods that are still green or soft—they won’t store well.
Can I dry mum seed pods indoors?
Yes! Lay pods on a paper towel or mesh screen in a warm, dry spot (like a sunny windowsill) for 1–2 weeks. Avoid direct heat (like an oven) or high humidity, which can spoil seeds. Stir them occasionally for even drying.
What if my seed pods mold or get damp?
If pods develop mold, discard them immediately—moldy seeds won’t germinate. To prevent this, store pods in a paper envelope or breathable bag with a silica gel packet in a cool, dry place (like a seed vault or fridge).
Are there alternatives if my mums don’t produce seed pods?
If your mums skip flowering, try fertilizing lightly in spring or choosing more reliable varieties like ‘Autumn Beauty’ or ‘Pride of Hamburg.’ For instant color, opt for pre-grown mum plants at nurseries—they’ll bloom faster than seeds!
Wrapping up and next steps
Harvesting and drying mum seed pods is a simple yet rewarding way to ensure next year’s garden stays vibrant and full of life!
By following these steps—timing your harvest, gathering pods, drying them properly, and storing seeds with care—you’re not just saving money, you’re connecting with nature’s cycle. 🌱
Ready to put your new skills to the test? Grab a pair of scissors, a brown paper bag, and a sunny windowsill, and start your mum seed adventure today. Your future blooms will thank you!